
Hi Savvys,
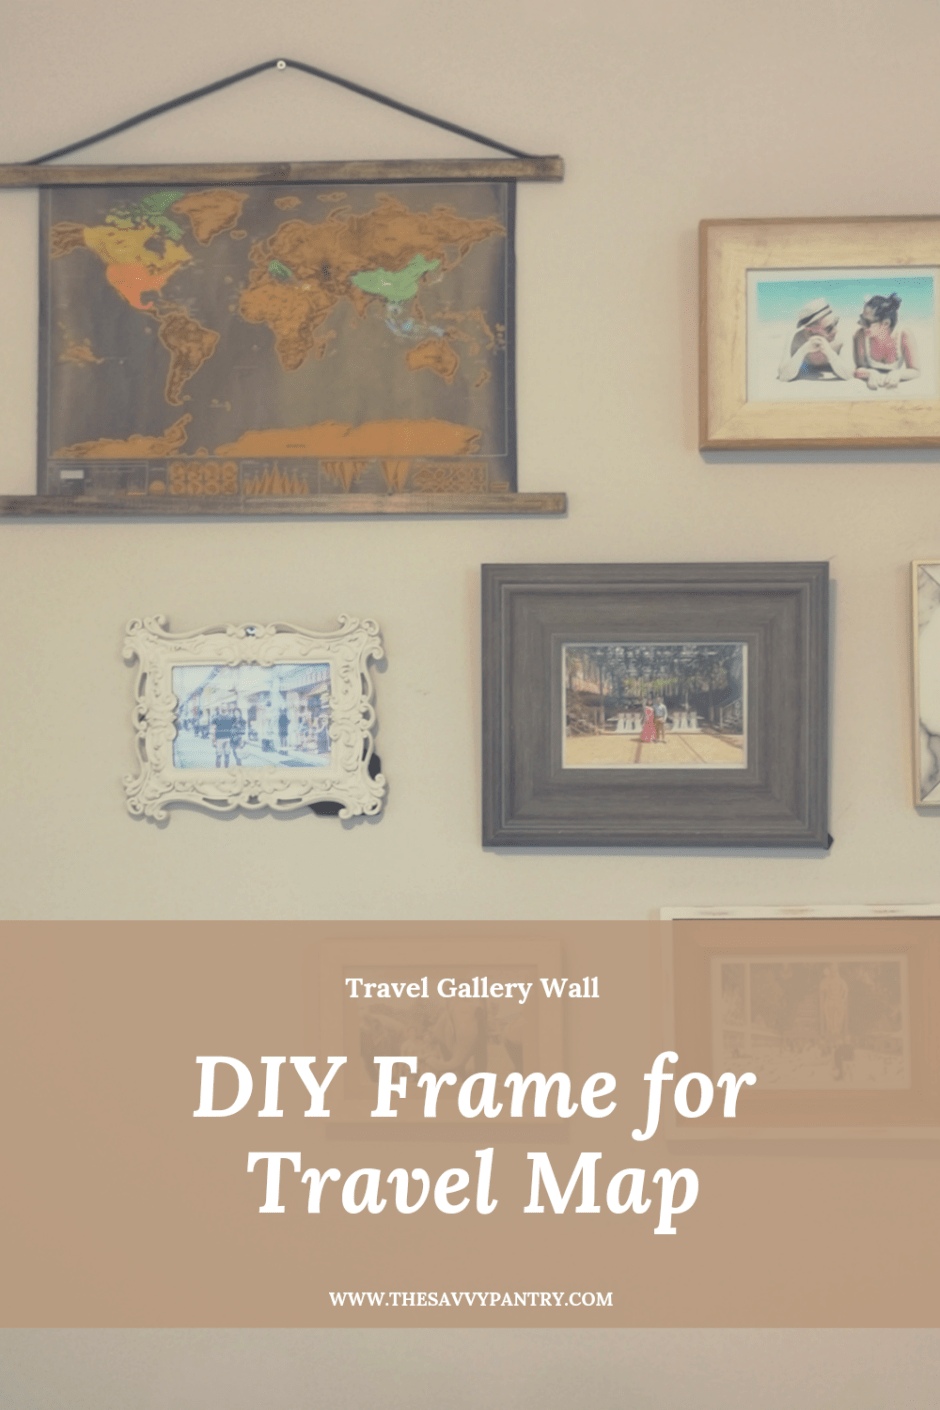
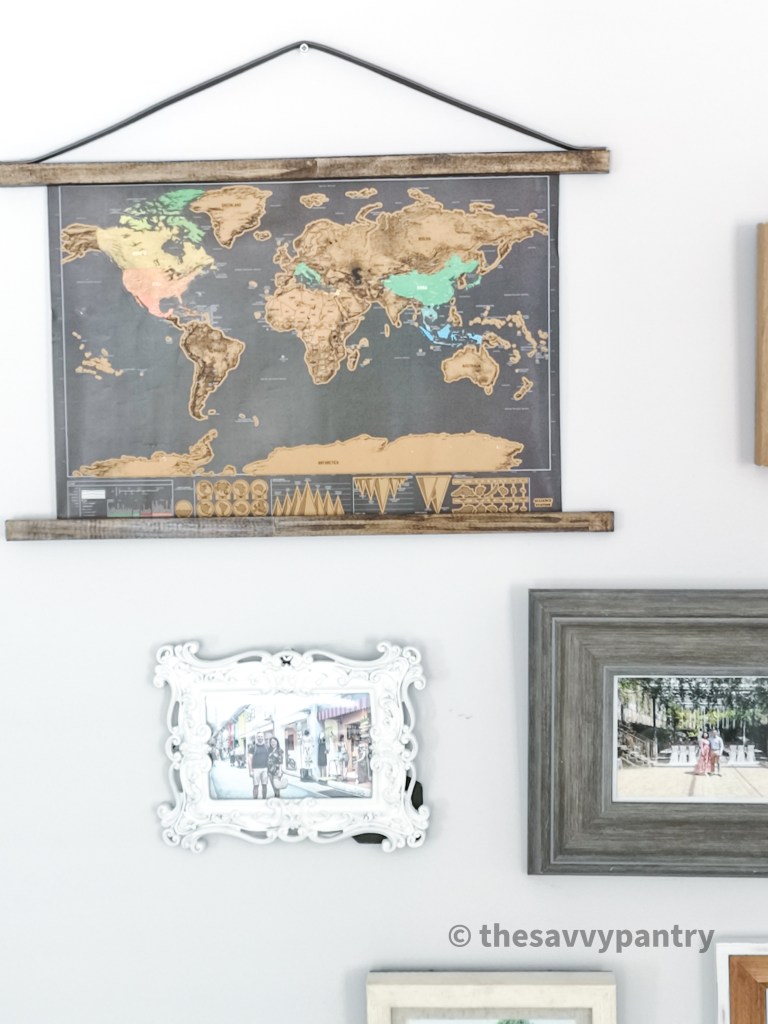
I had purchased this scratch the world travel map a few years ago and was finally able to scratch off all of the countries that we had visited (a.k.a another lockdown project completed). However, the problem with this map is that it is very hard to find a frame for the specific dimensions of this map.
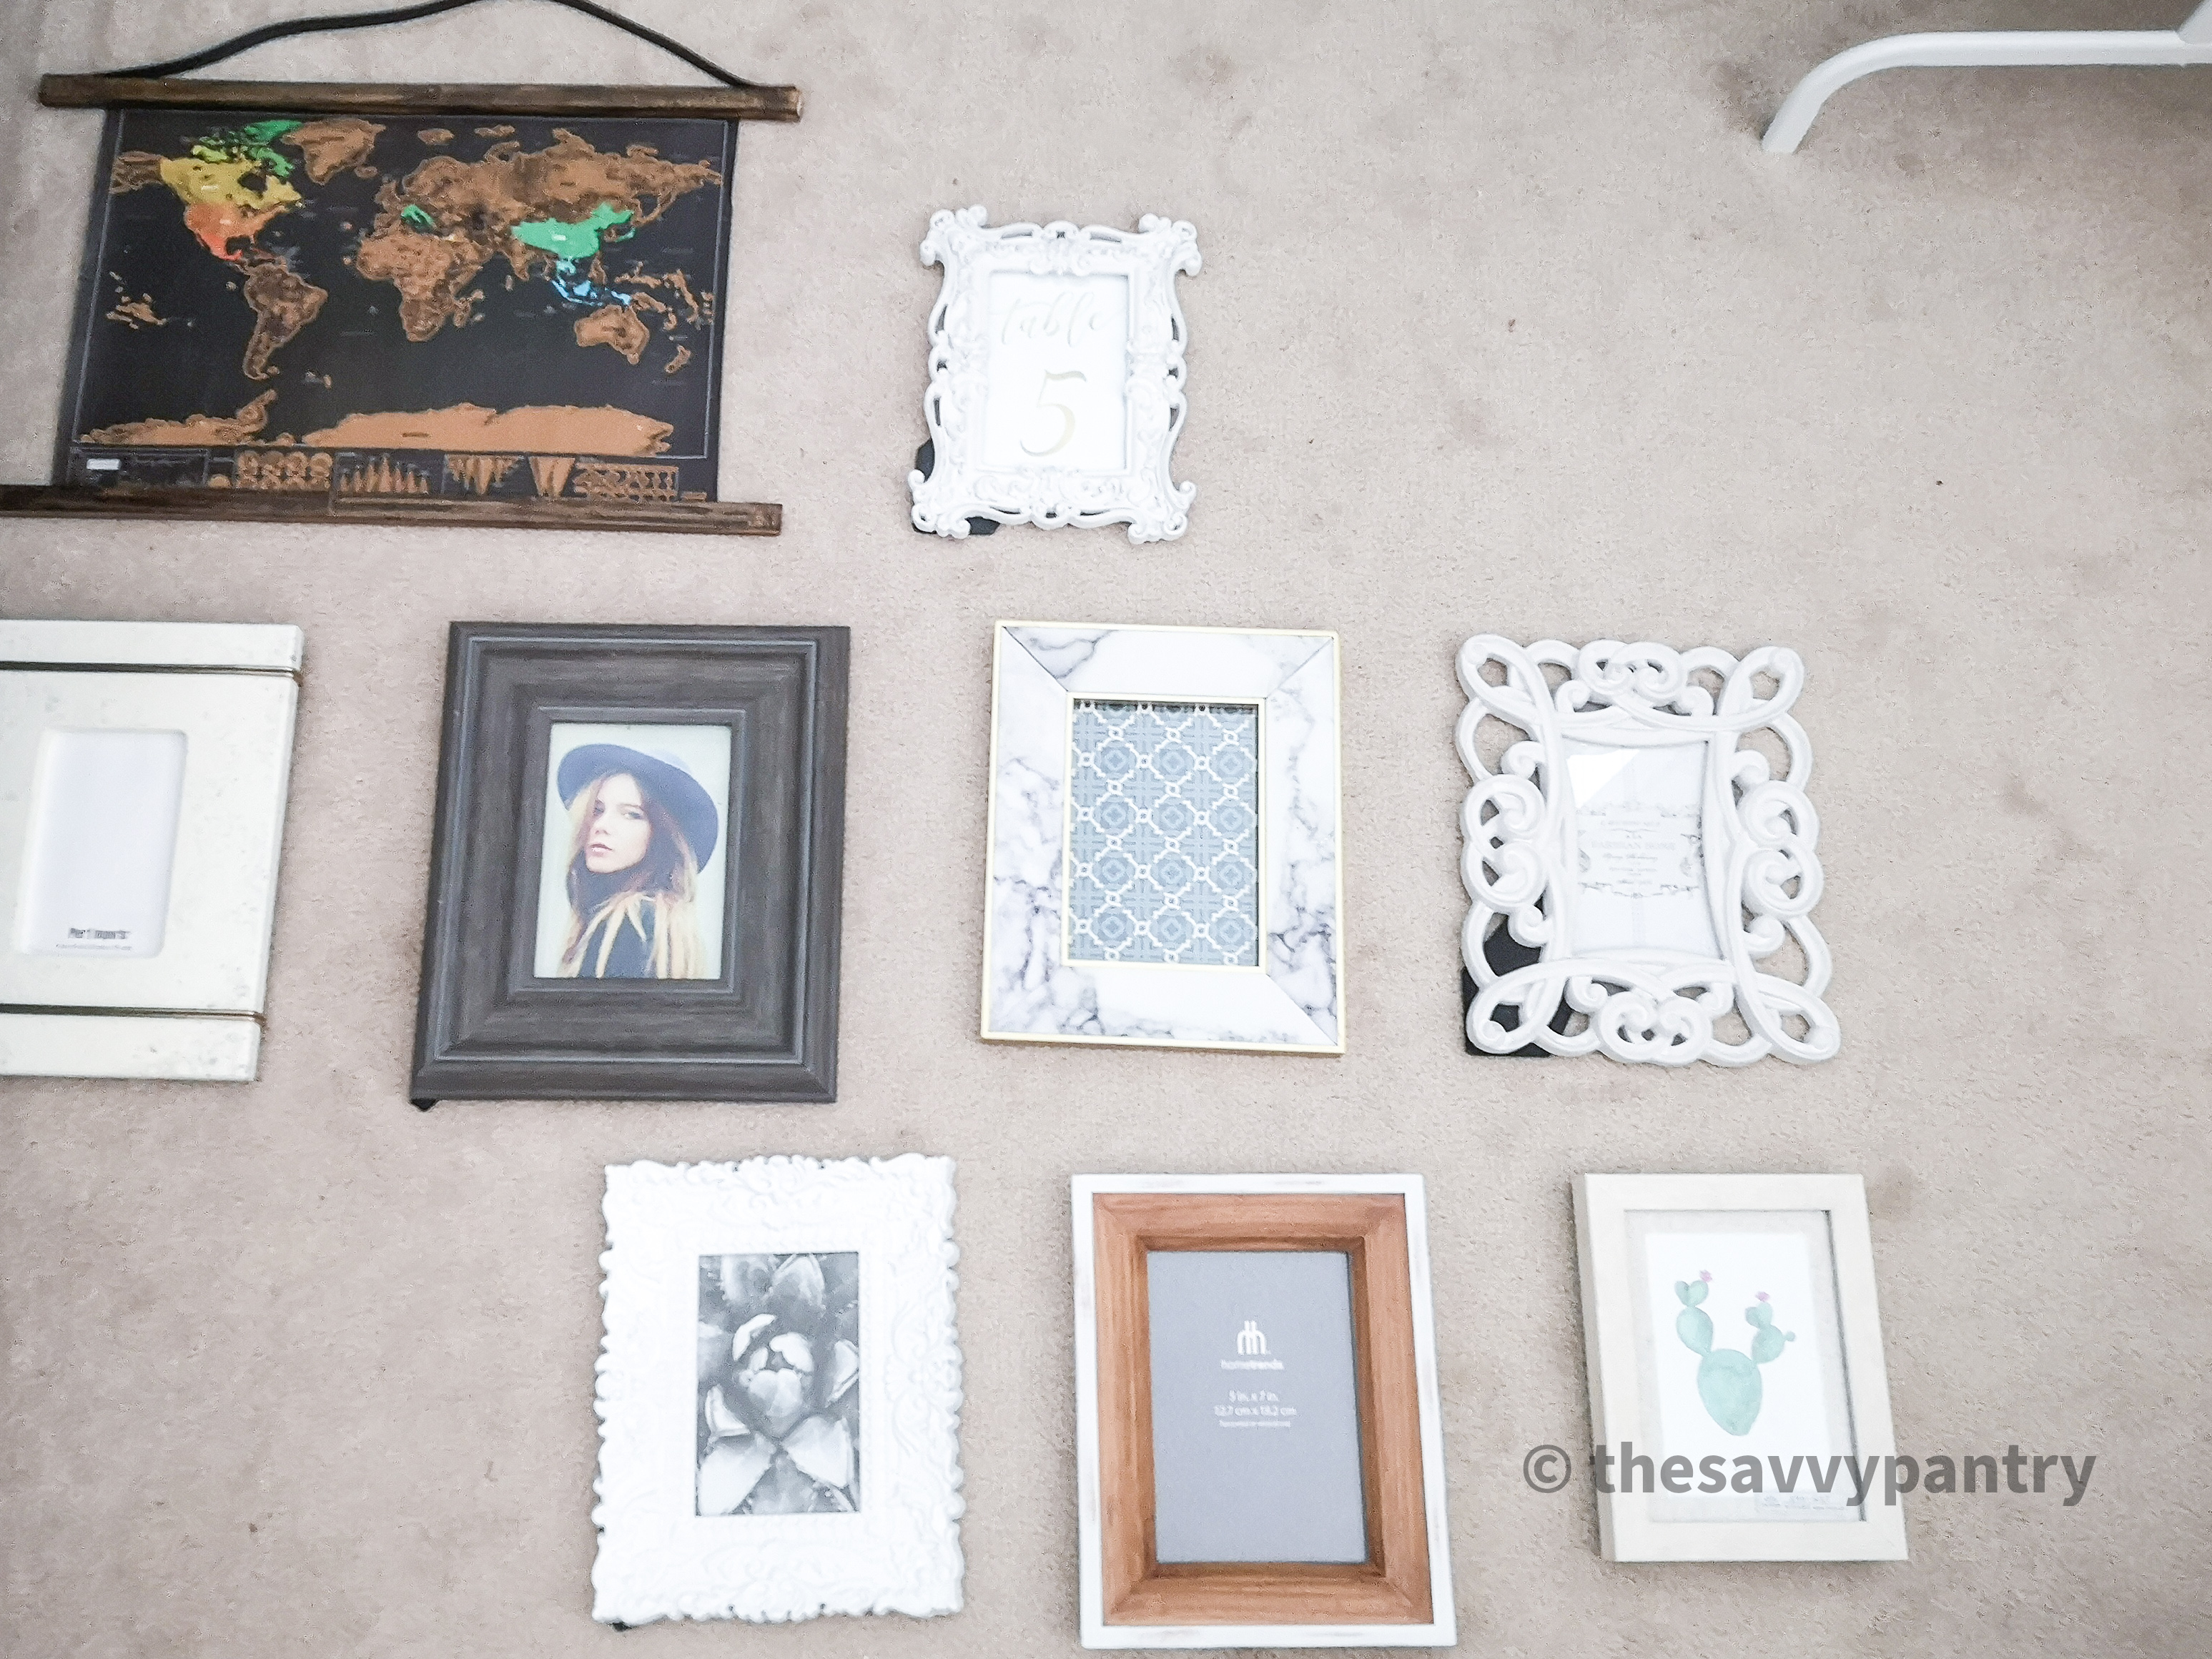
I had a clear vision of a travel gallery wall that I wanted to hang in our office, and it would not be completed without this map. I opted to DIY an easy frame myself!
The materials needed are very minimal and this ended up being a very affordable project in the end, costing under $15 total! The materials you will need are:
- 1 wooden trim measuring 7/16 x 11/16, cut into 2 pieces based on the size of your map (I cut out 2-21 inch pieces and still had a lot of wood leftover for another project)
- A stain of your choice
- 2 sponge brushes
- Varnish (optional)
- An old belt
- A staple gun
- A regular stapler
- Pen
- Ruler
The below are steps that I took to make this DIY custom frame:
- After purchasing the wood from home depot, I used their wood cutting station to cut out 2 pieces at 21 inches each. I reserved the leftover wood for another project.
- Using one of the sponge brushes, lightly dab it into the stain and spread it evenly over the wooden trims.
- Using the other sponge brush (the dry one), you can use it to spread out any of the stain evenly. Repeat this process by alternating between the 1st brush to apply more stain where necessary and the 2nd brush to ensure that all of the stain is spread evenly along all of the sides of the wooden trim.
- Let the stain dry in a cool place for 48 hours.
- At this point, you can apply a varnish coat over the trims, however I left this part out since I liked the rustic look of the trim.
- Using an old belt, I cut off the end with the holes and buckle. Using a staple gun, I stapled it to either end of one of the wooden trims on the narrow side (the widest side is where you will staple the map to). If you don’t have a staple gun, you can use small nails instead
- To attach the map to the wooden pieces, I used a pen to mark where I wanted the map to sit and using a ruler, measured to ensure the map would be centered by having 1.5 inches on either side.
- I found that using a regular staple was sufficient in attaching the map to the wood since the wood is pretty soft. Make sure that when you staple the map onto the wooden pieces that the back is facing you.
Now you’re ready to hang up your easy custom-made frame!
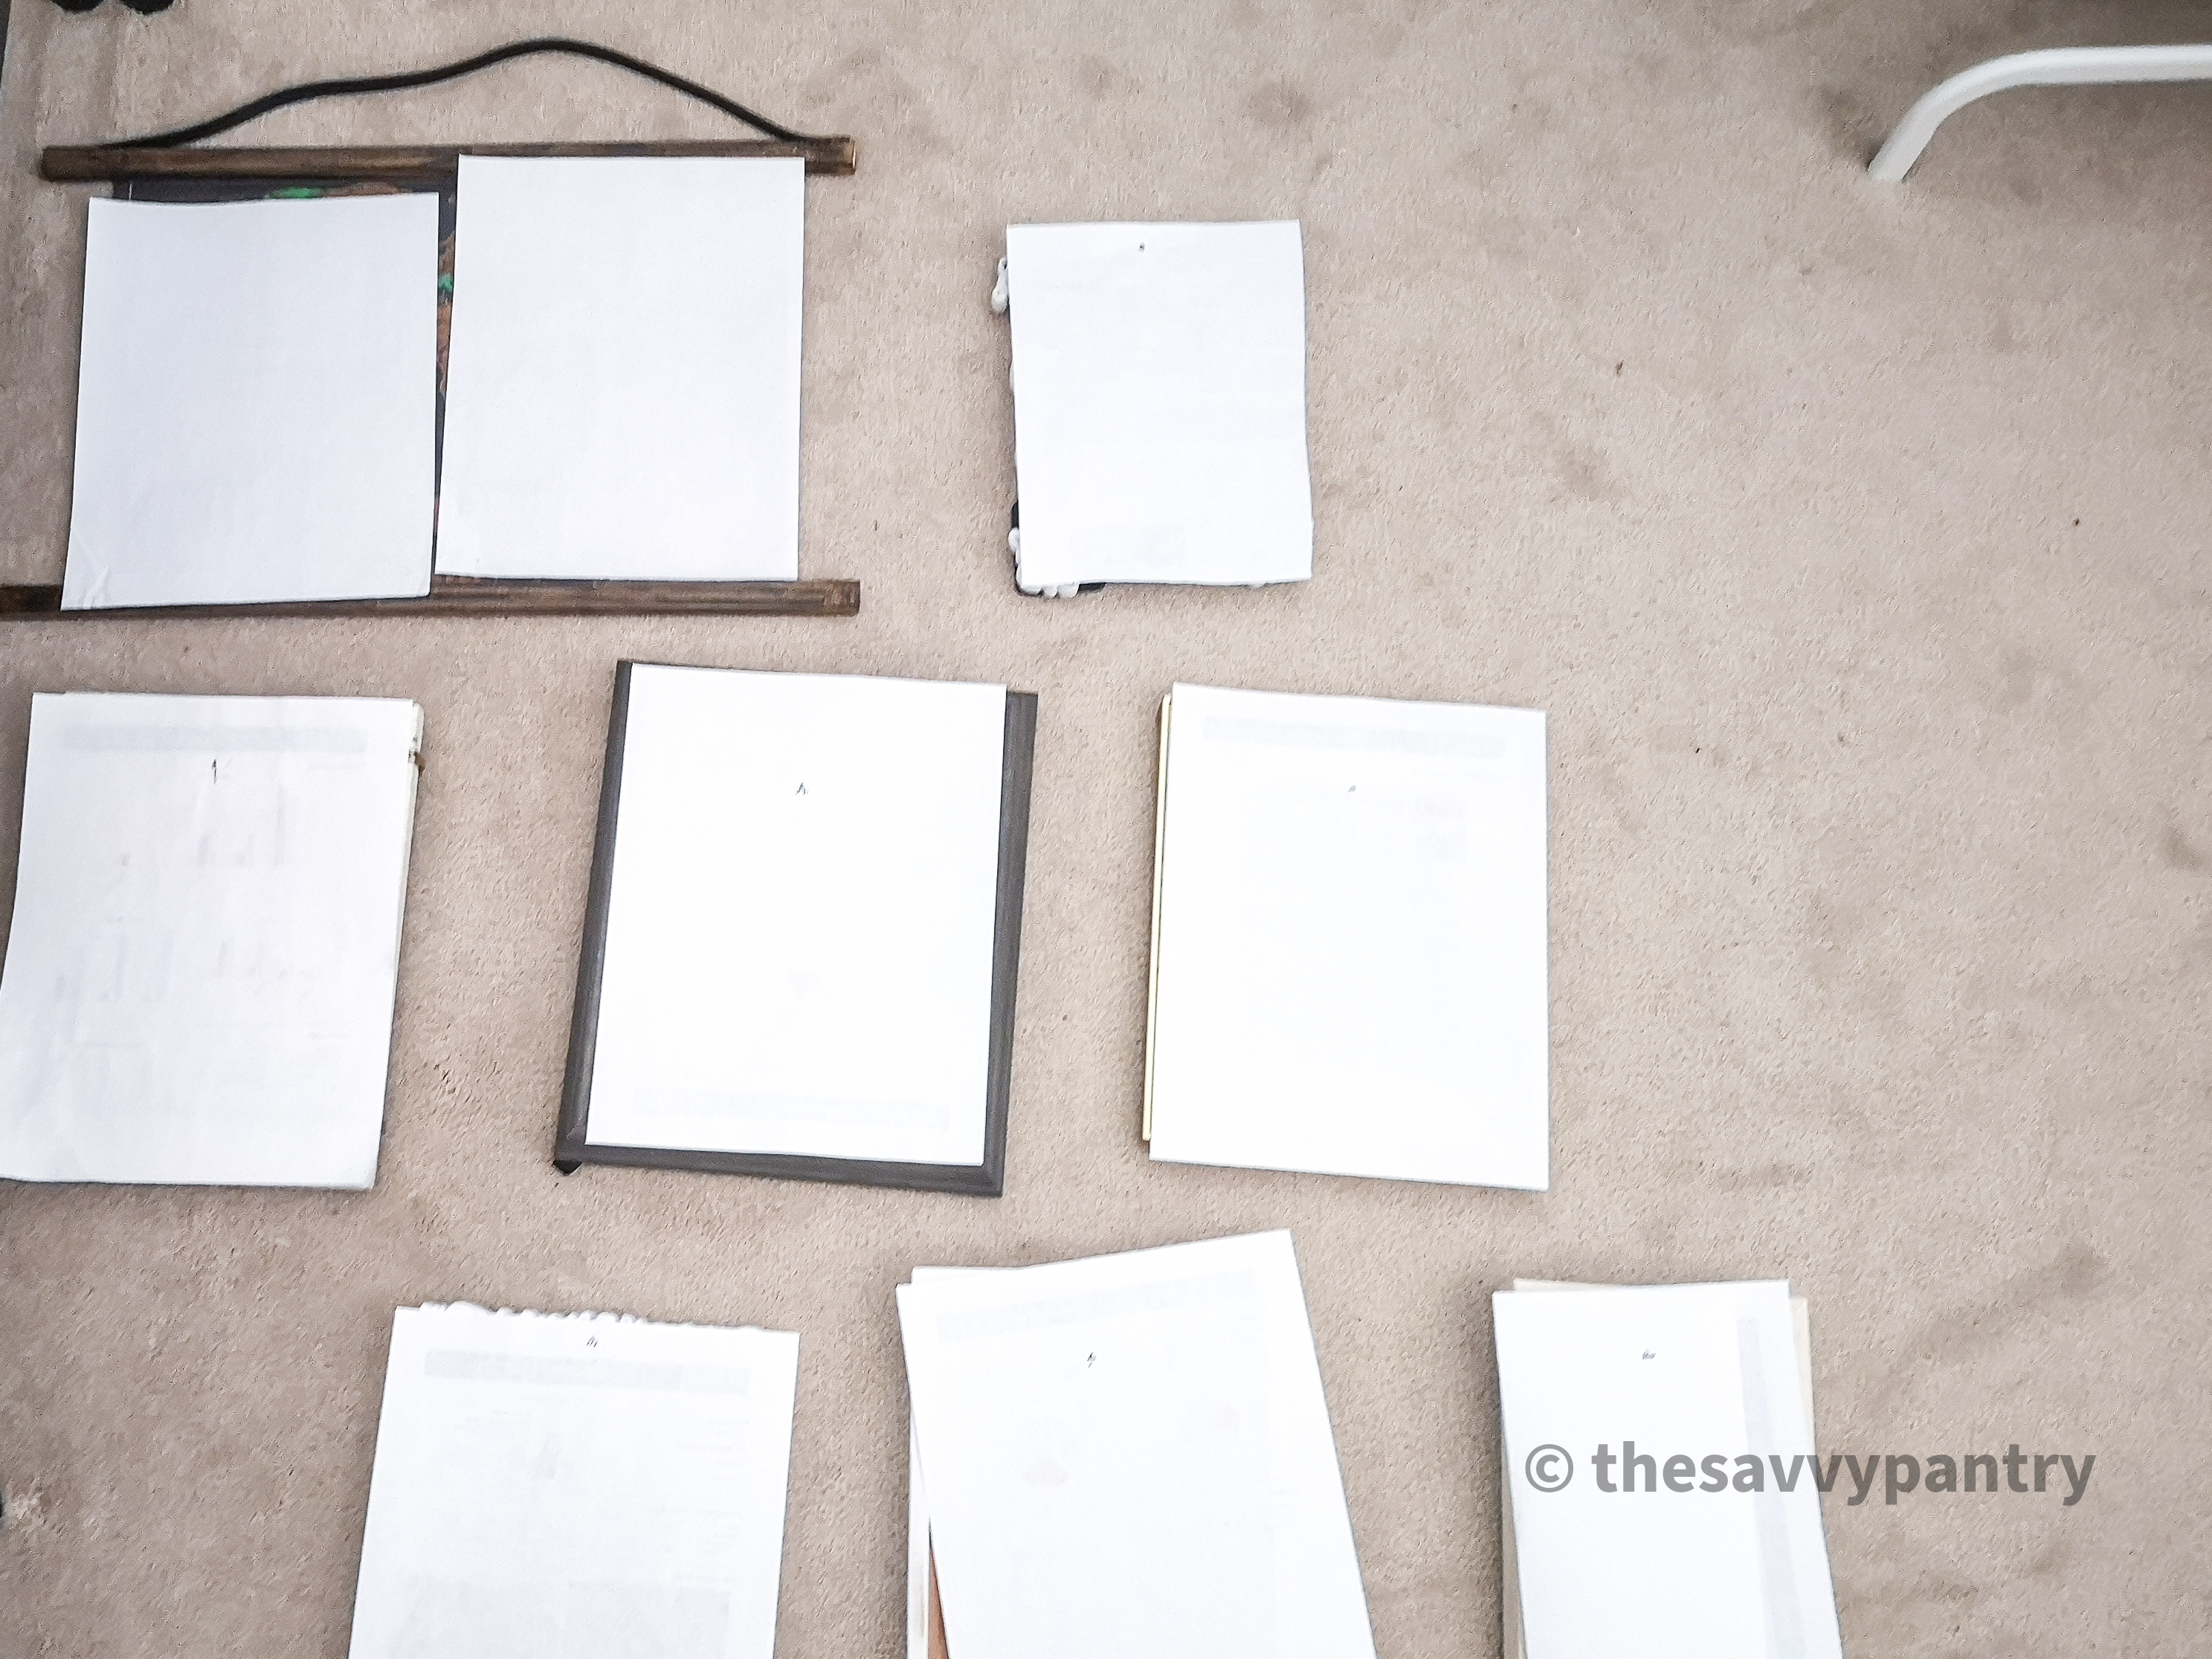
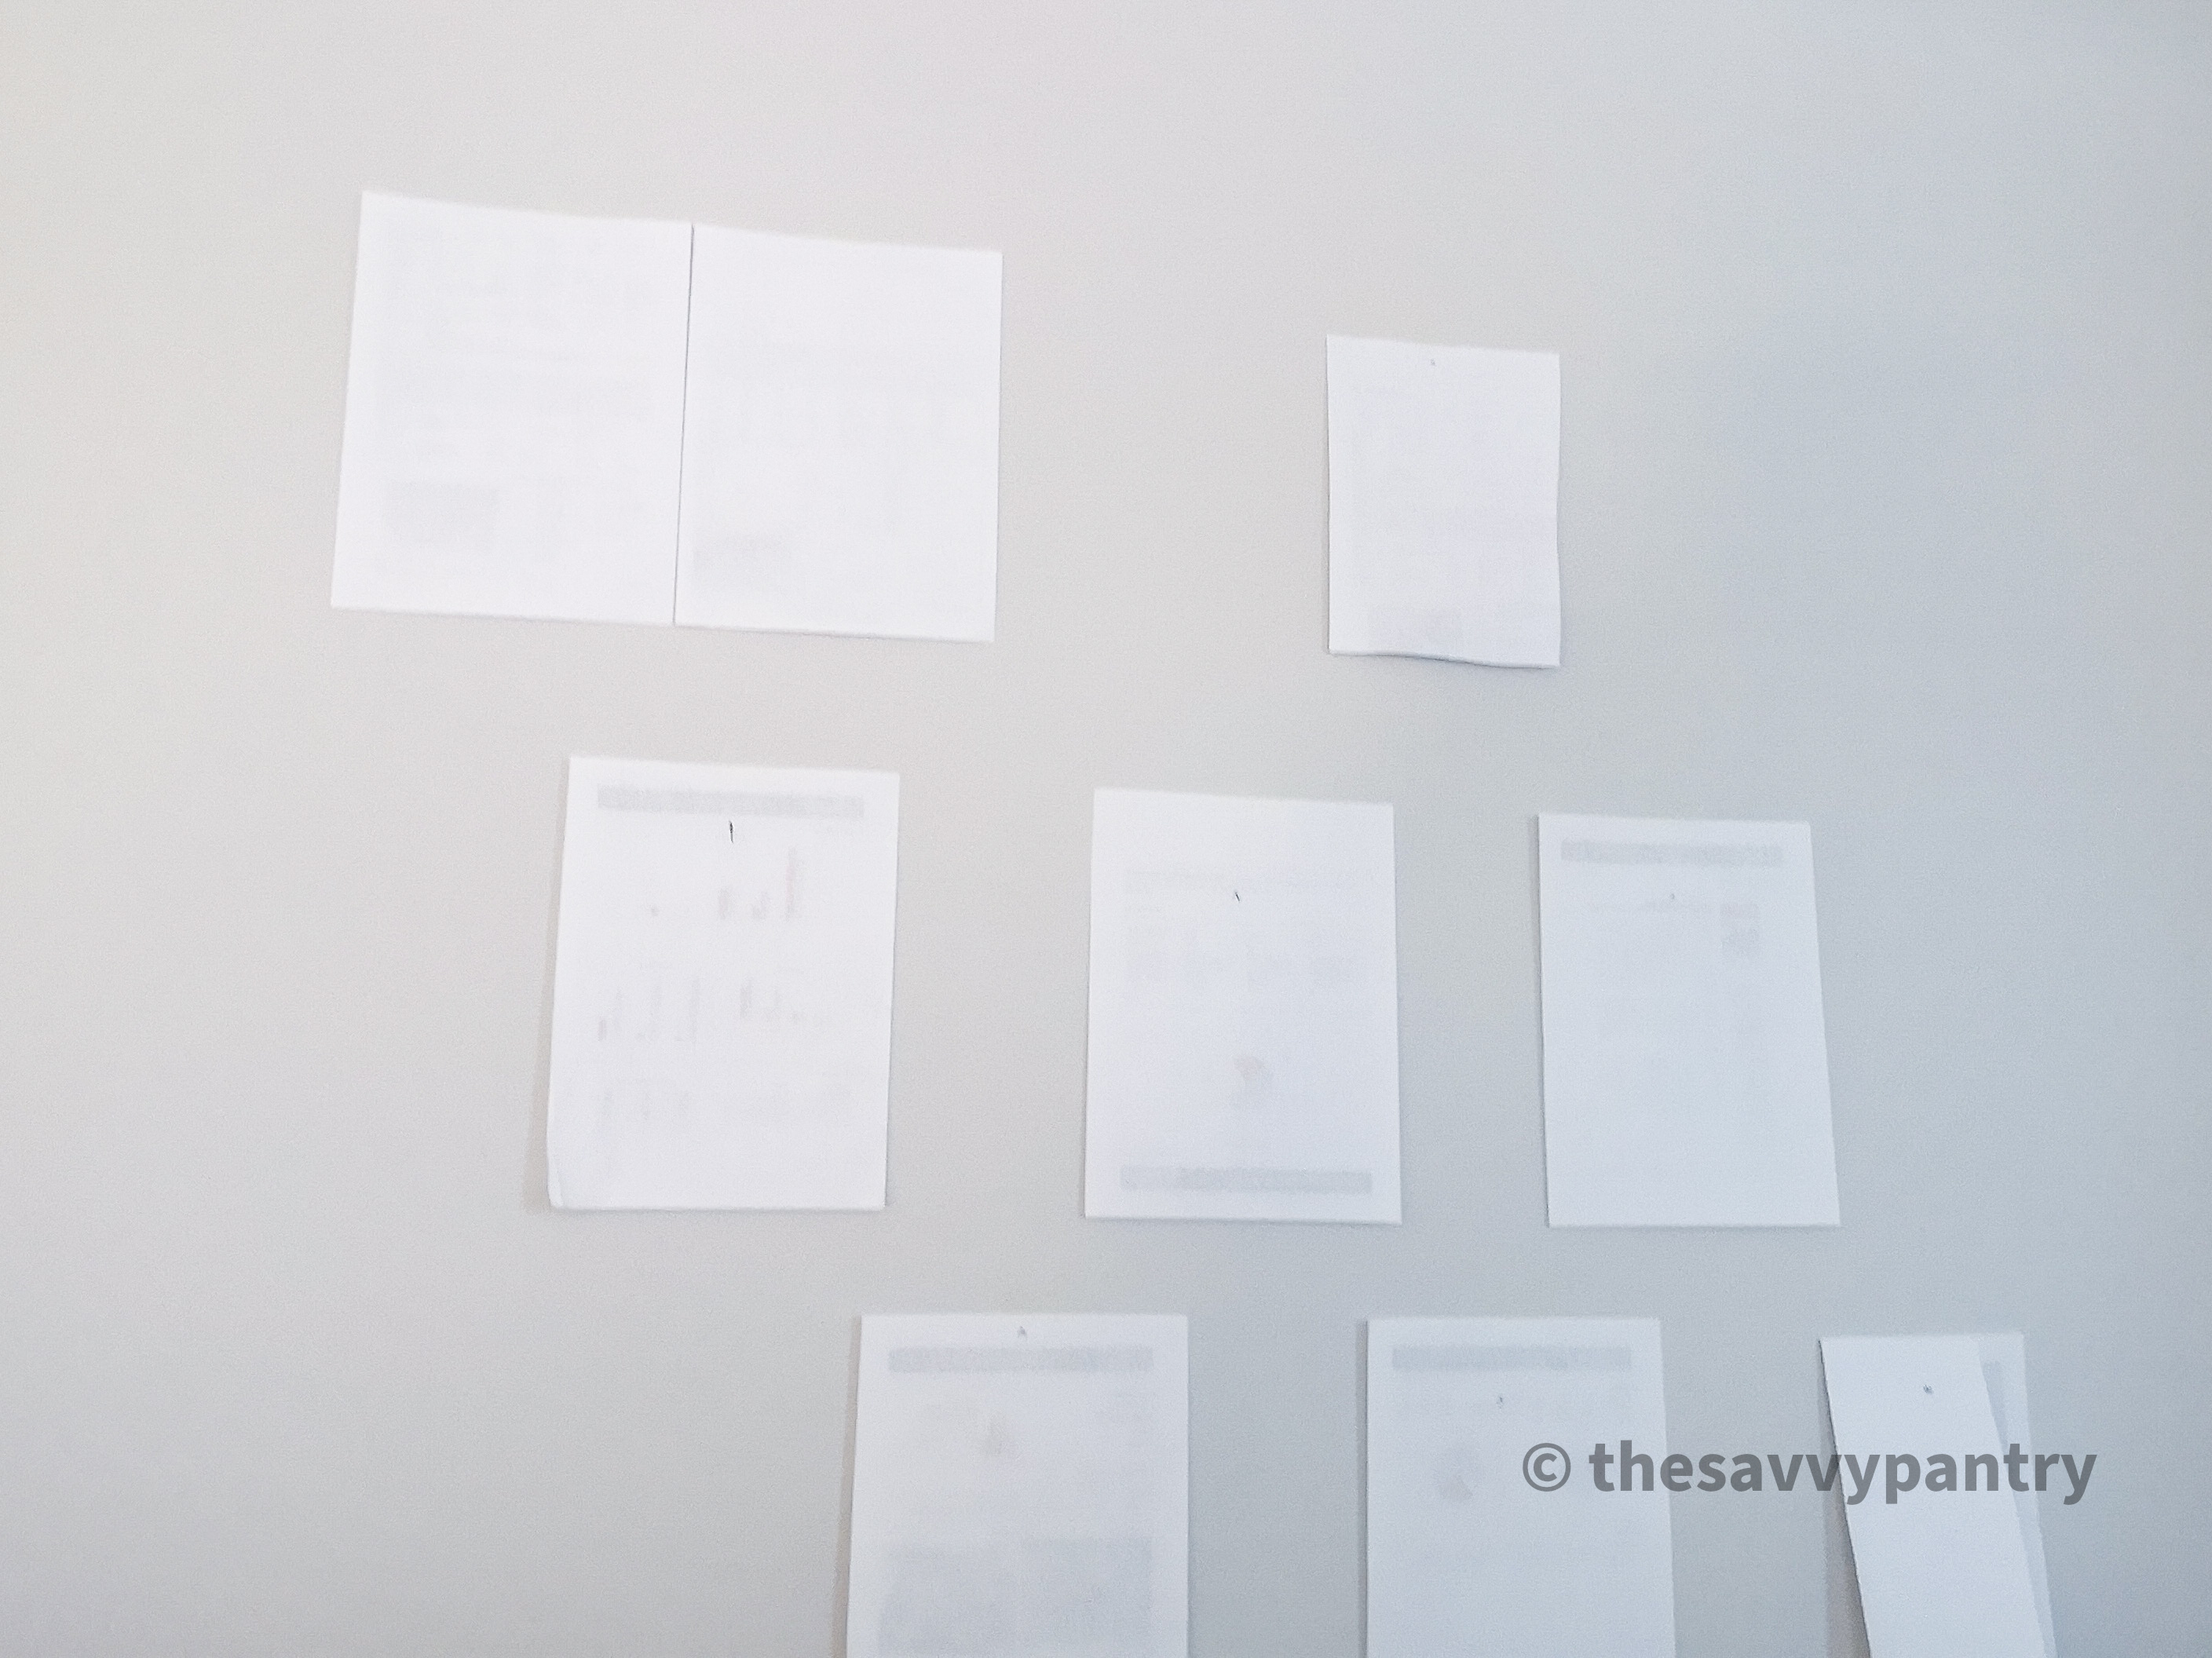
I knew I wanted to make a gallery wall featuring photos from our travels over the years and having this map in a frame really tied the gallery wall together. The below are tips on how I put together a gallery wall
- I like to lay out my frames on the ground first to see what kind of look I want. This also means less rework for me before drilling holes into the wall
- Once I had my frames in the most optimal placement, I used white scrap paper and cut them to the size of my frames to use these as a place holder. I also used a pen to mark on the paper where the frame hooks are.
- When we were ready to hang the frames to the wall, we taped the pieces of paper onto the wall to mark off where we wanted the final placement of the frames to be. This made it very easy to adjust the spacing of the frames without making re-work for ourselves.
- Because we had marked where the frame hooks were on the paper, we used this as guidance on where to install the nails for our frames.
- The last step is the fill those frames with your fondest memories before hanging them up!
