Homemade Apple Sauces – 2 Ways

https://youtube.com/shorts/-I3r_RLnFy8?feature=share

Hi Savvys,

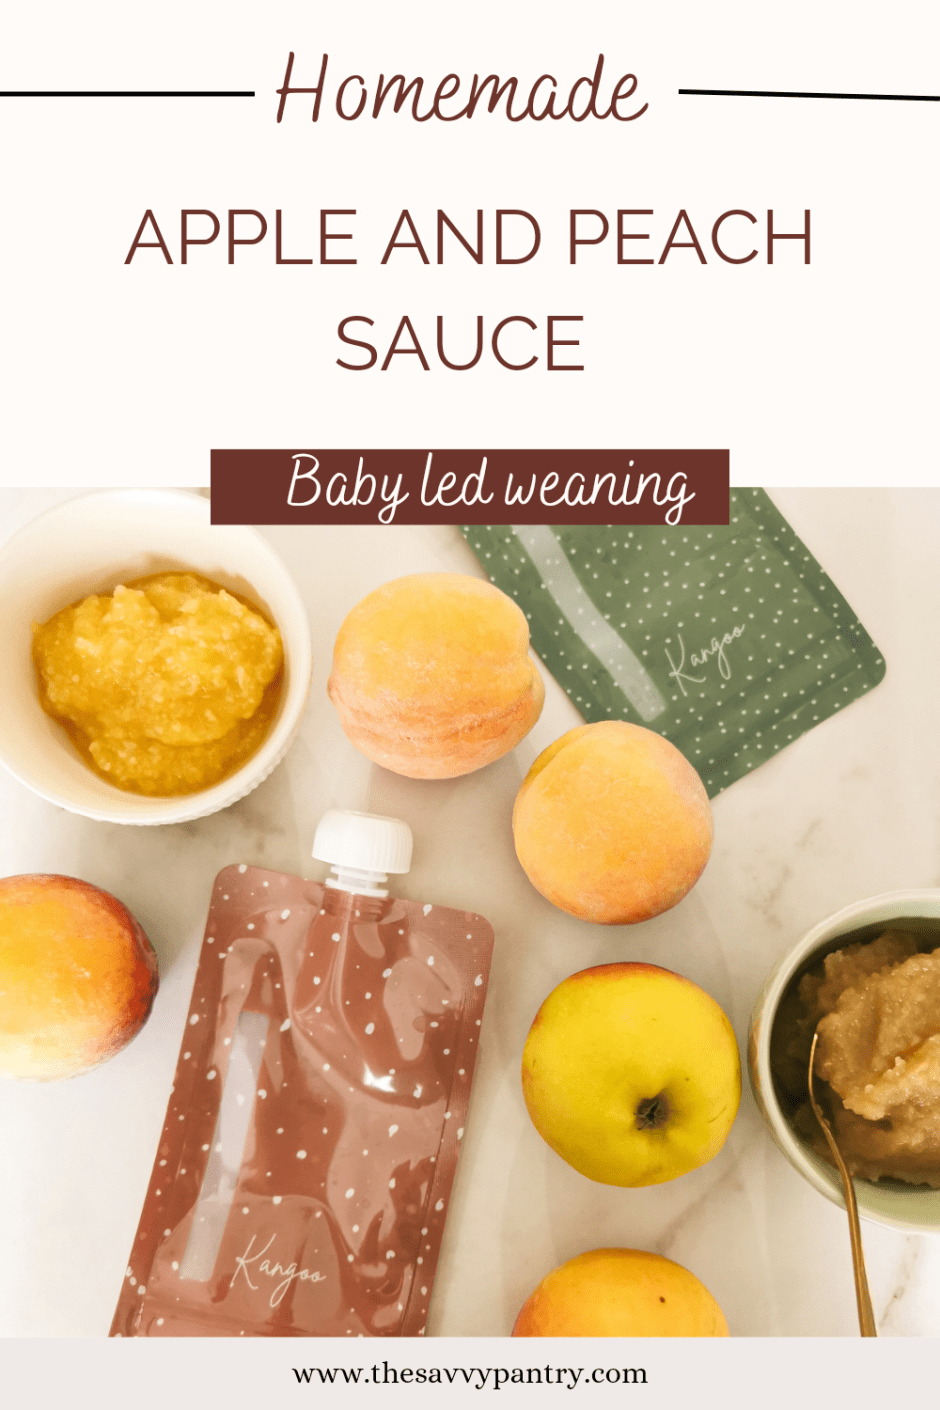
I have always wanted to purchase reusable food pouches since they are a more eco-friendly way to serve pureed fruits to my little ones.  My littles love having fruit pouches (like apple sauce) but I try to limit their intake of these convenient foods for when we travel so that I can limit our waste when snacking.  I finally got my hands on some reusable ones from Kangoo et Cie!  I love that these pouches come in cute patterns, are easy to fill and of course are reusable.  They are also BPA-free, PVC-free, phthalates-free and lead-free food grade plastic making it safe for my family.

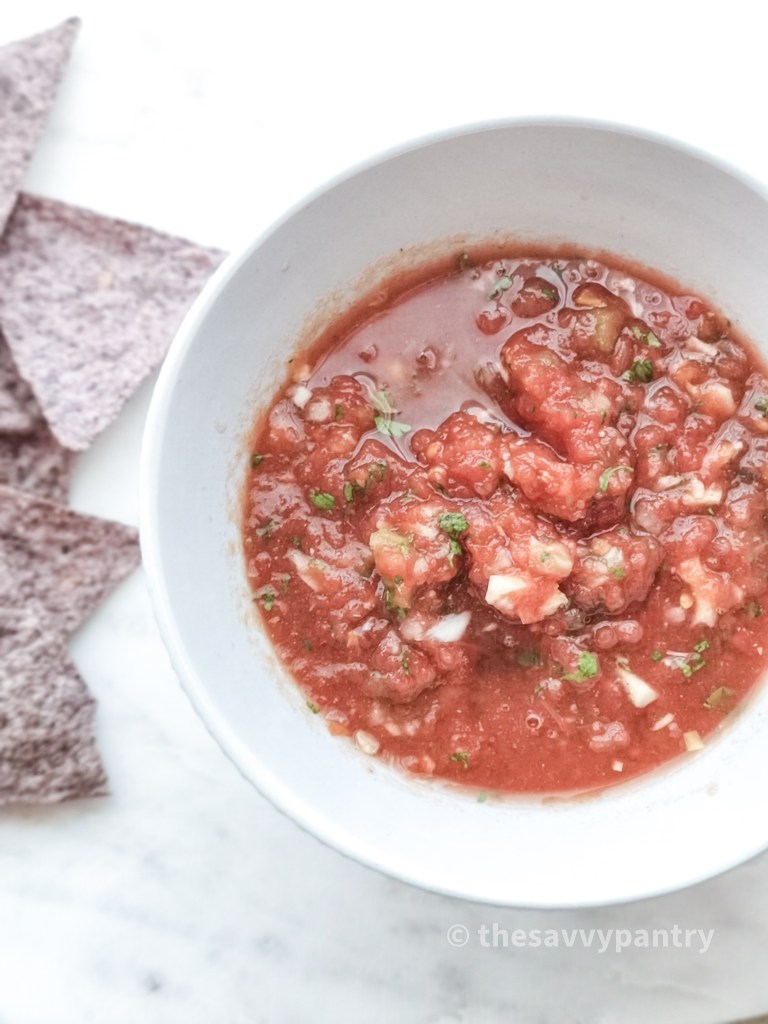
I made a basic apple sauce puree with cinnamon as well as an apple, peach and cauliflower puree for added veggies!  Check out the below for the recipes.  I also froze them in ice cube trays in the shape of cylinders making it easy to add and defrost in the fruit pouches for on the go!  These recipes are also perfect for baby led weaning!

I look forward to making more combinations of fruit purees and will be posting recipes in the future.  Comment below on what your favourite purees are!

Now set forth and be savvy!

~makes 4-6 portions, depending on how large your apples are and how full you fill your pouches

Ingredients

  • 4 apples, any kind – peeled, cored and diced
  • 2 tbsp water
  • 1 tsp cinnamon

~makes 4-6 portions, depending on how large your apples are and how full you fill your pouches

Ingredients

  • 4 apples, any kind – peeled, cored and diced
  • 4 peaches, peeled, pitted and diced
  • ½ cup frozen cauliflower florets
  • 2 tbsp water

Directions (same for both purees)

  1. Add all ingredients to a medium sized pot on high heat
  2. As soon as the water comes to a boil, turn the heat down to medium and let simmer until the ingredients are fork tender, about 7 minutes
  3. Blend in a food processor until desired consistency is reached.  I like to pulse it since my boys like the purees on the chunky side
  4. When cooled, store in the fridge for up to 3 days.
  5. I like to freeze in ice cube trays in the shape of cylinders so that I can easily fill the fruit pouches – about 3 cylinders fit each fruit pouch
  6. Can be frozen for up to 3 months

Pickled Asian Veggies

Hi Savvys,

Growing up, we always had these pickled carrot and daikon in our fridge, and I never what it was for besides in banh mis.  We typically ate it during holidays or special occasions, and it wasn’t until I was much older (like in my 20’s) that I learned to appreciate these Pickled Asian Veggies!  I like these in salads, wraps and on bowls.  They are also great to have along side any really fatty dish to help lighten it up.

Nowadays I always make sure to have a jar of these in the fridge.  So easy to make, crunchy and refreshing!  Savvy Tip: when all of the pickles are eaten, save the pickle juice to add to marinades, sauces and dressings!

Comment below on how you like to have these Pickle Asian Veggies!

Now set forth and be savvy!

Ingredients

  • 2 large mason jars (1L size), cleaned and sterilized
  • 1 medium daikon
  • 4 medium carrots
  • 1 cup white sugar
  • 2 cups white vinegar
  • 2 cups water

Directions

  1. Ensure your mason jars are sterilized and ready to go
  2. Cut the daikon and carrots into 2-3 inch length match sticks.  You can also use a mandolin or a food processor with the “julienne” blade.
  3. Add the water and vinegar to a pot and let it come to a boil.
  4. Meanwhile, add the cut-up veggies to your mason jars.  I was able to fill 2 large mason jars with this amount of vegetables.
  5. Add and stir the sugar into the hot mixture until dissolved.
  6. Pour into the jars over the vegetables.  The veggies should be completely submerged in the liquid.
  7. Let the jars come to room temperature before storing in the fridge.  They can be eaten the next day and stored for up to 6 months in the fridge.

Easy 5 Ingredient Salsa

Hi Savvys,

I love having a well stocked pantry so that I can whip up any recipe that my family is craving that week without having to go to the grocery store.  One of my pantry staple recipes is this easy 5 ingredient salsa.  The base of this salsa is canned diced tomatoes, and it uses ingredients that are already in my fridge and pantry.  The only ingredient that we may or may not have is cilantro, but a quick hack is to save some in the freezer for last minute recipes like this one.

All of the ingredients are thrown into the food processor and is ready in less than 5 minutes.  I love using this salsa to eat with tortilla chips, as a topping to tacos or even as a sauce for casseroles. Can be jarred and frozen for up to 3 months!

Leave a comment below on what you like to use this salsa with!

Now set forth and be savvy!

Ingredients

  • 1 28 oz can of whole or diced tomatoes
  • 3 cloves of garlic
  • 1 jalapeno (seeded if you prefer less heat)
  • 1 red onion
  • 1 handful of cilantro
  • 1 tsp cumin
  • ½ tsp salt

Directions

  1. In a food processor, add all of the above ingredients
  2. Pulse for 30 seconds, ensuring that the salsa is chunky
  3. You can freeze half of the salsa for a later use for up to 6 months in the freezer
  4. Serve with chips and enjoy!

Vegan Dalgona Style Coffee with Matcha | Coconut Whip and Aquafaba

TheSavvyPantry-VeganDalgonaCoffeeMatchaAquafabaCoconutMilk-Title

Hi Savvys,

With social distancing and more time to play around in my kitchen as a result, I have finally hopped onto the Dalgona coffee train and I am glad that I did!  When I first made this the traditional way wit 1:1:1 ratio of water, coffee and sugar for my husband, I was so excited to see how quickly it whipped up and how delicate the result was.  I don’t drink coffee so the treat was all for him but I also wanted to indulge myself.  I have seen lots of people do this with matcha powder, however usually with egg whites.  Here is my vegan version, made 2 different ways!  I would also consider this “recipe” a pantry staple since I always have these ingredients on hand.

The first way is with aquafaba, which I always have in the freezer.  This was the first version I made and was delighted with the foam it created.  Though it isn’t as thick as the coffee version, it still did the trick.  It also didn’t seem as creamy but more airy which meant it didn’t feel over indulgent.

The second way to make this is with coconut milk.  As all vegans know, you need to let your can of coconut milk sit in the fridge overnight before whipping this up.  I have to say, the coconut version is my favourite since it provides the same fluffiness as the coffee version and feels like you are eating mouse for breakfast.

Both versions are great to whip up any time, however the aquafaba has the advantage of already being in your freezer and thus is a pantry staple, where as you need open up a whole can of the coconut milk which means you will need to make a huge batch of this stuff or use the remaining milk for a smoothie/curries later, so it’s really up to your preference.

Hope you guys enjoy these versions.  Now set forth and be savvy!

TheSavvyPantry-VeganDalgonaCoffeeMatchaAquafabaCoconutMilk-Title-Aquafaba

TheSavvyPantry-VeganDalgonaCoffeeMatchaAquafaba (4)

Ingredients

  • 2 tsps sugar
  • 1 tsp hot water
  • 4 tbsp aquafaba, chilled in the fridge
  • ½ to 1 tbsp of matcha powder (depending on your preference)

Directions

  1. Place the sugar and water in a small bowl to dissolve while you proceed onto the next step
  2. Place the aquafaba in a bowl/container and whisk until frothy, about 1 minute – you will know it’s ready when it is light and fluffy, almost like egg whites
  3. Add the matcha powder and sugar mixture, whisk for another 30 seconds or until it is well incorporated
  4. Serve over your favourite non-dairy milk

TheSavvyPantry-VeganDalgonaCoffeeMatchaAquafabaCoconutMilk-Title-CoconutMilk

TheSavvyPantry-VeganDalgonaCoffeeMatchaAquafabaCoconutMilk (12)

Ingredients

  • 2 tsps sugar
  • 1 tsp hot water
  • 4 tbsp coconut milk, chilled in the fridge
  • ½ to 1 tbsp of matcha powder (depending on your preference)

Directions

    1. Place a full can of coconut milk in the fridge overnight (or for 30 minutes if you forgot to do this step)
    1. The next morning, place the sugar and water in a small bowl to dissolve while you proceed onto the next step
    1. Open the can of chilled coconut milk and scoop 4 tbsps of only the coconut cream from the top of the can and place in a bowl/container and whisk until frothy, about 30-45 seconds
    2. Add the matcha powder and sugar mixture, whisk for another 10-15 seconds or until it is well incorporated
    3. Serve over your favourite non-dairy milk

Crostini 4 Ways: Caramelized Onions, Mushrooms, Beet and Roasted Tomato

Crostini 4 Ways - Header

TheSavvyPantry-Crostini4Ways_Pin

Hi Savvys,

Welcome to my Vegan Holiday Series! I will be sharing 5 blog posts with you featuring recipes that you can bring to any holiday gathering, whether you are hosting or need to bring to a potluck. The recipes are all easy, can be made ahead and frozen, and of course use all plant based ingredients.

IMG_20191116_124150(1)

For the 1st post, I wanted to provide you with a variety of appetizers that will surely please a crowd. I am presenting you with crostini recipes, 4 ways, using white bean dip and hummus but with different tasty toppings. See below for the recipes.

Enjoy! Now set forth and be Savvy!

*Savvy tip on the below recipes, make the dips ahead of time and freeze for later use.

*Savvy tip for the veggies and bread, you can roast all of the veggies at the same time in the at the same temperature and bake the bread when there’s 10 minutes left on the veggies

IMG_20191116_124045(1)

1-TheSavvyPantry-HummusCrostiniwithCaramelizedOnionsHeader

Ingredients for Hummus

  • 1 1/2 cups of cooked chickpeas (1 15 oz can)
  • 1/2 of the roasted garlic bulb
  • 1/2 lemon juice and zest
  • 1/2 tsp salt
  • 1/4 tsp black pepper
  • 1/4 cup tahini
  • 2 tbsp olive oil
  • 1/4 cup aquafaba (the juice from the chickpeas) or water

Ingredients for Caramelized Onions

  • 2 tbsp vegan butter
  • 1 large onion (or 3 smaller ones)
  • 2 cloves of garlic
  • 1/4 tsp salt

Directions for Hummus

  1. To a blender, add the chick peas, half the roasted garlic bulb, lemon juice, zest, salt, pepper and tahini to a food processor
  2. Blend the ingredients in a food processor for about 30 seconds
  3. Stream in the oil and aquafaba until smooth, scraping down when necessary
  4. Set aside until assembly

Directions for Caramelized Onions

  1. Melt the vegan butter in a pan, and caramelize the sliced onions and garlic on medium low for 30 minutes
  2. Periodically stir the onions but let sit so that it can get caramelized. You can stir them in increments of 5 minutes to prevent burning
  3. Just before you take it off the heat, add some salt
  4. Set aside until assembly

2-TheSavvyPantry-HummusCrostiniwithRoastedTomatoes

Ingredients for Roasted Tomatoes

  • 1 pint of grape tomatoes
  • 1 clove of garlic, minced
  • 1 tsp olive oil
  • 1/4 tsp salt
  • 1/4 tsp dried basil leaves
  • 1/8 tsp black pepper

Ingredients for Balsamic Glaze

  • 1/2 cup balsamic vinegar
  • boil on medium for 10 minutes until syrupy consistency

Directions for Roasted Tomatoes

  1. Preheat your oven to 400 degress
  2. Cut the tomatoes in half lengthwise
  3. Place the tomatoes on a cookie sheet lined with parchment paper
  4. Add the rest of the ingredients and toss so that tomatoes are fully coated
  5. Roast in the oven for 40 minutes, tossing half way through

Directions for Balsamic Glaze

  1. In a small sauce pan, add the balsamic glaze
  2. Boil on medium for 10 minutes until syrupy consistency
  3. Watch out, it will thicken as it cools down. If it gets too thick, you can add a bit of hot water to thin out

3-TheSavvyPantry-WhiteBeanCrostiniwithSauteedMushrooms

Ingredients for White Bean Dip

  • 1 12 cup white beans (1 15 oz can)
  • 1/2 of the roasted garlic bulb
  • 1/ 2 lemon juice and zest
  • 2 tbsp olive oil
  • 1/2 tsp salt
  • 1/2 tsp dill
  • 1/2 tsp chives
  • 1/2 tsp parsley
  • 1/2 tsp basil
  • 1/2 tsp oregano
  • 1/4 tsp black peppers

Ingredients for Sauteed Mushrooms

  • 6 mushrooms
  • 2 cloves of garlic
  • 1 tbsp oil
  • 1/4 tsp rosemary
  • 1/4 tsp thyme
  • a splash of soy sauce/tamari (about 1/4 tsp)
  • 1/8 tsp black pepper
  • 1/8 tsp salt

Directions for White Bean Dip

  1. Add all of the ingredients for the white bean dip into a food processor and blend until smooth
  2. Set aside until assembly time

Directions for Sauteed Mushrooms

  1. Sautee garlic on medium heat for about 2 minutes
  2. Add mushrooms and sautee for 4 mins, adding a splash of water if the mushrooms are getting stuck to the pan
  3. Add the spices and stir for 30 seconds until well combined
  4. Take off the heat and set aside in a dish for assembly

4-TheSavvyPantry-WhiteBeanCrostiniwithRoastedBeets

Ingredients for Roasted Beets

  • 1 beet
  • 1 tsp oil
  • 1/2 tsp salt

Directions for Roasted Beets

  1. Preheat oven to 400 degrees
  2. Cut the beet up into thin slices
  3. Place onto a cookie sheet lined with parchment paper
  4. Toss with the oil and salt
  5. Bake for 40 minutes, tossing half way through

5-TheSavvyPantry-CrostiniAssembly

Ingredients

  • 1 baguette
  • 2 tbsp olive oil
  • Hummus
  • Caramelized Onions
  • Roasted Tomatoes
  • Basic
  • White Bean Dip
  • Sauteed Mushrooms
  • Roasted Beets
  • Balsamic Glaze
  • Mint

Directions

  1. Preheat oven to 400 degrees
  2. Slice the baguette in to thin slices on an angle, about 1/6 of an inch thick
  3. Brush olive oil on both sides, placing them on a cookie sheet
  4. Bake the bread at 400 degrees for 15 minutes, flipping halfway through

Assembly

  1. Hummus and Caramelized Onions
    1. Spread some hummus onto the toasted bread
    2. Top with about 2 tsp of the caramelized onions
  2. Hummus and Roasted Tomatoes
    1. Spread some hummus onto toasted bread
    2. Place 4-6 roasted tomatoes on top
    3. Sprinkle with torn basil
    4. Drizzle with balsamic glaze before serving
  3. White Bean Dip and Sauteed Mushrooms
    1. Spread some white bean dip onto the toasted bread
    2. Top with about 2 tbsp of the sauteed mushrooms
  4. White Bean Dip and Roasted Beets
    1. Spread some white bean dip onto the toasted bread
    2. Top with 4-6 pieces of roasted beets
    3. Drizzle with balsamic glaze before serving

Spicy Roasted Chickpeas in Tfal Actifry

Spicy Roasted Chickpeas in Tfal Actifry

Hi Savvys!

Ever since I bought my T-fal actifry over a year ago, I’ve been scouring the internet for all things actifry.  I love savoury snacks, so I knew I had to discover different ways to make easy, healthy snacks in my actifry.  I love making homemade snacks so I can control the amount of oil and salt being used.

InShot_20190211_075202577

These roasted spicy chickpeas will leave you feeling satisfied and will quell any temptation for a bag of chips.  These are crunchy, have that umami sensation and are really filling, so just a handful will help you get through the afternoon blues.

Whenever I use my actifry, I always like to cook my veggies half way before I add the seasoning – I find that if I add the seasoning at the beginning of the cook time, by the time it’s done, the seasoning has disintegrated.

InShot_20190211_075341936

I’ve only been making this version, but will be posting different flavours in the future.  Comment below if you have any recommendations!

Now set forth and be savvy!

Ingredients

  • 2 cups chickpeas, drained and dried
  • 1 tsp oil
  • ½ tsp paprika
  • ¼ tsp salt
  • ¼ tsp garlic powder
  • ¼ tsp onion powder
  • ¼ tsp chilli powder

Directions

  1. Place the chickpeas and oil in your actifry. Set time for for 10 minutes.
  2. After 10 minutes are up, add the seasoning. Set time for another 10 minutes.
  3. Let cool before munching on these or you’ll burn the roof of your mouth!
  4. You can also use this recipe in an oven – roast for 20 minutes at 400 degrees.

Check out below for why I pack these when we travel!

TheSavvyPantry-SpicyRoastedChickpeas00

Baked Vegan Samosas

Baked Vegan Samosas

Hi Savvys!

Every year for New Year’s eve, my family hosts a party with lots of food, games and family.  I’ve gotten into the tradition of helping to make most of the appetizers with my sisters.  Since moving to Toronto, I now like to prep a lot of the appetizers before arriving to Montreal, and freezing them until we’re ready to bake them.

TheSavvyPantry-BakedVeganSamosas-2

These samosas are wrapped in phyllo dough and filled with lots of spices and veggies.  The recipes calls for lots of pantry staples and veggies that you usually already have on hand.  These are my take on samosas, and have become a family favourite.

I hope your family enjoys them as much as my own!

Enjoy, set forth, and be savvy!

Recipe makes 24-30 samosas

Prep Time: 60 minutes

Cook Time: 20 Minutes

Ingredients

Samosas

  • 6 small potatos (or large potatos), cubed (yields about 4 cups of potatoes)
  • 1 tsp grated ginger
  • 1 clove of garlic, minced
  • 1 small onion, diced
  • 1 tbsp oil of your choice (try not to use coconut oil)
  • ½ tsp coriander seed
  • ½ tsp mustard seed
  • ½ tsp cumin seed
  • 1 tsp garam masala
  • 1 tsp curry powder
  • ¼ tsp hot chilli powder
  • ¼ cup water
  • ½ cup frozen green peas
  • ½ cup frozen corn
  • ½ tsp salt
  • Hand full of cilantro, chopped
  • 1 package of phyllo dough

Directions:

Preparing the veggies:

Peel and cut the potatoes into bite sized pieces about ½ inch cubes.  Set aside in a large bowl.

Grate the ginger, mince the garlic and dice the onion and set aside in another bowl.

Preparing the filling:

Heat the oil on medium high in a frying pan (large enough to fit all of the potatoes in).  Fry the coriander, mustard and cumin seeds in the oil until fragrant, about 2 minutes.

Add the bowl of ginger, garlic and onions and fry till fragrant, about 2-5 minutes.

Now add the potatoes and cook for about 4 minutes.

Add the rest of the ingredients except for the frozen green peas, corn, cilantro and phyllo dough.  Cook for another 7 minutes until the potatoes are tender.  You may need to add a bit more water to prevent the filling from sticking to the pan.

Add the frozen green peas, corn and cilantro and stir until heated through.

Set aside to cool and prepare your working area for the phyllo dough.

Assembly:

Preheat oven to 350 degrees.

Unroll and lay out the phyllo sheets onto a baking sheet and place a damp cloth on top to prevent drying.

Prepare another baking sheet lined with parchment paper.

Take a single sheet of phyllo dough, and cut it in half lengthwise so that you have 2 pieces for 2 samosas.

Now take 1 of the halves and place a tbsp of filling in the top left corner, and fold the sheet in half again lengthwise so that you’ve created a little pocket for the filling.  Now fold the filling side down so it creates a triangle – continue to fold the filling into a triangle shape and place on a the baking sheet with the seam side down.

Continue to make the samosas by making 2 with 1 sheet of phyllo dough.

Bake the samosas for 15 minutes, flipping halfway through.

TheSavvyPantry-BakedVeganSamosas-1