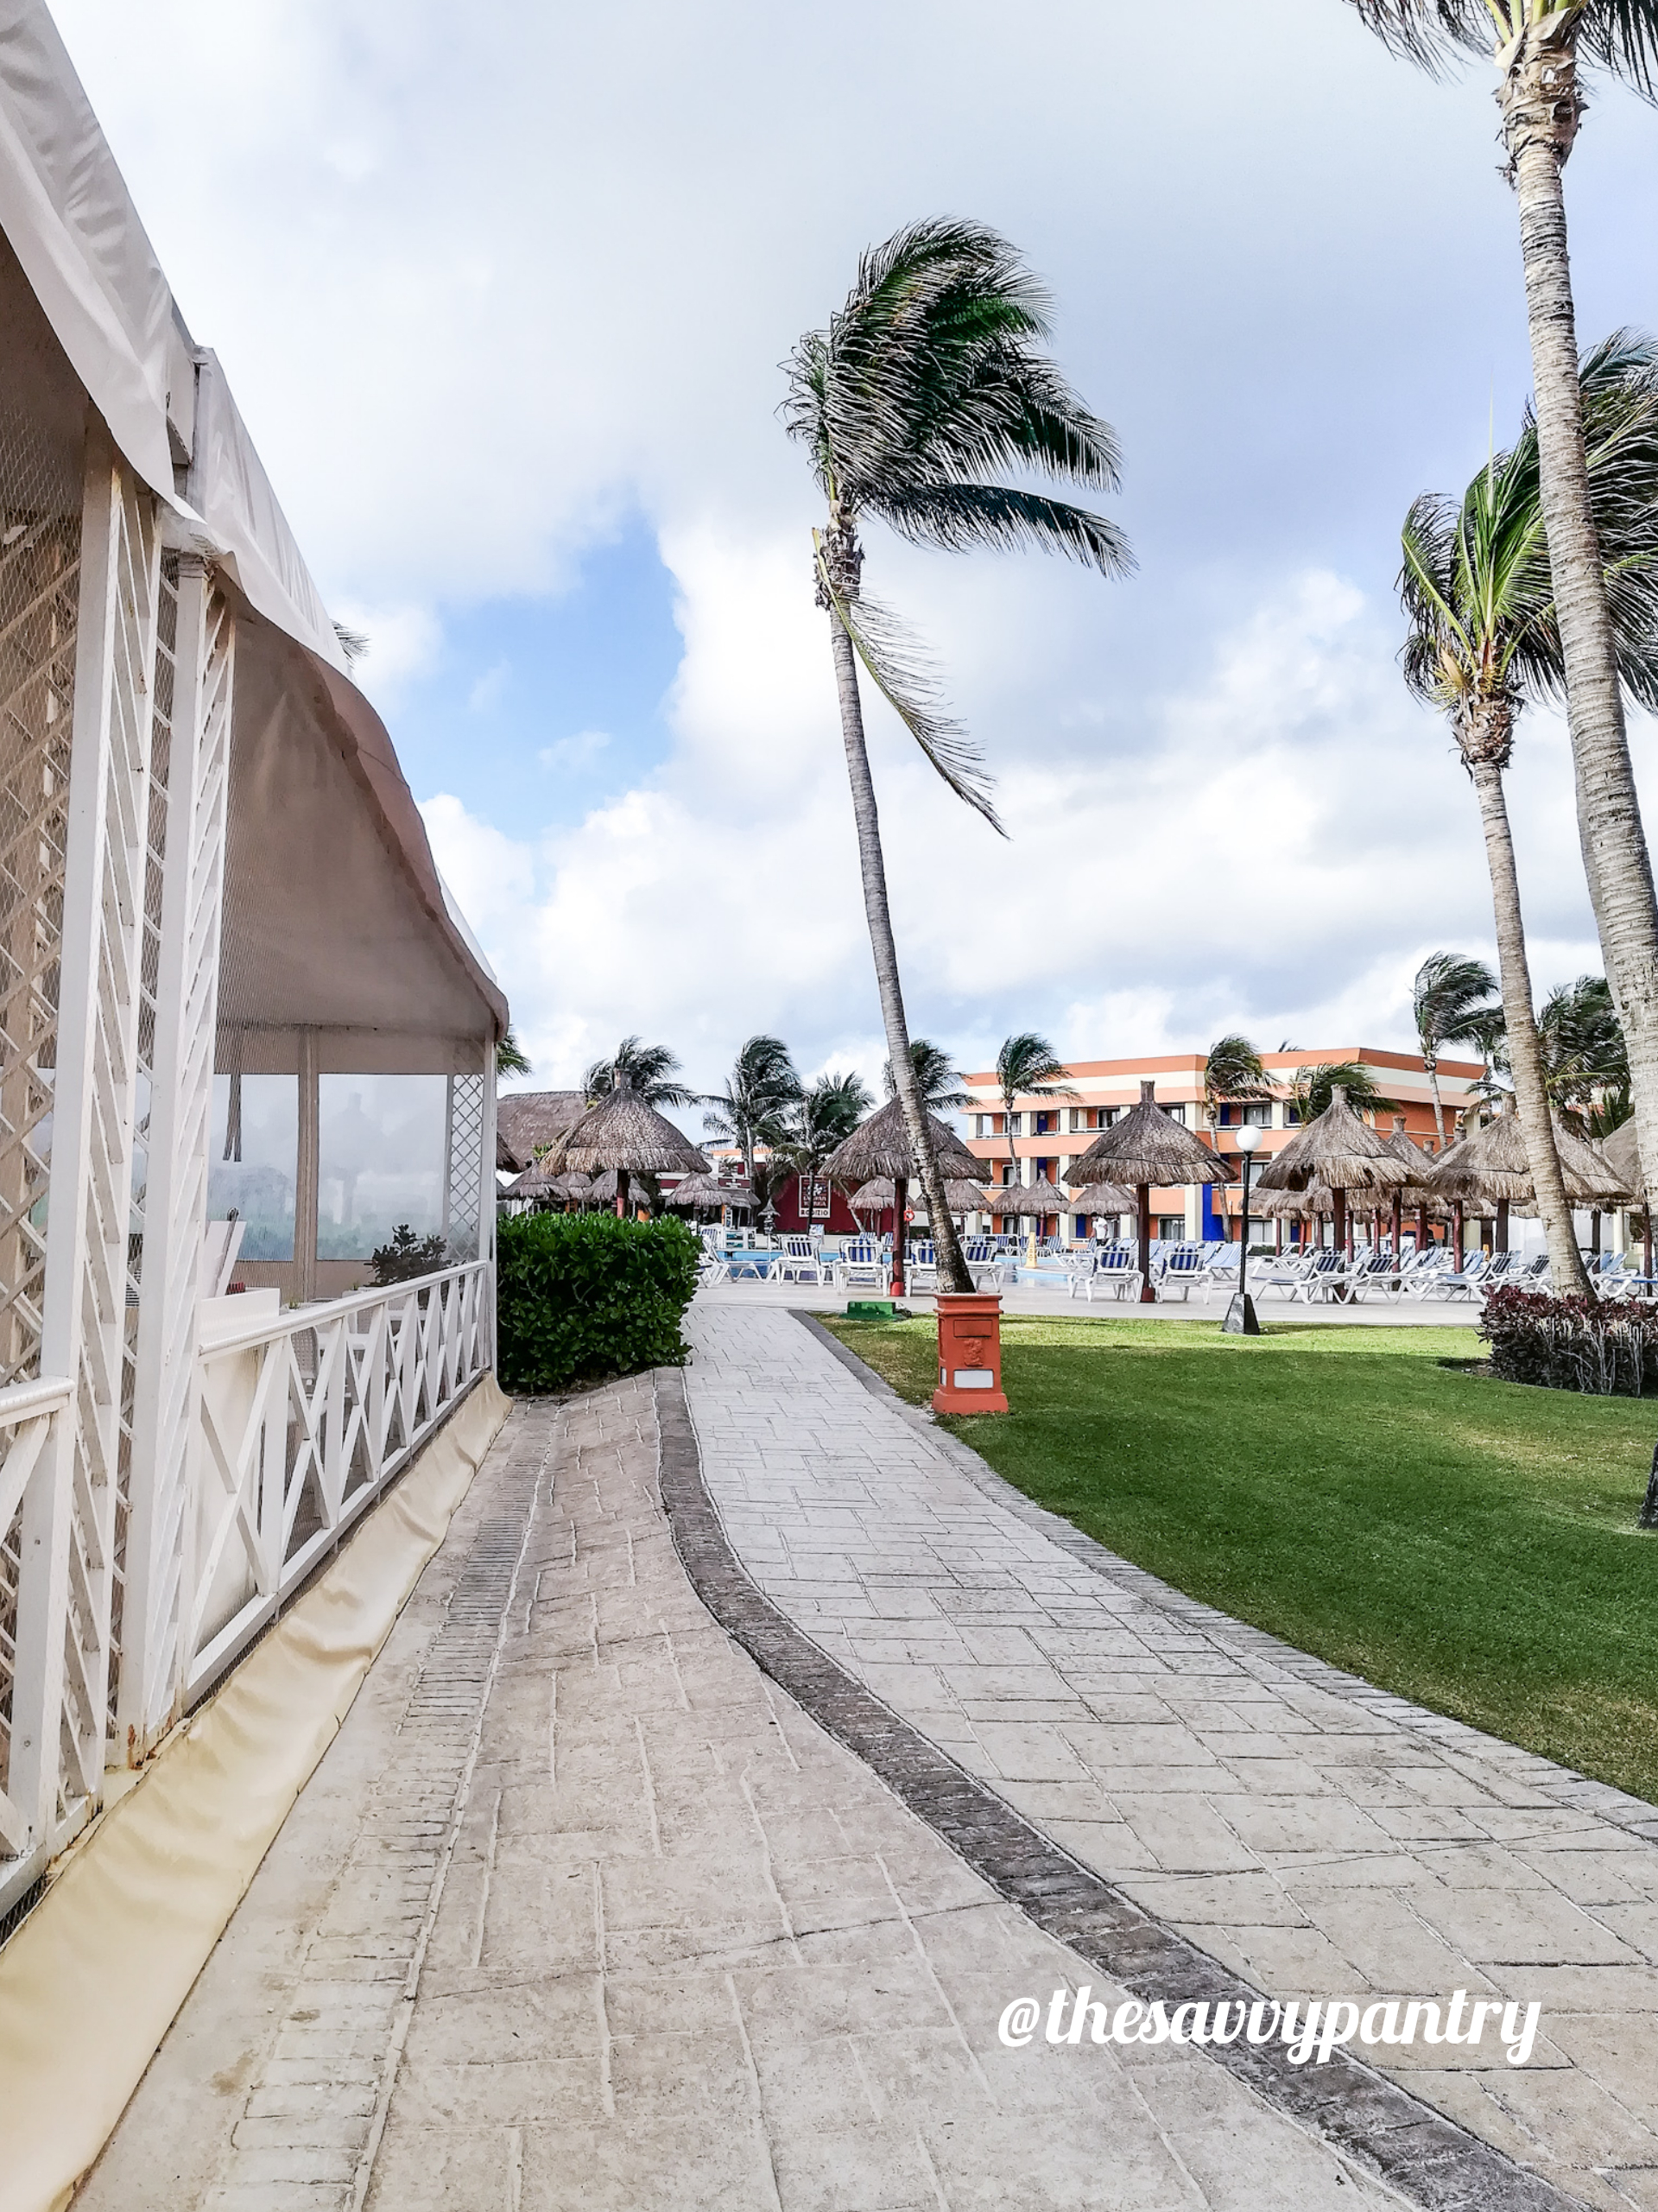
AT the beginning of last year, I had tagged along on a busines trip with my husband to Zurich, Switzerland! I was really excited to have this opportunity since we probably would have never visited the city on our own.
We spent 5 days in the city, and since my husband was there for a conference, I had a day of exploration on my own. For our itinerary, check out my blog post for our 2-day itinerary in Switzerland. I was happy to have this day of independence where I got to explore and eat vegan foods. You can check out my blog post here for my What I eat in a day vegan in Zurich.
This grocery haul features all products from a chain called Co-op grocery store. I spent an hour exploring here by myself, but could have easily spent half a day here. They had so many store-branded and national branded vegan products at affordable prices. I honestly wanted to buy them all and bring them home with me to Canada but knew that wouldn’t be possible. I was really drawn to the cheeses since it’s hard to find good vegan cheese in Canada, so I prioritized this. In the end, I was only able to bring back 3 products with me to Canada. See below for the details!
The first product is the Soft White Cheese from New Roots. When I first saw this in the store, it immediately reminded me of brie cheese. I love brie cheese and was curious to see how this one would stand up to the creaminess and tanginess of the original. I made mushroom bruschetta to go with this and it was absolutely delicious and far exceeded my expectations. I loved it so much that I only allowed myself to eat it sparingly since I wanted to savour every last piece. I wish I brought home more of this product. If you are ever in Switzerland, definitely check it out!
The second product I brought home was this Prosciano Wedge from Violife. I know you can get Violife products in Canada but haven’t seen this wedge anywhere. When I saw it in the store, I immediately knew I wanted to bring it home and make a simple lemon pasta dish with it. It grates and melts pretty well but the flavour was pretty mild. I think I would have used more of it if it was going to be the star of the pasta dish, however, as with the first cheese, I wanted to savour it as much and as long as possible so used it only sparingly.
The last cheese that I bought was the Chicca Classic Cheese from Verys. When I saw it, it immediately reminded me of fresh mozzarella. I knew I had to bring this back to ty for myself at home. I made a simple naan pizza and topped it with this cheese. It didn’t completely melt but it did have a wonderful texture. When eaten in a caprese style salad, it also went pretty well and the texture was soft and very similar to mozzarella.
I hope you guys enjoyed the mukbang – I was so inspired by those cheese and wish I had more to enjoy!
At the beginning of last year (February 2019 to be exact), I was so fortunate to tag along with my husband on a business trip to Switzerland! I was so excited to take this trip because to be honest, it would probably be a country I would never be able to visit just because of how expensive it is to fly there and to visit.
As soon as I knew we were going (about 1 month before actually leaving), I got started right away on my itinerary planning. I like to plan out all of the sights as well as restaurants that I would be hitting up in a day through google maps and sending it to my phone. *Savvy tip*, if you save an offline map from google maps and then map out your itinerary, you are able to locate the spots you want to hit up without WIFI. See more information below under “WIFI Access”.
Here is some general information of our time in Switzerland:
Hotel in Zug, Switzerland:
We stayed in Zug since this was where my husband’s work event was being held. We stayed at the Ibis Hotel in Baar, which was very convenient because it was right across the street from the train station. My husband only had to be in town for 3 days, so we extended our trip so that we had an additional two days prior to explore the city. This hotel was chosen by my husband’s work, so I do not necessarily recommend it, however I would recommend the chain itself. Our hotel ended up being about 25 minutes from Zurich and about an hour from Lucerne by train so the location wasn’t too bad in the end.
Transportation from the Airport to our Hotel: The most efficient way of traveling from the airport to our hotel in Zug was by train. It was only about a 15-minute train ride and as mentioned above, the train station ended up being right across the street from our hotel.
Transportation in and around Zurich and Lucerne: As mentioned, we took the train from Zug to Zurich and Lucerne. Once in Zurich and Lucerne itself, the cities were small enough where we were able to walk everywhere.
WIFI Access: Connection was only available in our hotel room and some public establishments. To get around this, what I have done in the past, and also implemented on this trip, was to load our itinerary on Google maps and download the map for offline navigation. This method works most of the time, however sometimes the GPS gets confused and doesn’t know where you are and ends up restarting. You end up having to use the map the old way (aka without a GPS and finding your own directions like a traditional map). Since Zurich and Lucerne were quite small and pretty easy to navigate, when our GPS did restart, it was pretty easy to use the map function and navigate the old-fashioned way.
Budget: We had budgeted a total of $2500 CAD for the entire trip, which came to $250 CAD per day for 5 days, however note that I had only budgeted 2 days for hotels since the remainder of the trip was paid for by my husband’s company. I also used Budget your Trip to gauge what to expect per day for expenses. See below for the breakdown of our actual expenses (keep in mind this is for 2 people):
Airfare from Toronto to Zurich for 1 person: $1371
Hotel: $163 (for 2 nights)
Meals (on credit card): $504
Transportation (credit card): $191 (Train)
Other (entertainment and souvenirs): $31
Total cost of trip for 3 days: $1138
Excluding airfare, we actually spent a total of $889, which came to $222 per day per person (for the 2 days). When compared to the approximation given on Budget your Trip, the site did recommend $271 per day per person, so I highly recommend this website as a great resource in budget planning.
When we arrived in Zurich, we decided to head straight over to Hiltl Haus for lunch. I had heard great things about this buffet style restaurant and was really excited. When we arrived, you did have an option of having the all you can eat option, however it was quite expensive (it would have been well over $100 CAD for the two of us for lunch). We opted for the weighted option instead and shared 3 plates (which still cost about $70 CAD for the two of us, but it was more than enough food). The food here is all vegetarian with vegan options and has cards indicating if the dish contains any of the allergens people are typically allergic to, such as gluten, dairy, soy, and eggs. It also indicates if it is vegetarian or vegan for quick reference. They had a huge variety of salads, stews, curries, stir fries and desserts. Honestly it was tempting to opt for the all you can eat option; however, it wasn’t worth it for a lunch. We really enjoyed our meal here and we actually returned to Tibits later in the week, which is a more casual and take out version of Hiltl Haus. It was much more affordable and the food was just as good!
After lunch, we decided to check out Hiltl Vegimetzg, which is a vegetarian butcher right next to Hiltl Haus. There were so many great products that I wish I could have bought some to try and bring back to Canada. They had vegan cold cuts, meats and even ice cream. They even had cook books for sale which is great if you want to re-create the Hiltl Haus recipes in your own home. I highly recommend a visit, even if it’s just to window shop if you are in the area!
After lunch, we officially started our walking tour and headed towards Augustinergrasse, known for their beautifully painted bay windows. This is definitely an area you must visit for all of those Instagram worthy photos. We took our time walking this area, looking at all of the shops and taking photos of the colorful buildings. This street connects directly to Bahnhofstrasse, which is a great area for high end shopping. We loved window shopping here and feeling like a local as we explored the streets. From here, we walked over to Lindenhof, which is a great lookout onto the city.
After taking in the sights of the city and posing for a few photo ops, we walked over to Town Hall Bridge, which is a pedestrian bridge that crosses over Lake Zurich. It is very lively with lots of people and families walking around and taking in all of the sights. It’s a great place for photo ops since you can see the swiss alps in the distance. On a clear day, you can even see the white caps on top of the alps! Photos do not do it justice and you will definitely need to see it for yourself in person.
We headed over to the Opera House where there were lots of people hanging out and enjoying the company. There were lots of people having picnics, playing music or taking a stroll with their babies. It was a quick visit for us at the Opera House before we headed back to the train station to end our day trip in Zurich.
Click here for my full walking tour from the Zurich train station!
From our hotel in Zug, we took the train to Lucerne, which was only about hour and gave us plenty of time to take in the wonderful scenery as we made our way over to the city. From the train station, the first stop was to visit Europaplatz, where we quickly connected to some free WIFI and took in the sights of Lake Lucerne. There are also restaurants and shops around this area so you can definitely spend some time here as well.
After gaining access WIFI and updating our location, we made our way over to the Chapel Bridge. This bridge is considered Europe’s oldest covered bridge and allows you to take some photos. This bridge connects the New and Old town, which is where we were headed for our walking tour. We took our time walking the bridge since there is a lot of artwork inside the roof, so be sure to take your time.
Once we reached the other side of the bridge and entered Old Town, we walked along the water to see where we could grab some lunch. We ended up at the restaurant attached to Hotel des Alpes where we enjoyed traditional cheese fondue and rosti.
After fueling up on some much-needed carbs, we continued our walking tour over to St. Leodegar Church for more sight seeing and photos. The last bit of our walking tour included visiting Lion Monument and then taking our time walking back to the train station.
Click here for my full walking tour from the Lucerne train station.
If you read my previous posts where I shared itineraries in Singapore and Thailand, then you already know that this is the third country that we visited on our 16-day Asia trip that spanned 4 countries and 6 cities! As mentioned, we had started and ended our trip in Singapore because it was the cheapest way to travel to Asia from Canada (Toronto specifically). We had decided to spend 1 day in Malaysia since we were already in the area and didn’t want to miss this opportunity. To get to Kuala Lumpur, we flew from Bangkok, Thailand via Malaysia Airlines.
Here is some general information of our time in Kuala Lumpur:
Transportation from the Airport to our Hotel: We had arrived to Kuala Lumpur (KUL) at around 11PM. We ended up taking the subway to our hotel, which ended up taking the same amount of time as a grab would have taken. Since we had our international SIM that was compatible in all of the countries we visited (read below for more information), we decided to use it and book a Grab on our way back to the airport to save some of our energy. There was an option to book a shuttle taxi for about $25 CAD, which in hindsight would have been the cheaper option since the Grab ended up costing about $46 CAD.
Transportation in and around Kuala Lumpur: Since we had access to our WIFI device, we used it for Grab to get from our hotel to the Batu caves since we wanted to get there early. From the Batu Caves, we did take the train back into the city, and from there, continued to book Grab rides since it was quite affordable. Unfortunately, all of the sights we had planned to visit were not all in walking distance and since we were strapped for time, we decided to utilize Grab wherever we could.
WIFI Access: I will leave the same comments as my Singapore post as it is still relevant here. Connection was only available in our hotel room and some public establishments. To get around this, what I have done in the past, and also implemented on this trip, was to load our itinerary on Google maps and download the map for offline navigation. This method works most of the time, however sometimes the GPS gets confused and doesn’t know where you and ends up restarting. You end up having to use the map the old way (aka without a GPS and finding your own directions like a traditional map). However, I do recommend just purchasing an international SIM card that you can use and be connected to at all times (if you need to). Personally, for me, I preferred to be connected the entire time since the offline google maps kept restarting and was unable to locate us. It is also useful if you plan on using Grab while in the city. This was the first time travelling internationally where we had purchased an international SIM to be able to be connect to internet and I must say that now I am a converted. The international SIMs are very affordable and offer a lot of data (we would also turn it off if we were going to be in a given location for an extended amount of time to preserve data and batter power) and we were able to use the same SIM for the remainder of our entire trip in all of the other countries. We did end up using 3 different types of connection, but I recommend the last option so that you can be connected the entire time:
International SIM(purchased at the airport) – Once we left Singapore and arrived to Phuket Airport, there were lots of boots that were selling international SIMs. We ended up purchasing one of these at a booth called Smile and they connected it for me – it was super easy to use however kind of confusing because I couldn’t understand how much data I had left so we used it sparingly during our visit in Phuket and Chiang Mai. Because we paid in cash, I unfortunately do not recall how much we spent, but it was definitely less than $10 CAD.
Rented WIFI Device – I had actually rented a device when we were in Singapore for our visit in Bangkok since we were going to be here for 3 days without any excursions. We rented a pocket WIFI which we picked up at the BBK airport via Klook (https://www.klook.com/en-CA/activity/16446-4g-wifi-thailand/). In total it cost $26 for the 3 days (which at the time we thought was a bargain) – they do have to hold a deposit which is refundable once you return the device, so make sure you have enough cash to avoid the change in exchange rates on your credit card. It was also not clear how much data we had but I think it was unlimited. I didn’t mind the hand held device since we had used one when we visited Tokyo, however I definitely would recommend an international SIM when possible.
International SIM (purchased online and picked up at airport) – After doing more research while in Bangkok and realizing that the convenience of being connected to data became a growing need, which was already 6 days into our trip, I did more research on Klook. I found SIMs available for 15 countries in South East Asia, which meant that for the remainder of our trip (still 7 days), we could be connected in all of the countries (Malaysia, Indonesia and Singapore) and not have to worry about finding WIFI. We found a great deal with the SIM only costing $8.90 for 4GB of data from Klook. This option ended up being the best because not only is it a one-time purchase (no need to return anything like we had for the rented WIFI device), but you can actually download an app that came in English that tracked how much data you had. If you did go over the allotted data, you had to option of adding more data if necessary. I really liked the convenience and visibility of this option the best and felt in full control.
Hotel in Kuala Lumpur:
We stayed at the Melia Kuala Lumpur. Being a large chain hotel, it was conveniently located next to the subway station. We arrived late but there was someone at the reception who had greeted us. The room was very large and had a resort like feel. This would definitely be a very comfortable hotel to stay in for longer term stays. There was a separate area for sitting and lots of outlets, which was great because we had a lot of things to charge for our 1-night stay. We didn’t get a chance to check out the pool but based on the photos on the website, it looked lovely and would have been great for photos and relaxation. The room we booked also included breakfast which a large selection of hot, cold and continental food. It was probably one of the best hotel breakfasts I’ve ever had. I recommend this hotel and look forward to staying here when we visit again.
Budget: We had budgeted $115 CAD cash for the day, which was meant to be used for food, transportation and shopping. We knew credit card would be readily available in most establishments but since we were only here for a day, we wanted to use more cash than credit. Again, I also used Budget your Trip to gauge how much expenses to expect per day. See below for the breakdown of our actual expenses (keep in mind this is for 2 people):
Airfare from Bangkok to Kuala Lumpur for 2 people: $284
Hotel: $85 (for 1 night)
Cash (mostly for meals): $115 CAD
Transportation (credit card): $60 (Grab)
Total cost of trip for 2 days: $544
Excluding airfare, we actually spent $160 for the day, or $80 a person. This is pretty close to the $69 per day approximation found on Budget your Trip, however we did splurge on the Grabs, so I still highly recommend this website as a great resource in budget planning.
See below for the full details. Don’t forget to also check out some highlights from our trip (video above).
Now set forth and be savvy!
This was our only day in Kuala Lumpur and it wasn’t a full day as our flight to Bali was leaving at 10:50PM, and since it was an international flight we had to be at the airport before 8PM. The original plan was to visit lots of sites, but Sean ended up having stomach issues so we had to take it slower which meant that we didn’t get to experience the city to the fullest as much as I would have liked to. However, it gave us a small taste of the city which brought up excitement to visit again in the future.
Our original plan was to start at Batu Caves early in the morning to beat the crowds then take the train over to Chinatown to explore and have lunch. Then after Chinatown, the plan was to visit Sri Mahamariamman, Central Market and finally Petronas Twin Towers. It also ended up raining shortly after we left the Batu caves which slowed us down further as we were taking shelter. You can access the original walking tour in the link below, and I do think all of it can be visited in 1 day, so we will definitely try again in the future.
Batu Caves – Right after breakfast, we took a Grab to visit the Batu Caves. It is recommended to go as early as possible, and we arrived around 9:30 and it was quite busy already. There were lots of pigeons and monkeys roaming the premises but the place is so large you can easily take photos without them. To visit the actual caves, you do have to walk up the stairs towards the temple. Make sure to bring sneakers to make the journey easier and more comfortable. Once we entered the caves, there were temples inside where you could visit as well. You definitely want to make sure to visit the caves as the photos do not do it justice. If you need a washroom, there are the shops at the base where you can pay to use the facilities. We visited here for about 2 hours – be sure to walk around since there are lots of other temples on the premises where you can take photos and visit. After we were done our visit, we took the Kmuter towards Kuala Lumpur Station and got off at NU Sentral.
fbt
Since it was raining, we decided to hang out by the mall for a bit. We stumbled upon Anjappar Restaurant which was right outside of the mall. What caught our attention was that there were locations across the world, including in the GTA, so we wanted to check it out. We ordered a Thali and Palak Paneer to share and it was delicious, costing about $31 RM (about $10 CAD). After lunch, we explored the mall attached to NU Sentral since it was still raining out. Around mid afternoon, we decided to take a Grab to visit Chinatown.
Chinatown – We arrived quite late into the afternoon, which was good because a lot of the shops seemed to only open around 5. It was still raining so we did take our time, and luckily for us, the Petaling Street Market in Chinatown has an enclosure to protect us from most of the rain. There are lots of shops for souvenirs and electronics, but because it was towards the end our trip, I didn’t have any spare room in my luggage to bring back anything. I was even tempted to purchase an extra luggage but opted instead to promise to revisit again in the future.
After this short visit to Kuala Lumpur, we headed back to our hotel to collect our luggage and head over to the airport for our flight to Bali.
If you read my previous post where I shared my 2-day itinerary in Chiang Mai, Thailand, then you already know that this is the third city in Thailand that we visited on our 16-day Asia trip that spanned 4 countries and 6 cities! As mentioned, we had started and ended our trip in Singapore because it was the cheapest way to travel to Asia from Canada (Toronto specifically). We had decided to spend 7 days in Thailand in 3 cities, and since it was so jammed packed with activities, I decided to create a post for each city we visited to really highlight everything we did and loved. To get to Bangkok, we flew from Chiang Mai, Thailand via Vietjet Air.
Here is some general information of our time in Bangkok, Thailand:
Transportation from the Airport to our Hotel: We had arrived to Bangkok Airport (BKK) at around 8PM. Since we had picked up our Pocket WIFI device at the airport, we decided to use it and call a Grab to take us to our hotel. The taxi and Grab both ended up costing about 500 TBH ($21 CAD) but we opted to take a Grab for the convenience.
Transportation in and around Bangkok: Since we had access to our WIFI device, we used Grab to get from our hotel to anywhere that might be far. Outside of this, we didn’t need to book any transportation as it was included in our excursions or in walking distance.
WIFI Access: I will leave the same comments as my Singapore post as it is still relevant here. Connection was only available in our hotel room and some public establishments. To get around this, what I have done in the past, and also implemented on this trip, was to load our itinerary on Google maps and download the map for offline navigation. This method works most of the time, however sometimes the GPS gets confused and doesn’t know where you and ends up restarting. You end up having to use the map the old way (aka without a GPS and finding your own directions like a traditional map). However, I do recommend just purchasing an international SIM card that you can use and be connected to at all times (if you need to). Personally, for me, I preferred to be connected the entire time since the offline google maps kept restarting and was unable to locate us. It is also useful if you plan on using Grab while in the city. This was the first time travelling internationally where we had purchased an international SIM to be able to be connect to internet and I must say that now I am a converted. The international SIMs are very affordable and offer a lot of data (we would also turn it off if we were going to be in a given location for an extended amount of time to preserve data and batter power) and we were able to use the same SIM for the remainder of our entire trip in all of the other countries. We did end up using 3 different types of connection, but I recommend the last option so that you can be connected the entire time:
International SIM(purchased at the airport) – Once we left Singapore and arrived to Phuket Airport, there were lots of boots that were selling international SIMs. We ended up purchasing one of these at a booth called Smile and they connected it for me – it was super easy to use however kind of confusing because I couldn’t understand how much data I had left so we used it sparingly during our visit in Phuket and Chiang Mai. Because we paid in cash, I unfortunately do not recall how much we spent, but it was definitely less than $10 CAD.
Rented WIFI Device – I had actually rented a device when we were in Singapore for our visit in Bangkok since we were going to be here for 3 days without any excursions. We rented a pocket WIFI which we picked up at the BBK airport via Klook. In total it cost $26 for the 3 days (which at the time we thought was a bargain) – they do have to hold a deposit which is refundable once you return the device, so make sure you have enough cash to avoid the change in exchange rates on your credit card. It was also not clear how much data we had but I think it was unlimited. I didn’t mind the hand held device since we had used one when we visited Tokyo, however I definitely would recommend an international SIM when possible.
International SIM (purchased online and picked up at airport) – After doing more research while in Bangkok and realizing that the convenience of being connected to data became a growing need, which was already 6 days into our trip, I did more research on Klook. I found SIMs available for 15 countries in South East Asia, which meant that for the remainder of our trip (still 7 days), we could be connected in all of the countries (Malaysia, Indonesia and Singapore) and not have to worry about finding WIFI. We found a great deal with the SIM only costing $8.90 for 4GB of data from Klook. This option ended up being the best because not only is it a one-time purchase (no need to return anything like we had for the rented WIFI device), but you can actually download an app that came in English that tracked how much data you had. If you did go over the allotted data, you had to option of adding more data if necessary. I really liked the convenience and visibility of this option the best and felt in full control.
Hotel in Bangkok:
We stayed at the Novotel Bangkok Silom Road. Being a large chain hotel, it was conveniently located and had lots of restaurants and convenience stores near by. The room was quite large and very modern looking. I also liked how much storage we had so that we can hide our luggage away without it being in the way. We didn’t get a chance to check out the pool however we had a view of it from our room, and the view from the pool looks out onto the city. It would have made great photos. They also offered breakfast at the hotel for about $30 CAD per person which we thought was too expensive so we just opted to purchase breakfast at the convenience store and store it in our mini fridge in our room. This hotel is also about a 30-minute walk to Chinatown and about a 12 minute walk to the pier, which you can take a river taxi to visit the temples. I recommend this hotel for the location and the quality.
Budget: We had budgeted $70 CAD cash per day, which was meant to be used for food, transportation and shopping. We knew credit card wouldn’t be readily available in most establishments so we carried more cash than Singapore, but less than the other countries we visited. Again, I also used Budget your Trip to gauge how much expenses to expect per day. See below for the breakdown of our actual expenses (keep in mind this is for 2 people):
Airfare from Chiang Mai to Bangkok for 2 people: $146
Hotel: $270 (for 3 nights)
Cash (mostly for meals): $214 CAD
Shopping and other expenses (on credit card, which includes our excursion): $177
Transportation (credit card): $48 (Grab)
Total cost of trip for 2 days: $856
Excluding airfare, we actually spent $236 per day, or $118 a person. If we exclude the cost of the excursion, we actually only spent $107 per day per person, which is closet to the $92 per day approximation found on Budget your Trip, however we did splurge on the shopping and the Grabs, so I still highly recommend this website as a great resource in budget planning.
See below for the full details. Don’t forget to also check out some highlights from our trip (video above).
For the itineraries from the other areas we visited, see below:
Since we had arrived the previous night pretty late, this was our first official full day of our visit to Bangkok. Of course, I wanted to hit up all of the sight seeing on the 1st day just in case we missed anything, we could revisit again on our last day. From our hotel, we walked over to Sathorn TaksinPier which was about a 12-minute walk. Once we reached the pier, we took a ferry to no. 9 Tha Chang and walked over to the Grand Palace to start our walking tour. I recommend taking the ferry since this is an attraction and activity in itself. I did read online that there were different types of taxis that you can take that would be cheaper, however we weren’t able to find it on our way to Tha Chang, though we did find it on our way back.
fbt
The Grand Palace really is grand. We wanted to come here first because we knew it would get busy and to beat the lines and crowds. You do have to pay 500 BHT per person (about $21 CAD), but it does come with a water bottle and bathroom use (note that a lot of bathrooms in Asia require you to pay to use them). We spent about 2 hours here, not because we were walking around sight seeing but because it had rained and we took shelter for about 45 minutes. However, because of the rain, the crowds did disperse and we were able to walk around and take lots of lovely photos. All of the architecture is really quite amazing – definitely worth taking photos and selfies here. Since it is a temple, do dress modestly and bring a kimono. The staff also seemed to be preparing for a festival so unfortunately there were lots of areas that were closed off to the public, however since this place is quite large, there was more than enough space to explore.
rpt
After visiting the Grand Palace, it was already lunch time. There are many exits to the Grand Palace, and the exit that we took led us to the restaurant Baan Tha Tien. Upon entering the restaurant, we did notice many other tourists in here. The décor was also very trendy and had large windows to let in the sun. The food was pretty affordable – we ordered green curry and shrimp. It was the perfect portion size and gave us energy for the rest of the day.
After lunch, we headed over to the Reclining Buddha. It is hard to describe just how large this Buddha is. It’s so large that it’s almost impossible to take a photo of it from end to end. Of course, there were lots of other tourists here visiting, but it wasn’t too crowded. It being a temple, there were also people praying so do be mindful and respectful.
After visiting the Reclining Buddha, we took the ferry across to visit Wat Arun. This side of the pier had less tourists, but everything seemed to be spaced out a lot more, giving you more room to walk around. There is no entry fee here, and you are free to roam around. It was almost set up like a garden with paths for you to walk on through the temples. It was quite nice to have the breeze from the river while taking in all of the beauty of the sights. I absolutely loved all of the tiling and colors on the temples.
After visiting Wat Arun, we found the cheap river taxi and took it back over towards the Reclining Buddha. This river taxi only cost us about $1 CAD each. We had intended to visit Khaosan Road, but underestimated all of the walking we had done in the heat. Unfortunately, we did not get the opportunity to visit it on this trip but do hope to do so when we visit again.
We ended up heading towards Chinatown and the Flower Market which we also didn’t get to visit on this trip but will definitely add it to the list for next time). We decided to take a grab from the Reclining Buddha to Chinatown. We arrived around 5PM and the sun was starting to set. Most vendors were just starting to set up and we could already feel the energy of the city start to open up. We were lucky to arrive at 5PM because we were able to grab some street food which there were still tables available. This was probably my favourite part of Bangkok – Chinatown ended up being a haven for street food at such cheap prices. Most dishes cost under $3 CAD and were as delicious as eating in a Thai restaurant in Canada. Since a lot of people practice Buddhism in Thailand, there were lots of Buddhist friendly food stalls, which meant that they were also vegan friendly. We had pad Thai, dumplings and noodle soup. We honestly could have spent more money here if our stomachs were larger. There also seemed to be some kind of Chinese holiday going on and there were lots of activities in the streets which really added to the experience. After our visit in Chinatown, we walked back to our hotel which was about a 30-minute walk and called it a night.
When in Bangkok, visiting a floating market is a must. Most of the floating markets are quite far from the city center, so you do have to either find your way over through the public transportation, Grab or tours. We ended booking a tour for convenience and the price was quite affordable. The tour we booked was through GetYourGuide.com called Damnoen Saduak Floating Market 6-Hour Tour and only cost $65 CAD for the both of us. What I liked about this was that the shuttle from and to our hotel was include as well as the boat ride inside the market itself.
After being picked up from the shuttle, our tour guide brought us to a Coconut Sugar Farm for a quick history lesson on coconut sugar, some shopping for souvenirs and a bathroom break. This visit was quite short, maybe only 30 minutes, but we got to see how they boil down the coconut to make sugar. They also had various sizes of coconut sugar blocks that you can purchase to bring home.
After the visit, we arrived to Maeklong Station which is a famous market where the train drives right through it. We were able to see how the vendors quickly cleared the path for the oncoming train. From what I experienced, this seemed like an attraction in itself. After watching the train pass by the market, we headed for Damnoen Saduak Floating Market.
This market has both a land and water market. Upon arriving, we wasted no time and was immediately put onto boats to start our tour. The boat ride to the market in itself was quite lovely and it was nice to see all of the homes that are still occupied along the river. Once we got into the actual market, there were lots of opportunities to try food, drinks and even buy souvenirs. I was surprised to see a lot of the souvenir places took credit card as payment. There was so much to see and to eat on the river as well as on land. After our boat ride ended, we were given some time to explore the land markets as well. There is lots of opportunities here to try food as well. We got to try noodle soups, coconut crepes and mango sticky rice. Everything was delicious and very cheap – you could also bargain with the vendors.
After returning to our shuttle, our guide actually gave us a few options of where we wanted to get dropped off based on where the other people in the tour group were being dropped off. This was great for us because we didn’t have to travel back to our hotel. We got dropped off at a subway station and headed towards the Chatuchak Weekend Market. This market is huge and you can definitely spend hours here exploring, eating food and getting a massage. The shops are also very trendy – I would almost consider this like a mall but in a market setting. When we first arrived here, we did get a well-deserved foot massage, which was the first massage we received on our entire Asia trip. After the massage, we walked up and down all of the aisles taking in all that the market had to offer. They do have the aisles numbered which helped with navigating around. We took our time here, stopping at a café to have some iced coffee and Thai milk tea and shopped around for some souvenirs. I was happy to have found this shop that sold all kinds of wooden household products like trays, cutting boards and spoons. I did purchase a few things from here but because of the lack of luggage space that we had, I was limited to what I could buy. We also had dinner here, trying out lots of different foods from the various booths. It was a great way to end our second day in Bangkok.
This was our last day in Bangkok. We had our flight at 7:30 PM to Malaysia, and since it was an international flight, we had to be at the airport for 3:30PM, which meant we only had about half a day in Bangkok. We had originally wanted to hang out by the pool and visit Lumpini Park but we were so exhausted at this point in the trip that we just took it easy and decided to visit Chinatown again because of all of the food.
We started our day and had breakfast at Jok Prince for some cheap and comforting congee. This place was packed when we entered but the staff was really nice and found 2 seats for us to sit at. They didn’t speak English but they did have English menus with lots of choices. I ordered a plain congee while Sean ordered a chicken congee. I did find that mine had a bit of a burnt taste however it was very affordable and nothing really to complain about.
After breakfast, we started walking towards Chinatown but really took our time. We ended up stopping at a little coffee shop called Alice Café where we shared an iced coffee and a piece of Thai Milk tea cake. It was delicious and a great mid-morning break.
We continued our way over to Chinatown where luckily there were lots of food stalls open. We took our time looking at all of the stalls and ate as much as we could before having to head over to the airport for the next adventure! I am glad we made a second trip to Chinatown because we were really able to savour and indulge in all of the street food.
If you read my previous post where I shared my 2-day itinerary in Phuket, Thailand, then you already know that this is the second city in Thailand that we visited on our 16-day Asia trip that spanned 4 countries and 6 cities! As mentioned, we had started and ended our trip in Singapore because it was the cheapest way to travel to Asia from Canada (Toronto specifically). We had decided to spend 7 days in Thailand in 3 cities, and since it was so jammed packed with activities, I decided to create a post for each city we visited to really highlight everything we did and loved. To get to Chiang Mai, we flew from Phuket, Thailand via Air Asia.
Here is some general information of our time in Chiang Mai, Thailand:
Transportation from the Airport to our Hotel: We had arrived to Chiang Mai Airport (CNX) at around 11PM. We were in communication with our hotel before hand to let them know about our late arrival and they had advised that we can take a taxi from the airport to the hotel, which only cost about 250 THB (about $10 CAD). It was only about a 15-minute ride to the hotel and there was no traffic at this time.
Transportation in and around Chiang Mai: Since we had access to an international SIM, we used Grab to get from the hotel to the night bazaar. Outside of this, we didn’t need to book any transportation as it was included in our excursions. We also took taxis to and from our hotel.
WIFI Access: I will leave the same comments as my Singapore post as it is still relevant here. Connection was only available in our hotel room and some public establishments. To get around this, what I have done in the past, and also implemented on this trip, was to load our itinerary on Google maps and download the map for offline navigation. This method works most of the time, however sometimes the GPS gets confused and doesn’t know where you and ends up restarting. You end up having to use the map the old way (aka without a GPS and finding your own directions like a traditional map). However, I do recommend just purchasing an international SIM card that you can use and be connected to at all times (if you need to). Personally, for me, I preferred to be connected the entire time since the offline google maps kept restarting and was unable to locate us. It is also useful if you plan on using Grab while in the city. This was the first time travelling internationally where we had purchased an international SIM to be able to be connect to internet and I must say that now I am a converted. The international SIMs are very affordable and offer a lot of data (we would also turn it off if we were going to be in a given location for an extended amount of time to preserve data and batter power) and we were able to use the same SIM for the remainder of our entire trip in all of the other countries. We did end up using 3 different types of connection, but I recommend the last option so that you can be connected the entire time:
International SIM(purchased at the airport) – Once we left Singapore and arrived to Phuket Airport, there were lots of boots that were selling international SIMs. We ended up purchasing one of these at a booth called Smile and they connected it for me – it was super easy to use however kind of confusing because I couldn’t understand how much data I had left so we used it sparingly during our visit in Phuket and Chiang Mai. Because we paid in cash, I unfortunately do not recall how much we spent, but it was definitely less than $10 CAD.
Rented WIFI Device – I had actually rented a device when we were in Singapore for our visit in Bangkok since we were going to be here for 3 days without any excursions. We rented a pocket WIFI which we picked up at the BBK airport via Klook. In total it cost $26 for the 3 days (which at the time we thought was a bargain) – they do have to hold a deposit which is refundable once you return the device, so make sure you have enough cash to avoid the change in exchange rates on your credit card. It was also not clear how much data we had but I think it was unlimited. I didn’t mind the hand held device since we had used one when we visited Tokyo, however I definitely would recommend an international SIM when possible.
International SIM (purchased online and picked up at airport) – After doing more research while in Bangkok and realizing that the convenience of being connected to data became a growing need, which was already 6 days into our trip, I did more research on Klook. I found SIMs available for 15 countries in South East Asia, which meant that for the remainder of our trip (still 7 days), we could be connected in all of the countries (Malaysia, Indonesia and Singapore) and not have to worry about finding WIFI. We found a great deal with the SIM only costing $8.90 for 4GB of data from Klook. This option ended up being the best because not only is it a one-time purchase (no need to return anything like we had for the rented WIFI device), but you can actually download an app that came in English that tracked how much data you had. If you did go over the allotted data, you had to option of adding more data if necessary. I really liked the convenience and visibility of this option the best and felt in full control.
Hotel in Chiang Mai:
We stayed at the Peaberry Hotel in Chiang Mai. This hotel doesn’t look that big from the outside, but once inside it has many floors. It has almost a resort feel, since only the café and the front desk have a closed roof – the areas where the rooms were situated are open like you would find in resorts. There are no elevators, but there are ramps on the side of the staircase where you can easily wheel up your luggage. The hotel was great and contacted us right after we booked the hotel to ensure they received our flight information. The hotel does lock their doors after 10PM for security reasons and they were very accommodating with our late arrival. They also answered emails very quickly and provided great information for getting to the hotel from the airport. It was also great to see that there was breakfast included, however it was a smaller selection and included mainly cereal, toast and fresh fruit, they did have a menu where you can choose hot items (1 per person) that they make upon request. The manger, Lee, was very friendly and made us our omelettes in the morning.
Budget: We had budgeted $70 CAD cash per day, which was meant to be used for food, transportation and shopping. We knew credit card wouldn’t be readily available in most establishments so we carried more cash than Singapore, but less than the other countries we visited. Again, I also used Budget your Trip to gauge how much expenses to expect per day. See below for the breakdown of our actual expenses (keep in mind this is for 2 people):
Airfare from Phuket to Chiang Mai for 2 people: $190
Hotel: $105 (for 2 nights)
Cash (mostly for meals): $20 CAD
Meals (on credit card): $52
Shopping and other expenses (on credit card, which includes our excursion): $257
Transportation (credit card): $8.5 (Grab)
Total cost of trip for 2 days: $632
Excluding airfare, we actually spent $442 per day, or $221 a person. If we exclude the cost of the excursion, we actually only spent $92 per day per person, which is higher than the $56 per day approximation found on Budget your Trip, however we did splurge on the meal and could have gotten cheaper food if we just ate at the night market, so I still highly recommend this website as a great resource in budget planning.
See below for the full details. Don’t forget to also check out some highlights from our trip (video above).
Now set forth and be savvy!
This was the first (and only) full day of our visit to Chiang Mai. When we were planning our Asia trip and planned to visit Thailand, I knew that I wanted to make a visit to Chiang Mai to check out their elephant sanctuaries. There is so much information out there and it’s hard to tell which companies are truly ethical. I was lucky to have a friend visit the year before who had done extensive research and she recommended the Elephant Happy Home Sanctuary, and I am glad that she did. We had booked directly through their website, which contained lots of information about their elephants and their practices. Transportation was included to and from the sanctuary. Technically we booked the half day morning excursion, thought it felt like it a full day adventure with these elephants. The day included taking care of the elephants like feeding them, walking them and giving them their bath. Keep reading for more details!
After being picked up from our hotel, it was about an hour ride to the sanctuary, which is up in the mountains. The guide picks you up with a driver and the ride includes a break at the halfway point where we could pick up snacks before making our way to the sanctuary. Upon arrival, we are immediately taken to a cubby area where we could safely leave our belongings and change into what they call their native wear. It is recommended that you bring a bathing suit and a towel since you will be giving the elephants a bath. I also liked how changing into the clothing meant that we didn’t get our own clothing dirty. They also give you a pouch where you can keep your phone on you for photos.
After changing, our guide Apple gave us an orientation, describing the differences between Thai and African elephants and giving us a background history on how elephants became domesticated within Thailand. She also gave us background knowledge on what signs to recognize as being inhumane and unethical when researching sanctuaries, such as riding an elephant on their back or having the elephants tied up. It was very eye opening and you can see the passion and love that the sanctuary has for their elephants. We also learned about how they acquire their elephants, mostly through donations where they purchase elephants from circuses or other unethical establishments.
After the orientation, we were put straight to work! We grabbed baskets and had cut down sugar cane small enough so that the elephants can eat them as a snack. There were tree stumps where we would cut the sugar canes with a machete against, which was actually harder than it looked. After we each cut and collected our baskets full of sugar cane, it was time to meet the elephants. We got to meet a baby elephant which was kept in the stables and wasn’t going to be joining us for the day, so we got to visit him before we continued our activities with the other elephants. This is also where we met the former baby, Halloween, a.k.a Naughty Boy, who stole my heart. He was very rambunctious and very curious, which is why he has the nick name Naughty Boy. He would also run after you and put his trunk straight into your basket to steal food.
After going into the field to meet and feed the rest of the elephants, we were taken to a mud pit where we got to throw mud on the elephants which is supposed to help protect and keep their skin moisturized. This did get quite messy, so make sure you have flip lops you don’t mind getting dirty! We spent quite some time here with the elephants, and it was great because one of the other guides walked around taking photos for us to retrieve on Facebook later, which made for great souvenirs!
After giving them a “spa” bath, it was time for us to have lunch. I really enjoyed the family style set up. We got to portion and cook our own food (they had an option for tofu and veggie broth which was great) and top it with traditional toppings like fried onions and fresh herbs. The lunch was light but comforting – perfect fuel for the rest of the day.
After lunch, we prepared the elephants daily dose of vitamins, made into giant energy balls. Each elephant is allowed one per day and it consists of ingredients that would be found in energy balls for humans, such as dates and nuts. We got to feed the elephants a bit more sugar cane before taking a walk to the river where it was time to give them a bath. On our walk, we did see another sanctuary that was much larger on the other side of the pond. Even though they are technically a competitor, it was nice to see the community that these sanctuaries had with each other. These animals are large and surprisingly the walk did take some time because they do walk quite slow and often got distracted and would stop for some fresh greens.
Once we got to the river, we got to go into the water and play with them. The water itself wasn’t deep however the currents were really strong and it was scary at some points, but we stuck together and made it in and out safely. It was funny to see how much energy Naughty Boy had, and was trying to mount all of the other elephants. This ended up being our last activity for the day and once we returned to the sanctuary, we were able to take a shower to wash off all of the dirt. After this, we were taken back to our hotel.
After getting dropped off at our hotel, we decided to take a grab and have dinner at the vegan restaurant The Whole Earth. The restaurant is situated right off the main street and upon entering, we are advised to take off our shoes before entering the actual restaurant, however they did also offer slippers. Taking off our shoes didn’t bother us and it just added to the ambiance of the restaurant. We ordered pumpkin red curry, tempeh sautee, laarb tofu and pad thai. We also enjoyed a fresh cocktail and beer. The service was very friendly and they spoke English and was able to answer any questions we had. Everything was amazing and I highly recommend it here.
After dinner, we walked over to the Chiang Mai Night Bazaar. This is where you can do some shopping for clothes, souvenirs and teas to bring back home to share with your family. There was also lots of food and you can really stretch your money by having dinner here. We spent about 2 hours walking up and down the night bazaar since there was so much to see and so much to do. I highly recommend visiting when in Chiang Mai.
One of the must do activities when visiting Chiang Mai is a cooking class! This was our last day in Chiang Mai and it was only a half day which was perfect for our half day cooking class at Thai Farm Cooking School. They do have an option for a full day, so if you do have a full-day available I highly recommend it. Our flight was leaving at 6PM and the cooking class ended at 2PM and was about a 20-minute walk from our hotel so it was perfect timing.
The day started early with a visit to the local market where our guide, Wass, explained to us the different types of rice, herbs and vegetables commonly found in Thai cooking. It was also great because she gave us time to roam around the market and purchase anything for personal consumption. Unfortunately, because this was our last day in Chiang Mai, we didn’t get a chance to purchase anything but all of the fresh fruit and Thai desserts were so tempting.
After our tour in the market was over, we went over to the farm where we would spend the morning exploring their organic farm and cooking methods. The farm itself is large and has so many fruits and veggies, ranging from pandan leaves to start fruit. There were multiple large outdoor cooking stations for the various classes. The way that it was set up was very nice with a community feel even though you had your own cooking station. We also got to choose what type of soup and curry we wanted to learn to make as part of our cooking class.
Wass took us on a tour of the organic farm where we got to pick fresh ingredients for our dishes, such as bird eye chilis and edible flowers for our dessert. She also showed us all of the veggies that the garden grows and is used in the cooking school for all of the dishes. After the tour, we learned how to make steamed jasmine rice.
For the actual cooking class, we learned how to make soup (choice between Tom Yum or Coconut soup), curry (green, red or yellow), veggie spring rolls and of course mango stick rice. I am so happy to have experienced how to authentically make Thai curry paste and sticky
rpt
jasmine rice. These are skills and techniques that I have used back home when re-creating these recipes. The cooking class showed us that it isn’t so intimidating making these Thai dishes and that it can easily be conquered at home. We were also given a cook book at the end of the day full of all of the Thai recipes that they teach at their cooking school. Many of the recipes have become household favourites since returning from Thailand. The cookbook serves as a great souvenir and reminder of the flavours of Thailand.
If you read my previous post where I shared my 5-day walking tour itinerary in Singapore, then you already know that this past September, we went on a 16-day Asia trip that spanned 4 countries and 6 cities! As mentioned, we had started and ended our trip in Singapore because it was the cheapest way to travel to Asia from Canada (Toronto specifically). We had decided to spend 7 days in Thailand in 3 cities, and since it was so jammed packed with activities, I decided to create a post for each city we visited to really highlight everything we did and loved. We flew to Phuket, Thailand from Singapore via Scoot airlines. There are lots of cheap options to fly within Asia but I specifically liked how Scoot showed the CO2 savings when taking a flight with them.
Here is some general information of our time in Phuket, Thailand:
Transportation from the Airport to our Hotel: We had arrived to Phuket Airport (HKT) at around 8PM. There is a bus that you can take, however we ended up just taking a shuttle to our hotel which cost about 700 THB (about $30 CAD) for the both of us. We had to wait for about an hour for the shuttle as they were trying to fill it with other passengers before taking off. On our way to our hotel, we did stop halfway at a tour company (we were not forced to book any tours but were welcomed to look around) before making our way to our hotel. On our way from the hotel to the airport however, we did use a Grab which cost about $26 CAD. I do recommend Grab as an alternative to the shuttle bus and city bus, especially if you are multiple people, since this is the cheapest and fastest option.
Transportation in and around Phuket: We stayed in Karon and tried to walk as much as we could, however to visit the tourist attractions you will need to either hire a private driver or book a grab to take you from place to place. I recommend grab since it tends to be cheaper than the private drivers.
WIFI Access: I will leave the same comments as my Singapore post as it is still relevant here. Connection was only available in our hotel room and some public establishments. To get around this, what I have done in the past, and also implemented on this trip, was to load our itinerary on Google maps and download the map for offline navigation. This method works most of the time, however sometimes the GPS gets confused and doesn’t know where you and ends up restarting. You end up having to use the map the old way (aka without a GPS and finding your own directions like a traditional map). However, I do recommend just purchasing an international SIM card that you can use and be connected to at all times (if you need to). Personally, for me, I preferred to be connected the entire time since the offline google maps kept restarting and was unable to locate us. It is also useful if you plan on using Grab while in the city. This was the first time travelling internationally where we had purchased an international SIM to be able to be connect to internet and I must say that now I am a converted. The international SIMs are very affordable and offer a lot of data (we would also turn it off if we were going to be in a given location for an extended amount of time to preserve data and batter power) and we were able to use the same SIM for the remainder of our entire trip in all of the other countries. We did end up using 3 different types of connection, but I recommend the last option so that you can be connected the entire time:
International SIM(purchased at the airport) – Once we left Singapore and arrived to Phuket Airport, there were lots of boots that were selling international SIMs. We ended up purchasing one of these at a booth called Smile and they connected it for me – it was super easy to use however kind of confusing because I couldn’t understand how much data I had left so we used it sparingly during our visit in Phuket and Chiang Mai. Because we paid in cash, I unfortunately do not recall how much we spent, but it was definitely less than $10 CAD.
Rented WIFI Device – I had actually rented a device when we were in Singapore for our visit in Bangkok since we were going to be here for 3 days without any excursions. We rented a pocket WIFI which we picked up at the BBK airport via Klook. In total it cost $26 for the 3 days (which at the time we thought was a bargain) – they do have to hold a deposit which is refundable once you return the device, so make sure you have enough cash to avoid the change in exchange rates on your credit card. It was also not clear how much data we had but I think it was unlimited. I didn’t mind the hand held device since we had used one when we visited Tokyo, however I definitely would recommend an international SIM when possible.
International SIM (purchased online and picked up at airport) – After doing more research while in Bangkok and realizing that the convenience of being connected to data became a growing need, which was already 6 days into our trip, I did more research on Klook. I found SIMs available for 15 countries in South East Asia, which meant that for the remainder of our trip (still 7 days), we could be connected in all of the countries (Malaysia, Indonesia and Singapore) and not have to worry about finding WIFI. We found a great deal with the SIM only costing $8.90 for 4GB of data from Klook. This option ended up being the best because not only is it a one-time purchase (no need to return anything like we had for the rented WIFI device), but you can actually download an app that came in English that tracked how much data you had. If you did go over the allotted data, you had to option of adding more data if necessary. I really liked the convenience and visibility of this option the best and felt in full control.
Hotel in Phuket:
We stayed at the Sugar Marina Resort – ART hotel in Karon Beach. We initially chose to stay in Karon because of the beach, but we didn’t actually get a chance to check it out since our 2 days was actually 1 and a half and didn’t get a chance. I am happy though that we chose this hotel in Karon beach. If you like art, like my husband does, then you will love this hotel. All of the hallways are filled with art exhibits. Our room was also filled with art pieces which really added to the ambiance of the room. The room itself was very large and spacious and had lots of storage, so it’s great for long term visits. They also have a lovely breakfast buffet included, and I looked forward to it both mornings. You can find traditional Thai dishes like noodle soups and desserts wrapped in banana leaves as well as western items.
Budget: We had budgeted $70 CAD cash per day, which was meant to be used for food, transportation and shopping. We knew credit card wouldn’t be readily available in most establishments so we carried more cash than Singapore, but less than the other countries we visited. Again, I also used Budget your Trip to gauge how much expenses to expect per day. See below for the breakdown of our actual expenses (keep in mind this is for 2 people):
Airfare from Singapore to Phuket for 2 people: $347 (the flight itself was only $190, but because our carry ons were on the heavy side, we had to get them checked in which cost $155, so make sure to keep the weight low to avoid the extra charge)
Hotel: $118 (for 2 nights)
Cash (mostly for meals): $160 CAD
Meals (on credit card and not in cash): $52
Shopping and other expenses (on credit card, which includes our excursion): $308
Transportation (credit card): $71 (Grab)
Total cost of trip for 2 days: $1056
Excluding airfare, we actually spent $354 per day, or $177 a person. If we exclude the cost of the excursion, we actually only spent $100 per day per person, which is much lower than the $133 per day approximation found on Budget your Trip, so I highly recommend this website as a great resource in budget planning.
See below for the full details. Don’t forget to also check out some highlights from our trip (video above).
Now set forth and be savvy!
This was the first (and only) full day of our visit to Phuket. We knew that when visiting Phuket, we definitely wanted to take a trip to Phi Phi Islands. You can always find other ways to get to Phi Phi Islands, however I found it easiest and most convenient to book a pre-planned excursion while having it fit within our budget. Our tour was with V. Marine Tour and we booked it through viator tours. The tour was called Phi Phi Islands Adventure Day Trip with Seaview Lunch and I highly recommend this if you are the type to enjoy pre-planned excursions. The shuttle bus picks you up from your hotel and drops you off after the excursion. It is considered a full day excursion, about 8 hours including transportation. You are taken to Royal Phuket Marina where you are given an orientation of the day ahead. They also provide you with snacks and drinks and also photo deals for the day, which I also recommend. For $60 CAD, you get over 200 photos which includes photos from snorkeling, photoshoot style photos at the various locations as well as more scenic photos that are sent to all the customers who purchase the packages. It’s a great way to not have to worry about missing photos, but if you are a skilled photographer with an underwater camera, you can probably just take your own photos.
fbt
After setting sail via speedboat, our first destination was Maya Beach. Known for the famous beach of “The Beach” with Leonardo DiCaprio, this visit was a quick visit. Unfortunately, due to the popularity of the beach (mainly made from the movie), the beach itself is closed to the public since it is still recovering from pollution and environmental damage, but it is open only for sight seeing.
The next stop was Pileh Bay, where we were given about 30 minutest to walk around the beach and to swim. This was also a great opportunity for photo ops with your photographer if you opted for the photography package. There were lots of other tourists here and you can see lots of the other tour speedboats, but the beach is vast and you can easily walk around and find seclusion.
DCIM100GOPROGOPR7790.
After swimming, we headed back to the boat where we hit up the next sight seeing location, which was Viking cave, where you get to learn about the various species of birds that habitat this island.
The next stop was Ko Phi Phi Le, where we had lunch at Phi Phi Natural Resort. The lunch buffet featured something for everyone – we were able to eat primarily plant based here since there were lots of options. I do recommend eating light since right after lunch we went snorkeling. I enjoyed how you can eat by the ocean and take in the views and the breeze. We only had about an hour to spend here, so right after lunch we walked around and had a chance for another photo op.
rpt
After lunch, we headed over to Bamboo Island where we had an hour to snorkel, swim and relax on the boat. Even though there were lots of tourists, the water was still surprisingly very clear and it was amazing to see all of the fish in the sea. It was a great way to end the day since all of our reserved energy we had was used up for the last part of this trip. This was also a great place to get lots of underwater photos, so make sure your camera is ready.
DCIM112GOPRO
DCIM112GOPRO
DCIM112GOPRO
DCIM112GOPRO
DCIM112GOPRO
The final stop on this excursion was Monkey Beach. The beach was more of a cove and very small. There were lots of other tourists boats there and it did get quite crowded but the monkeys didn’t seem to mind. We only spent about 10 minutes here but it was enough to take some videos and photos before ending the trip.
DCIM100GOPROGOPR9008.
After getting dropped off at our hotel, we had every intention of checking out the Karon Temple Night Market and even walked by it but we were so exhausted from the day that we didn’t actually go in. We did however have a lovely dinner at Mama Jin where we enjoyed a tom yum soup, pad Thai and green curry.
This was our last day in Phuket and it was only a half day, however I did pack it full of sight seeing activities since our flight was only at 8PM. We had booked our entire drive through Grab, where the driver ended up taking us to all of the destinations that we wanted to go to which was great. This is also a great option if you are traveling with a larger group since vans are readily available. Our trip from our hotel to Old Phuket Town cost about $30 CAD which was cheaper than the options that the hotel was offering.
After breakfast at our hotel, we headed out at 10AM to the Big Buddha View Point. The drive from Karon up to the view point in itself was very pleasant. There are lots of Elephant tourist attractions, and I’m glad our driver actually discouraged us from visiting since they weren’t the most humane. We unfortunately saw lots of baby elephants fenced in small areas. Once we arrived to the Big Buddha View Point, our driver let us walk around as he waited to take us to our next destination. As mentioned in my Singapore post, I recommend packing your own kimono with you so that you can put it on when visiting the temples. The Big Buddha itself is very large and you can enter and see all of the architecture inside. On the outside, there is also lots of areas where you can just take a view of the city, which is great of taking photos as well.
Our next stop was Wat Chalong, which is very grand and has lots of temples to see. Again, you will need to wear a kimono here if you are wearing a tank top or shorts. The temples all have lots of stairs so I recommend wearing running shoes for optimal comfort. There are lots of areas for great photos as well so make sure to give yourself at least an hour to walk the sights and take photos at your own leisurely pace.
Our final stop was Old Phuket town, which was perfect because it was just about lunch time. For lunch, our driver recommended Michelin star awarded Tu Kab Khao. The décor in this place is very elegant and has European influences. I was surprised to see that it was actually quite large, with lots of different rooms for seating. We ordered pad Thai, sautéed greens and a chicken curry dish. I also ordered a Thai milk tea, which was the first of many. Everything was delicious and cost about $50 CAD. I highly recommend a visit here.
rpt
dav
Afterwards, we walked over to Chim Jae Walking Street, which is a great place to buy souvenirs. They also had a section with cafes which is great to take a break and get away from the heat. There are 2 entrances, and luckily one of the exits lead us straight to Soi RomaneeStreet, where you can see some beautiful architecture (again with influence from Europe) and take a break at the various coffee or ice cream shops. We ended up taking a break at Dou Brew Coffee and Craft where we ordered a matcha tea as well as Thai ice tea. It was a great way to end our visit to Phuket, but in the future, I do recommend at least 3 days here to fully take advantage of all this great city has to offer.
This past September, we went on a 16-day Asia trip that spanned 4 countries and 6 cities! We started and ended our trip in Singapore because it was the cheapest way to travel to Asia from Canada (Toronto specifically). This trip hit a lot of countries on our bucket list and was jammed packed with lots activities and itineraries, so I figured it would be easiest to make separate posts about this. The first installment of this series is our 5-day itinerary in Singapore, which is consolidated with the first 3 days and last 2 days of our trip.
Here is some general information of our time in Singapore:
Transportation from the Airport to our Hotels: For the first leg of our trip, we took the subway and got off at Tanah Merah station, which was about a 45-minute ride with 1 transfer. This was the cheapest and fastest option (given the amount of traffic) costing only $4 per person, one way. For the 2nd leg of our trip however, because we were arriving and leaving Singapore during hours where the subway was not operating, we actually purchased a shuttle service which was cheaper than Grab. For traveling both ways, it was about $36 CAD through WTS Tours for the both of us.
Transportation in and around Singapore: We tried to walk as much as we could, even if it was 45 minutes one way. During our first 3 days in Singapore, walking was our only mode of transportation (except for the subway ride from the airport). After connecting with some people in Singapore and seeing how easy it was to use Grab (their ride sharing service, the equivalent of Uber in Canada), I do recommend downloading it and using this as another means of transportation. It is very affordable and it’s the first time I actually used ridesharing before and really enjoyed it. However, to be able to access this service, you do need to have some sort of data, which brings me to the next point.
WIFI Access: Connection was only available in our hotel room and some public establishments. To get around this, what I have done in the past, and also implemented on this trip, was to load our itinerary on Google maps and download the map for offline navigation. This method works most of the time, however sometimes the GPS gets confused and doesn’t know where you and ends up restarting. You end up having to use the map the old way (aka without a GPS and finding your own directions like a traditional map). However, I do recommend just purchasing an international SIM card that you can use and be connected to at all times (if you need to). Personally, for me, I preferred to be connected the entire time since the offline google maps kept restarting and was unable to locate us. This was the first time travelling internationally where we had purchased an international SIM to be able to be connect to internet and I must say that now I am a converted. The international SIMs are very affordable and offer a lot of data (we would also turn it off if we were going to be in a given location for an extended amount of time to preserve data and batter power) and we were able to use the same SIM for the remainder of our entire trip in all of the other countries. We did end up using 3 different types of connection, but I recommend the last option so that you can be connected the entire time:
International SIM(purchased at the airport) – Once we left Singapore and arrived to Phuket Airport, there were lots of boots that were selling international SIMs. We ended up purchasing one of these at a booth and they connected it for me – it was super easy to use however kind of confusing because I couldn’t understand how much data I had left so we used it sparingly during our visit in Phuket and Chiang Mai. Because we paid in cash, I unfortunately do not recall how much we spent, but it was definitely less than $10 CAD.
Rented WIFI Device – I had actually rented a device when we were in Singapore for our visit in Bangkok since we were going to be here for 3 days without any excursions. We rented a pocket WIFI which we picked up at the airport via Klook. In total it cost $26 for the 3 days (which at the time we thought was a bargain) – they do have to hold a deposit which is refundable once you return the device, so make sure you have enough cash to avoid the change in exchange rates on your credit card. It was also not clear how much data we had but I think it was unlimited. I didn’t mind the hand held device since we had used one when we visited Tokyo, however I definitely would recommend an international SIM when possible.
International SIM (purchased online and picked up at airport) – After doing more research while in Bangkok and realizing that the convenience of being connected to data became a growing need, which was already 6 days into our trip, I did more research on Klook. I found SIMs available for 15 countries in South East Asia, which meant that for the remainder of our trip (still 7 days), we could be connected in all of the countries (Malaysia, Indonesia and Singapore) and not have to worry about finding WIFI. We found a great deal with the SIM only costing $8.90 for 4GB of data from Klook. This optioned ended up being the best because not only is it a one-time purchase (no need to return anything like we had for the rented WIFI device), but you can actually download an ap that came in English that tracked how much data you had. If you did go over the allotted data, you had to option of adding more data if necessary. I really liked the convenience and visibility of this option the best and felt in full control.
Hotels in Singapore:
For the first 2 nights of our stay in Singapore (Sept 27-29), we stayed at the Fragrance Hotel – Riverside (now known as Ibis Budget Singapore Clarke Quay). The hotel is considered a budget hotel and is essentially just a room with a bed and little area for coffee/hot water. If you’ve never been to this part of Asia, do not be alarmed if you notice that the bathroom itself is both a bathroom as well as a shower, meaning the shower is not separated out from the toilet – it is essentially a room with a toilet, shower head and sink. This was not our favourite part of the room; however, we are pretty low maintenance and since we don’t have children it was fine for the time being. The room itself was quite comfortable and more than enough room for us since we we’re only using this space to sleep and store our belongings. We decided to stay here because we were going to be attending a friend’s wedding at the Fullerton Hotel and liked that it was only a 10-minute walk from the hotel. It was also a great location because it was less than a 20-minute walk to Marina bay and all of the attractions.
For the last 3 nights of our stay in Singapore (October 10-13), we stay at the Amara Singapore. This hotel felt like a 5 star hotel compared to our first hotel – it has a grand lobby, is attached to a mall with great restaurants and is also only about a 20 minute walk back to Marina bay (which is where we spent the majority of our time, but you can read below for more info!)
Budget: We had budgeted $40 CAD cash per day, which was only meant to be used for food and transportation (like the subway). We assumed that for all other expenses we could just use our credit cards. I also used Budget your Trip to gauge how much expenses to expect per day. See below for the breakdown of our actual expenses (keep in mind this is for 2 people):
Airfare to and from Singapore for 2 people: $1688
Hotel: $838 ($263 for the Fragrance hotel and $579 for the Amara hotel)
Cash: $200 cash + exchanging another $50 = $250 CAD
Meals (on credit card and not in cash): $117
Shopping and other expenses (on credit card): $301
Transportation (credit card): $94 ($36 for the 2-way travel from Amara to the airport and $57 using Grab)
Total cost of trip for 5 days: $3260
Excluding airfare, we actually spent $314 per day, or $157 a person, which is pretty close to the $160 per day approximation found on Budget your Trip, so I highly recommend this website as a great resource in budget planning.
See below for the full details. Don’t forget to also check out some highlights from our trip (video above).
Now set forth and be savvy!
This was the first official day of our trip. We left Toronto on September 26th, spent the night in San Francisco due to construction at the airport (and we didn’t want to miss our connecting flight), and flew out the next morning to Singapore. We arrived in Singapore at 6PM and took the metro to our hotel.
After checking into our hotel, we decided to take a stroll over to Marina Bay. It was about a 25-minute walk from our hotel to Marina Bay, which was a nice break from being on the plane for about 16 hours. At this point it was already past 8PM and we were exhausted but excited to finally arrive in Singapore.
Our first visit was to check out Merlion Park. There were lots of other tourists here so it was hard to get a good photo. The sky was pitch black, which was perfect to see all of the lights and sights of Singapore.
After a stroll through Merlion Park, we decided to go over to Makansutra Gluttons Bay Hawker Center. This was the first time we had every seen a hawker station, and in hindsight we do realize it was quite small, however the food selection was amazing. Because it’s so close to Marina Bay, I highly recommend coming here for cheap eats, especially if you are trying to maintain a budget while visiting Singapore. There was a huge selection of Singaporean food and we honestly didn’t know where to start – so we opted for some curry, laksa and noodles. Of course, you need to also try out some of the fresh juices which are sold for about $1 at the stalls as well. Makansutra Gluttons Bay wasn’t quite busy yet (I guess it was still considered early), however once we ordered and sat down, this is when the tables started getting full.
The food: We had visited a stall called Kebabchi and ordered paneer Karahi ($12 SGD) and garlic naan ($3 SGD), which cost a total of $15 SGD. We also visited another stall called Old Satay Club and ordered a Spicy Noodles dish ($7 SGD) as well as a vegetable Murtabak ($6 SGD), which is a Singaporean stuffed pancaked, which cost only $13 SGD total. We also ordered a sour plum juice and cane sugar juice, which cost $1 SGD each, for a total of $2 SGD. This is when we realized that we can really stretch our money while eating at Hawker centers and completely fell in love with this concept.
After dinner, it was about 9PM and we were ambitious and wanted to check out Raffles Place, however we didn’t get the chance to on this trip, but hopefully will in the future.
fbt
Since I had made some breakfast cookies to have on the plane, we had leftovers so we had these and some tea in our hotel room before leaving for the day of sightseeing.
Our first stop was the Sri Layan Sithi Vinayagar Temple. When we arrived, it was actually closed for renovations so I was only able to get a few photos of the outside. It is beautiful temple, and to get a good photo of the outside, you actually have to take it from across the street. This is a temple you should add to your itinerary.
The next stop was to visit Chinatown, specifically the Buddha Tooth Relic temple. This template is quite large and there are lots of things to look at inside. If you’re luck you can also get a glimpse of the monks in prayer. At the front, they do offer wraps to cover yourself if you are wearing shorts and a tank top, but I knew we were going to visit lots of temples on this trip so I packed myself a kimono to wear.
Since this temple is right in Chinatown, we walked around a little bit to check out the souvenir shops and to grab a cold drink at one of the local stands. Since it was still quite early in the morning (around 10AM), a lot of the stalls were still closed so be sure to come back later once everything has opened up.
The next stop was Tanjong Pagor, which is filled with lots of little coffee shops and pretty buildings. There are also park benches where you can sit and relax and enjoy the views. We had stopped by a local coffee shop and sat in the shade in the park to relax and enjoy the scenery.
Luckily for us, Maxwell Hawker Center was close by, and since it was only 11am we decided to have an early lunch. I am glad that we came early because there wasn’t too many people and it was easy to grab a seat. This place is huge with lots of stalls to satisfy any craving. We had ordered laksa as well a “carrot cake” dish which is really just fried daikon, which is my favourite. If you want to try some Hainanese chicken rice, you’d want to check out Tian Tian, which was made famous by the late Anthony Bourdain. We didn’t get a chance to check it out since the line up was already very long and we had a full day of sight seeing ahead of us – however we look forward to our next trip to Singapore to try out a lot of the food we missed out on.
Our next stop was to visit the skylight views of the Pinnacle @ Duxton. There are lots of condo buildings that make up this complex, and since we were visiting during off peak season, it was hard to find the admissions office. You do have to buy a ticket, where they provide you with a fob to enter the elevators to visit the views. Once you arrive at the top level, it’s actually very quiet. All of the condo buildings are connected from the top floor so that you can easily walk around – however your fob only gives you entry and exit access from one of the buildings so you do have to make your way back. You get a view of the entire city, and it looks like there is even a tram available that drives around the entire building, providing you with views without having to walk all of the condos. There is also a garden in one of the sections and it was strange to see so many birds this high up. After descending back down to ground level, there are also free areas around the buildings where you can walk around and visit as well.
By the time our visit as over, it was around 2:30PM and the heat was excruciating. We decided to walk back to Chinatown to see if there was any place where we could cool down and luckily we found Mei Heong Yuen Dessert. Luckily for us, there was no line up and we were able to get a seat at the back of the restaurant where there was a nice breeze. We ordered a mango lychee shaved ice to share and it was just what we needed. I wish I could go back and order more desserts, but that will be for another trip!
After our little break, we headed back to our hotel to freshen up since we had our friend’s wedding to attend at The Fullerton Hotel.
Today was a half day in Singapore since we had an 8PM flight to Phuket, Thailand. Since our checkout was at 12PM, we were able to leave our luggage at the front desk until we had to leave for our flight. We started our morning off at around 10AM and we headed over to Marina Bay Sands. We decided to walk towards Elgin Bridge for the sights as well as stopping by a 7-Eleven to pick up some onigiri as a morning breakfast.
fbt
We spent the morning walking around Marina Bay sands where there were lots of people taking breaks and eating lunch. The heat was getting pretty unbearable so we decided to take a lunch break at the Shoppes at Marina Bay Sands. This mall is pure luxury and this is where I finally understood “Crazy Rich Asians” because all of the stores were high end. Luckily for us, however, the food court offered lots of variety at affordable prices. We ordered a Chicken Katsu ($7.80 SGD) and a Scallop and Chicken Katsu ($9 SGD) from Rasapura Master. In total, lunch was pretty affordable at $16.80 SGD.
After lunch, we walked around the mall for a bit before heading back to our hotel to grab our luggage. From our hotel, we took the subway to the airport, which was about an hour ride, and then waited for our international flight to Phuket.
This was our last leg of our Singapore trip since coming back from Indonesia. Since we had relaxed quite a bit in Bali, we were fully refreshed and I had a full day planned ahead of us.
Our first stop was walking over to Little India to check out Tekka Market. Since it was still quite early, we decided to head over to Ananda Bhavan, known for their vegetarian breakfasts/brunch. When we got to the restaurant, there was quite a few people already and no available seats, so we shared a table with a father and son duo, who were both very nice and made small conversation with us. There was also a lot of people who came in for take out or to check out the bakery at the front of the shop. We ordered a Mint Masala dosa ($4.50 SGD) as well as the Indian Thali with naan ($9.50 SGD) which cost a total of $14 SGD which was a great deal. The dosa was large and delicious. Thali’s are also my favourite because there is so much variety and you get to sample so many different curries.
After brunch, we walked back to Tekka market and roamed around, taking a look at all of the different shops that sold anything from clothing to snacks and even electronics. Luckily, it was the end of our trip and we were all shopped out otherwise I’m sure I would have wanted to bring back so many snacks and spices from Tekka market.
After exploring Tekka market, we walked over to Sri Veeramakaliamman Temple which was about a 5-minute walk. This temple is very majestic and you can stand there just staring for 30 minutes, looking at all of the details on the temple.
After taking a few photos, we decided to walk over to Sultan Mosque on Arab Street, which was only about a 15-minute walk. We spent the afternoon here since Arab street and Haji lane in itself were also tourist attractions. Since we had spent a lot of the time outdoors walking around, we made our way over to Fika Swedish Café where we went to cool down and rest. We ordered their Dirty Chai to share, which was topped with whipped cream and was a great little afternoon treat.
Haji Lane
Haji Lane
Haji Lane
Sultan Mosque
Fika Cafe
We made our way over to Bugis Junction, which was an 8-minute walk from Arab street. This mall was huge and we spent the remainder of our afternoon here walking around and exploring. I was looking for some Asian snacks to bring back for friends and family, and Sean was on the look out for video games so we had fun walking around and hunting for these goods. You can really spend all day here just walking around, having bubble tea and just enjoying the AC.
After this, we took a grab and visited Lau Pa Sat hawker center (featured in the Crazy Rich Asian book, not the movie) for dinner. This place is worth a visit when visiting Singapore. In general, visiting hawker centers are a very budget friendly way of enjoying your visit in Singapore where you really stretch your dollar and try out all of the cuisine the country has to offer. At Lau Pa Sat specifically, there were actually more people outside than inside, with lots of vendors grilling meats and seafood with patrons sitting on picnic benches. We opted to go inside since were trying to eat as plant based as possible on this trip, and ordered some laksa and noodles with a side of beer. The inside was quiet with half of the stalls closed, however there was still lots of selection to choose from.
After dinner, we decided to walk back to our hotel, and swung by Chinatown to see all of the night shops as well.
This was our last day in Singapore and it was a full day. Our flight was leaving the next morning at 8 AM, so we decided to make the most out of our last day. We had originally planned to visit Sentosa Island Beach and Tanjong Beach, but we were so tired from the day before that we took it easy today. We spent the majority of the afternoon walking around the free gardens of Gardens by the Bay. We originally were going to go into the paid section after visiting the free section, however there was so much to look at that we ended up just spending the entire time exploring the free section. There is also a little water park area, which is great for kids to cool down. Everything about this place is instagramable so be sure to take lots of photos. I regret not taking more, but the heat was getting quite unbearable that it was easier to just walk around and relax.
After vising the Gardens, we went back to our hotel to shower and freshen up since we were so sweaty from the day. We also decided to have an early dinner at 100 AM, which is the mall attached to our hotel. We had ramen at Bachmann, which was rated a 3 Michelin star, which is what caught our eye initially. We ordered an Oriental ramen ($16 SGD) and a Shoyu ramen ($16 SGD) for a total of about $38 SGD after tips and taxes. The ramen was pretty good but for the price we would have preferred to check out another hawker center.
After dinner, we walked over to the Shoppes at Marina Bay Sands to check out the light show. The light show is offered every night from 8PM – 9:30 PM with the best views from the Event Plaza in front of the Shoppe. Be sure to get there early so you can get a seat right up front. We got there around 7:30 and it was already packed full of people, but luckily, we found some seats by the steps. It was a great way to end our trip!
Since we came to visit Zurich as a tag-along to Sean’s conference (which was in February 2019 FYI!), this meant that I had 1 full day to roam around the city by myself while he was at his conference. This gave me a chance to check out all of the vegan restaurants I wanted to try in Zurich and re-visit some of the sights we had seen earlier in the week.
See below for all of the food that I ate in a day in Zurich! It wasn’t much, and to be honest I thought I would have eaten more food. But Zurich was really expensive so I am glad that the food was very filling.
The first restaurant that I tried was Roots and Friends. This restaurant was within a 5-minute walk from the train station which was perfect because I was pretty hungry when I arrived in the city. I arrived around 11 which was perfect because it was right before the lunch rush. Right after ordering and sitting down, there ended up being a huge line up of people picking up orders to go, so it was nice to get a seat and people watch while I ate my meal. Though February in Zurich is much milder than in Canada, it was still a bit chilly so I opted for a miso soup (which unfortunately is no longer on their menu according to their website) with a matcha latte on the side.
The soup was wonderfully flavoured with miso but also had a slight Thai curry flavour as well. It was filled with lots of raw veggies like cabbage and carrots and topped with fresh cilantro and mint. The matcha latte was the perfect dessert to go alongside my meal and was wonderfully creamy but not too sweet.
After lunch I walked around the city to visit some sights as I made my way over to the popular grocery/department store Co-op. I wanted to make a trip here because I heard that they had a huge selection of vegan foods (check out my vegan food haul found here) and wanted to bring some treats home. I probably spent an hour here because it was so nice to explore and discover all of the different foods that they.
On my way to my next destination, I wanted to visit a different Hiltl location (we had visited one on our first day for lunch) just to check out the selection. I really like this chain since both times I’ve been, they offered different selection of food which is great because it will keep you wanting to visit over and over again. However, the food is weighted so it does add up pretty quickly.
On my way back to the train station, I wanted to get some ice cream and bring back some dinner to the hotel. I was happy to have found The Sacred which had a nice vegan ice cream bar at the front as well as a weighted buffet with a great selection of food so that I can bring back to share with Sean. The front also had a little section where you could purchase soy and vegan products to cook at home. The owner was super nice and let me sample a few ice cream flavours before I chose the pistachio. I wish I had a chance to visit this restaurant again because there was so many things I wanted to try. For dinner, I took home a selection of veggie curries and some almond feta which was delicious.
Hope you guys enjoyed the list of restaurants that I checked out during our visit. There were so many more that I didn’t get to check out since I only had a few days to explore. But I will definitely keep a list handy for if we ever visit Zurich again.
This spring really started off to a sunny start, even though we’ve been experiencing wintery weather here in Canada. I had such a lovely experience traveling for the first time with all of my girls overseas! Growing up, we’ve always talked about vacationing and traveling the world together, but with our differing schedules (some of us working full time or still in school), it was always a challenge to find time together.
Earlier this month, we finally had the chance to travel together! We celebrated my sister’s bachelorette in style in Tulum, Mexico! We stayed at the gorgeous Grand Bahia Principe Tulum. I’ve stayed at this chain a few years ago in the Dominican Republic, so I already had an idea of what to expect in terms of the layout and resort amenities. But what I didn’t realize was how GRAND this resort in Tulum really was!
The resort: The actual Grand Bahia Principe Tulum resort is quite large in itself, but actually sits in a little community connected to 2 other resorts: the Grand Bahia Principe Coba resort as well as the Grand Bahia Principe Akumel resort and golf course. This resort is so large that there is even a disco and market on site! There is also a little train that picks you up from the front lobby of each hotel and can bring you to the different areas of the extended resort, as well as bring you to your Villa if you don’t feel like walking.
I also love that this resort seemed to be operating as sustainably as possible. There were no more uses of single-use plastic cups or straws on site. Everything was replaced with plastic reusable cups and compostable plates and cutlery outside of the restaurants. They also had an extensive explanation of their recycling and composting programs in the lobby, which I was very happy to see being executed when we were at the snack bar on the beach.
The Rooms: I’ve been to resorts before where we had to take an elevator to our room since the resort consisted of hotel buildings. I love that we got to stay in villa type rooms, as it really adds to the beach atmosphere, really maximizing the amount of fresh air we can get. We stayed on the second floor of unit 25 which looked out onto the garden.
Since we were a group of 8, the resort concierge was so accommodating and had our 3 rooms all next to each other.
Our room did have a few problems: the front lock had some technical where the key wouldn’t work. It took 3 times for a staff member to come fix it which was a bit annoying but luckily since all of our rooms were next to each other, we didn’t have any issues hanging out in each other’s rooms. Our shower also didn’t drain properly, but while we were out to dinner, someone came and fixed it. The shower also took a bit of time to warm up, which felt like we were wasting a lot of water having it run till it was warm enough (our unit was 2513).
We received a 2L water bottle each day of our stay, which was great because we always had water on hand when going to the beach and pool. We also had access to the mini fridge, but didn’t really take advantage because it contained colas and beer, which we could get in the restaurants. The toiletries were typical as well, with shampoo, conditioner, soap and a sewing kit readily available in the bathroom.
The beach: It should be noted that the beaches of Mexico tend to have a lot of seaweed washed ashore from the ocean. There were crew there every day shovelling as much of the sea weed they could. Other than that, the beaches were not rocky at all and the waters of course were gorgeous.
The food: I was a bit disappointed by the food based on my expectations from previously vising Mexico as well as Bahia Principe. There was definitely a lot of food to eat, but since I was trying to eat as plant based as possible, I was disappointed to not be able to find beans more readily available. The snack bar had lots of selections to make your own tacos and always had guac and salsa readily available, but I would have liked to have seen more bean selections for non-meat eaters. There was always lots of fresh fruit like papaya, pineapple and mango which we indulged in with every meal.
We only visited Tulum for 3 full days and we never left the resort, but it was a great way for us to recharge after the long winter we had. I would recommend visiting another resort if you are looking for more of a typical bachelorette style energy, but we were pretty laid back and just enjoyed relaxing in the sun and each other’s company.


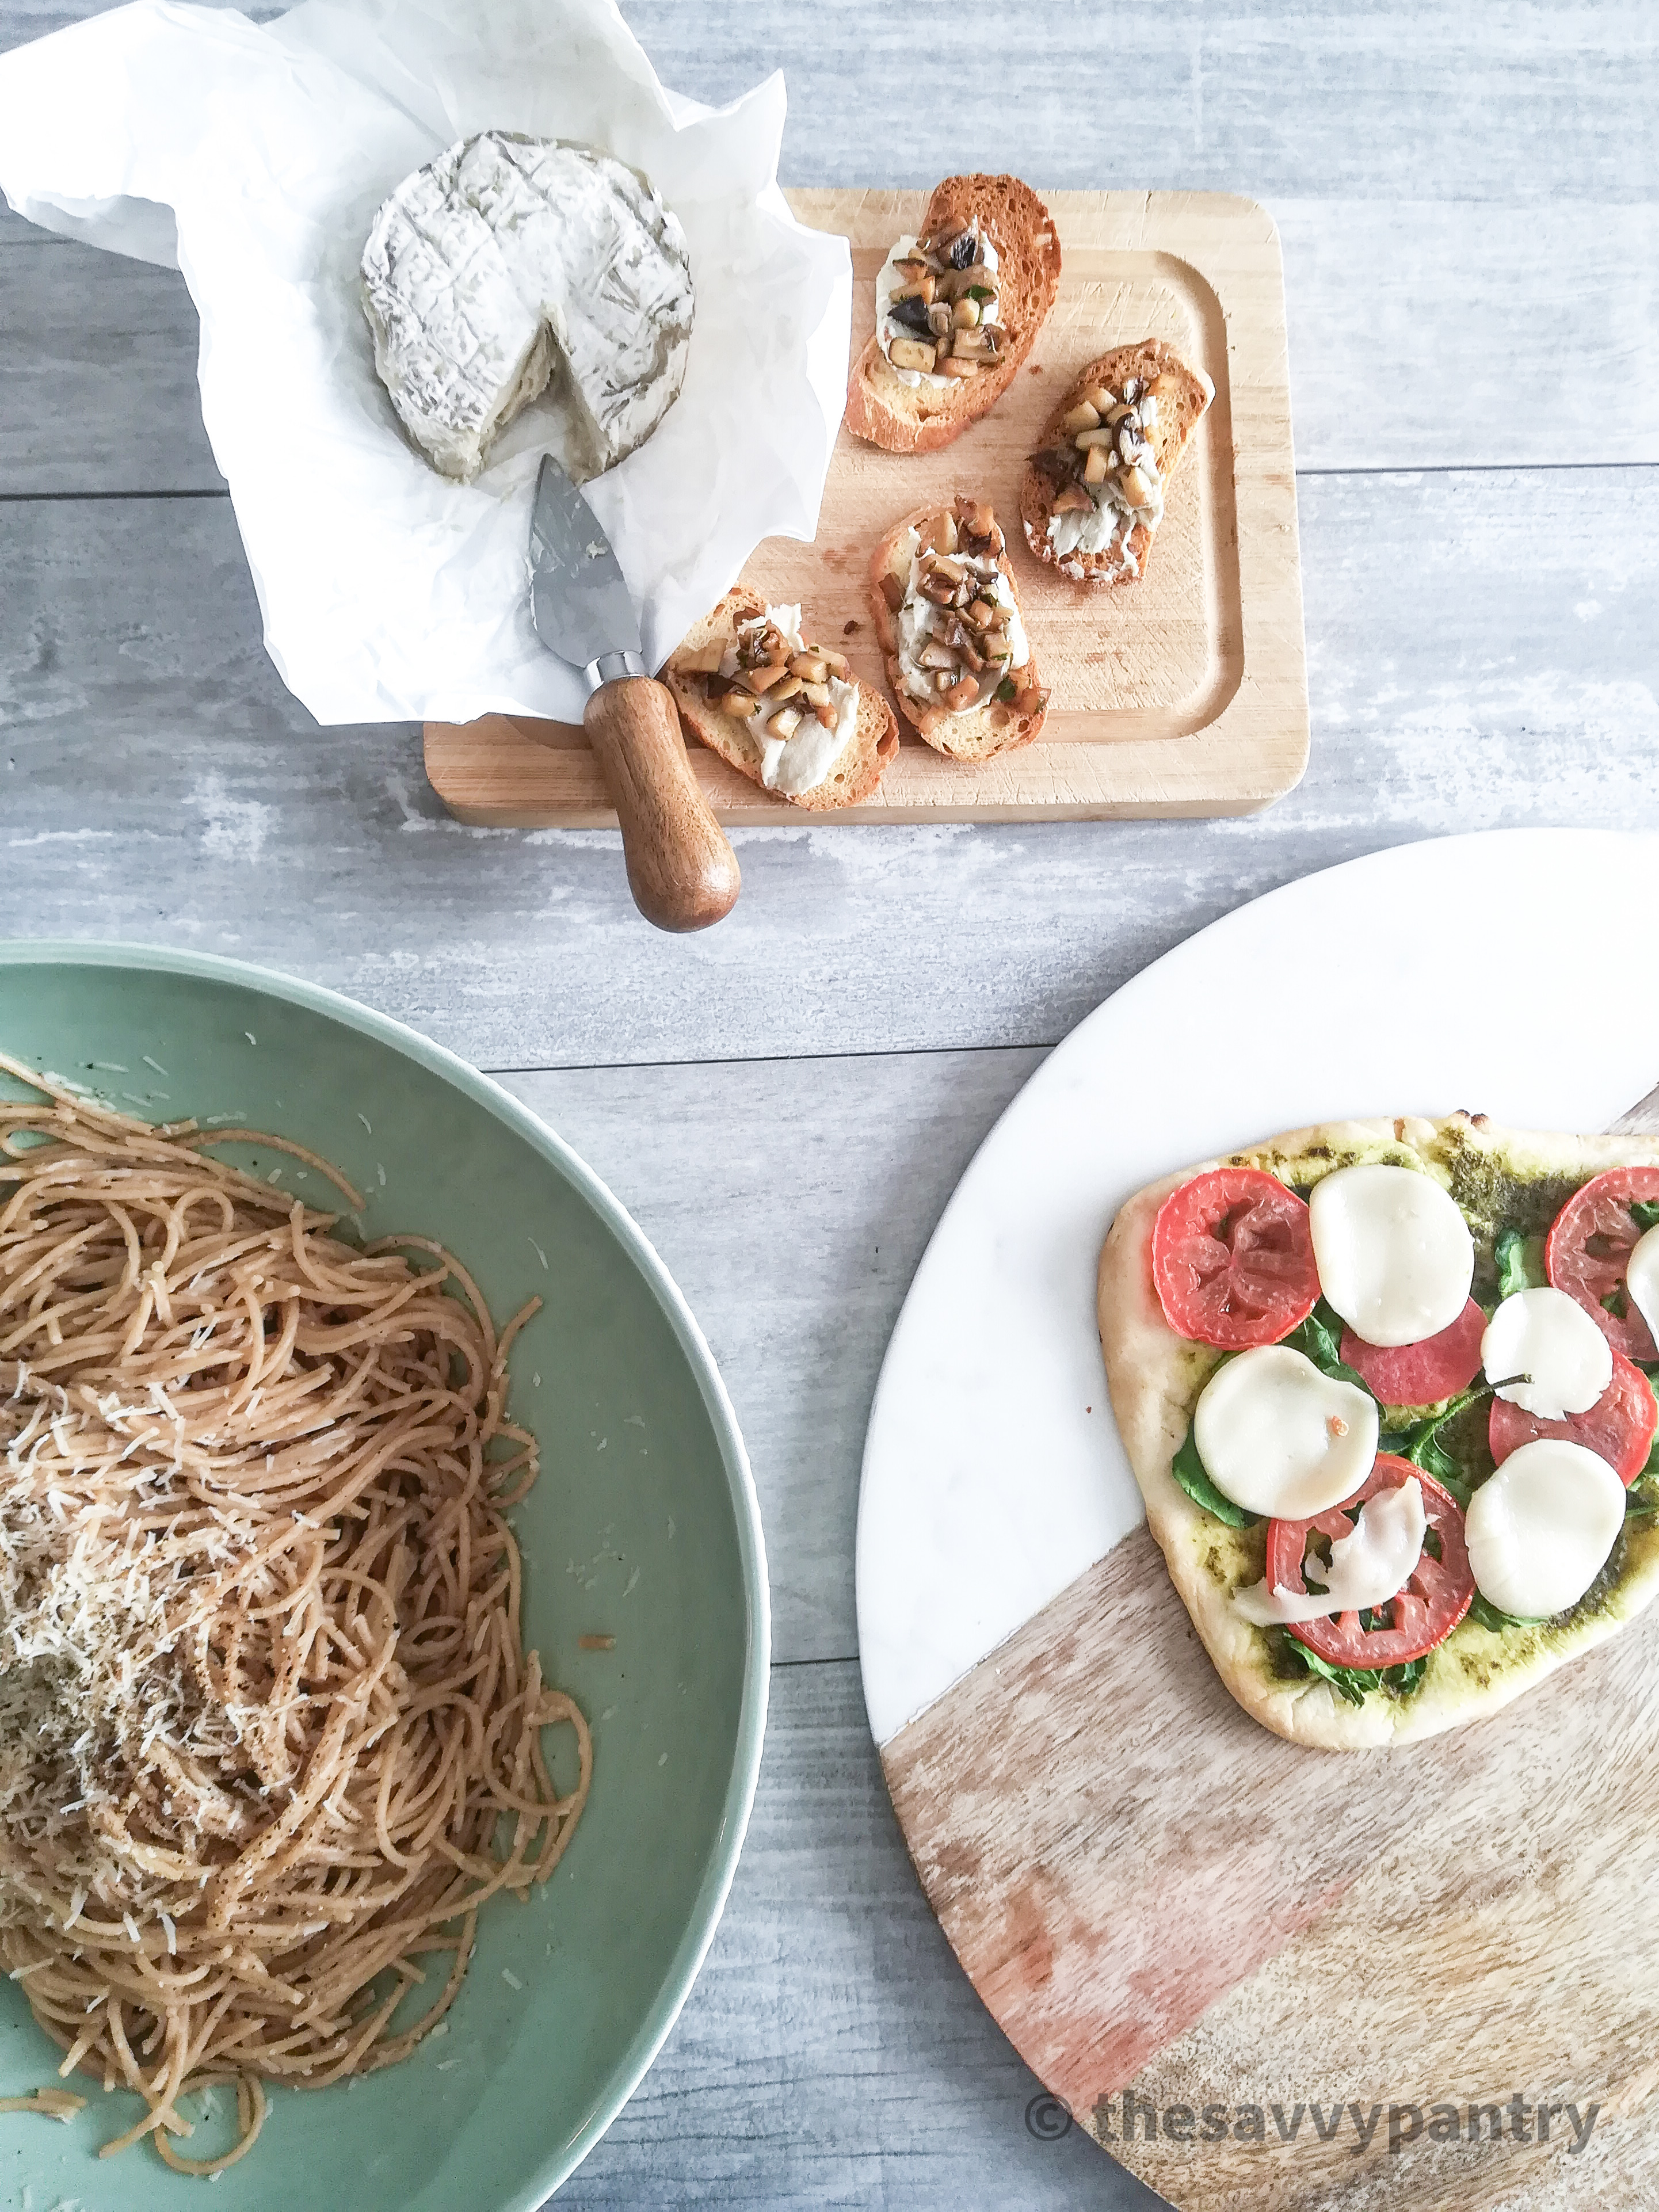
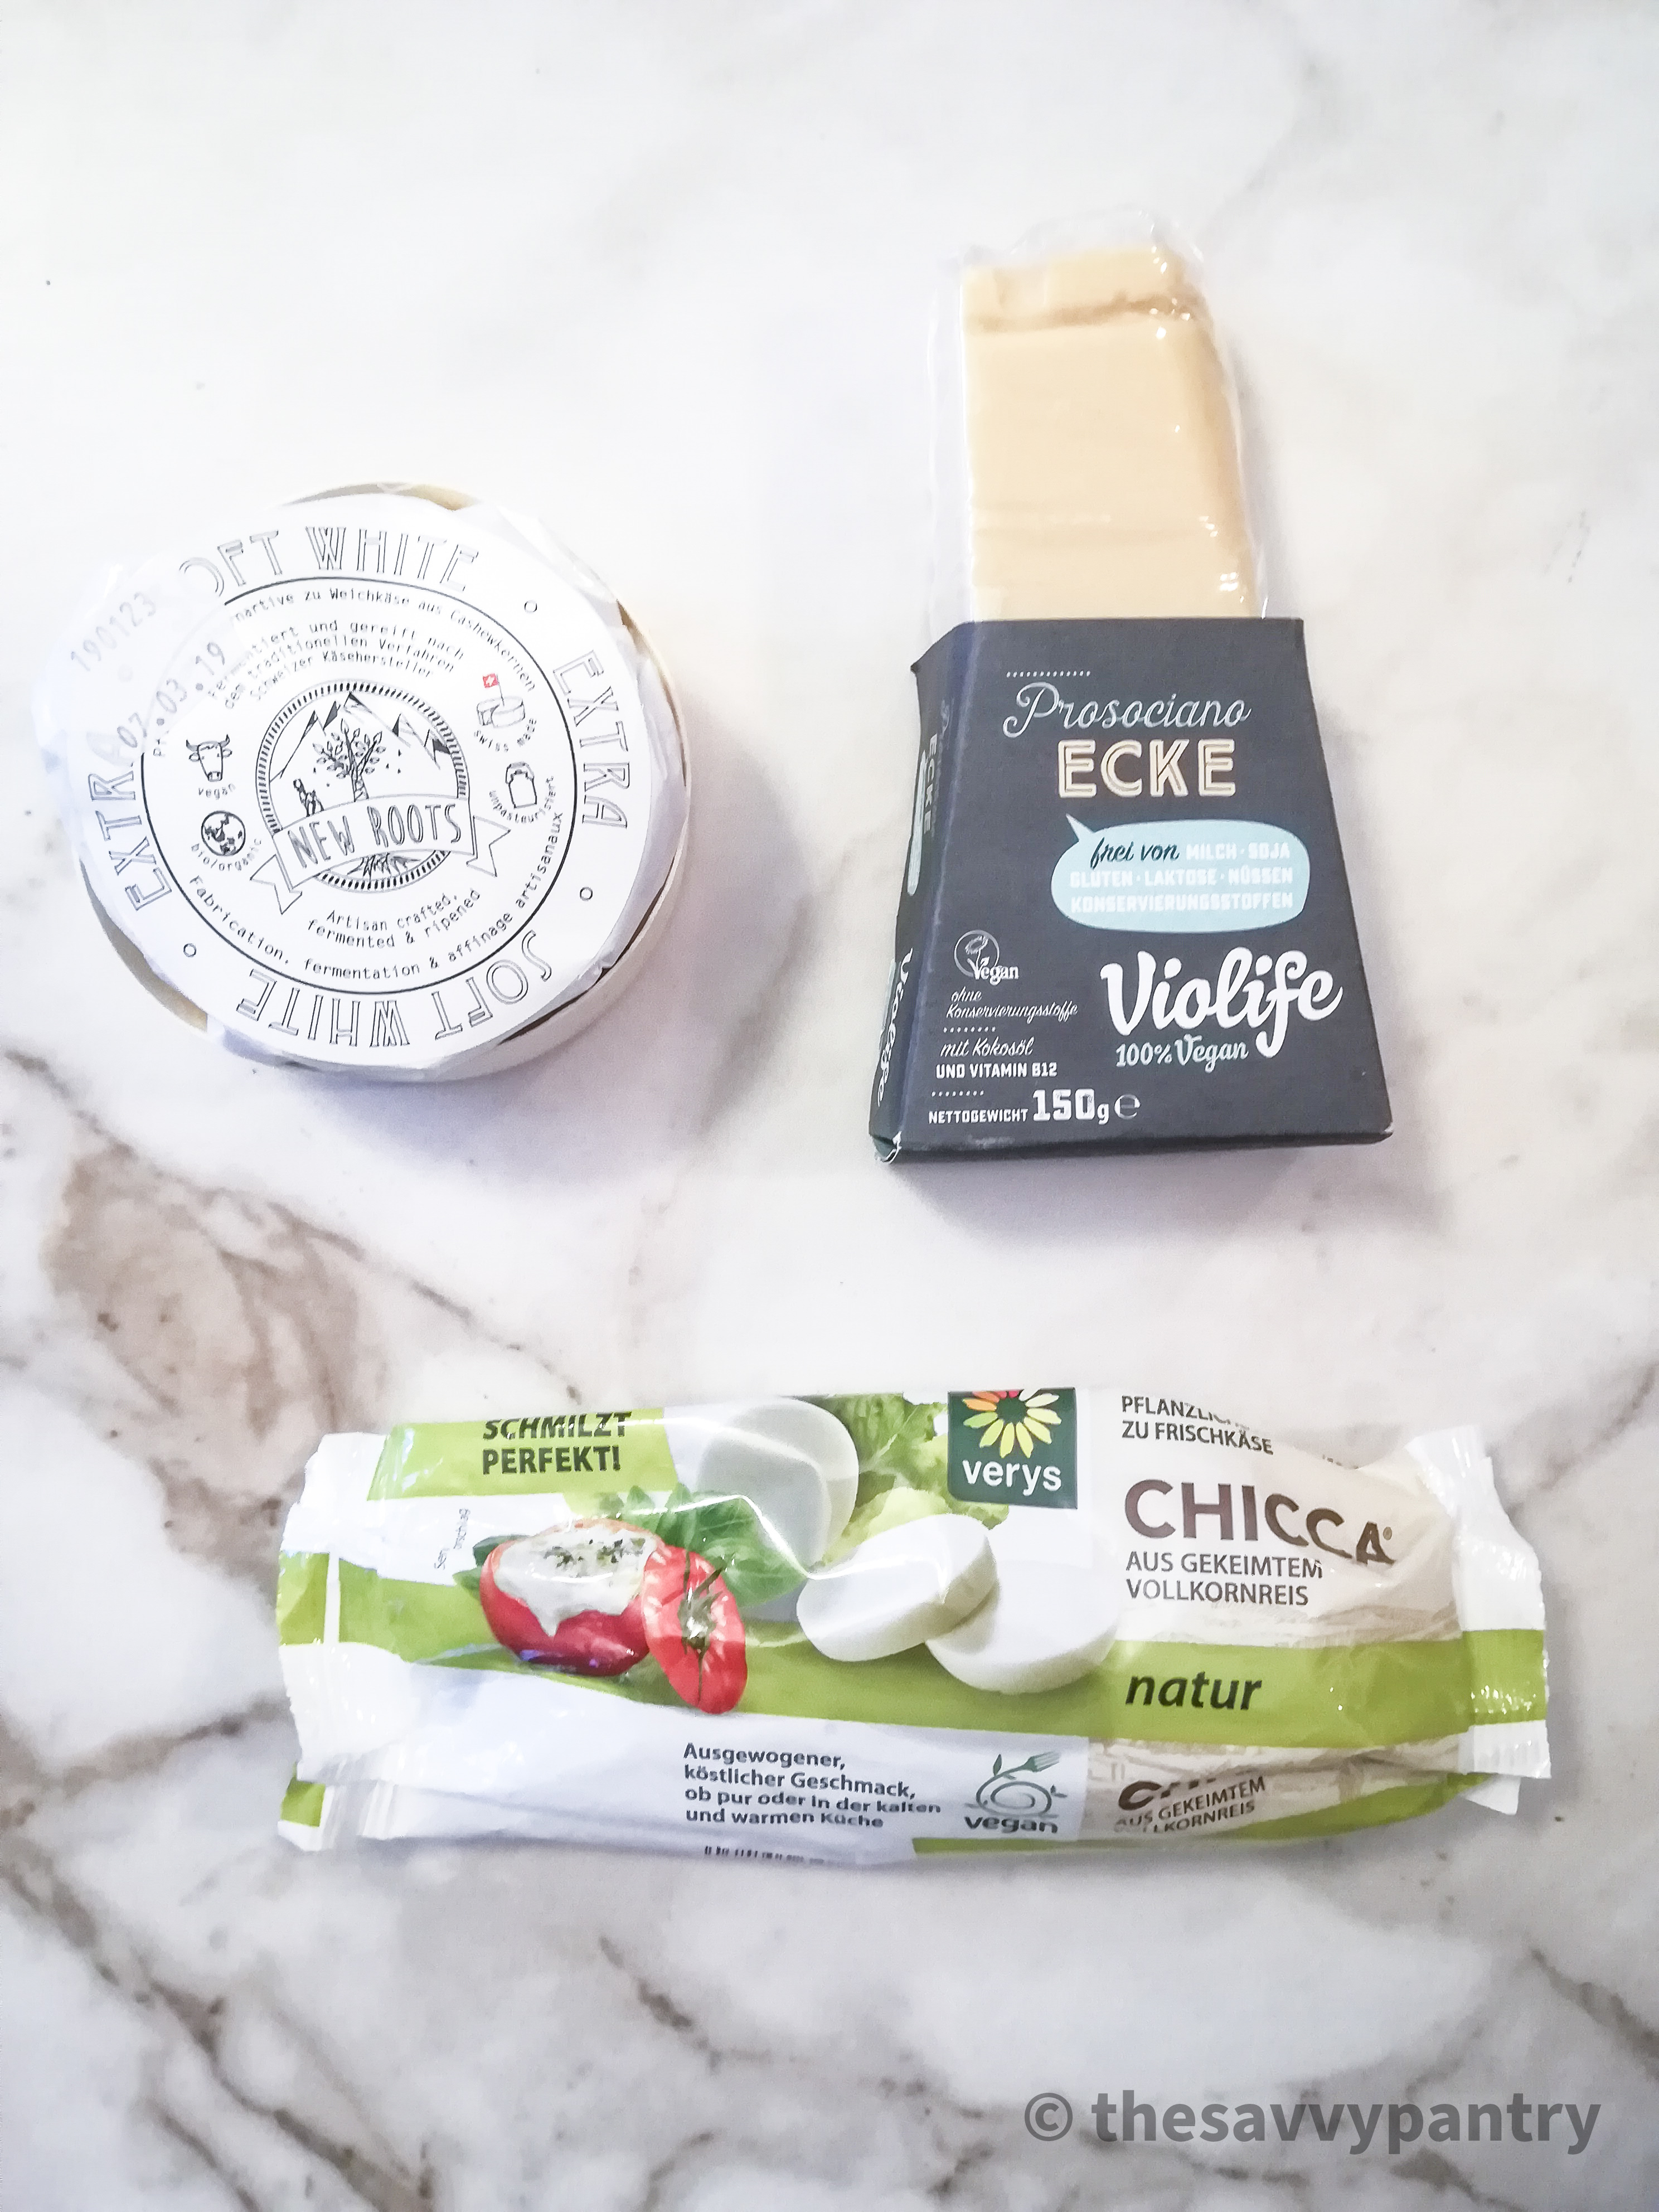
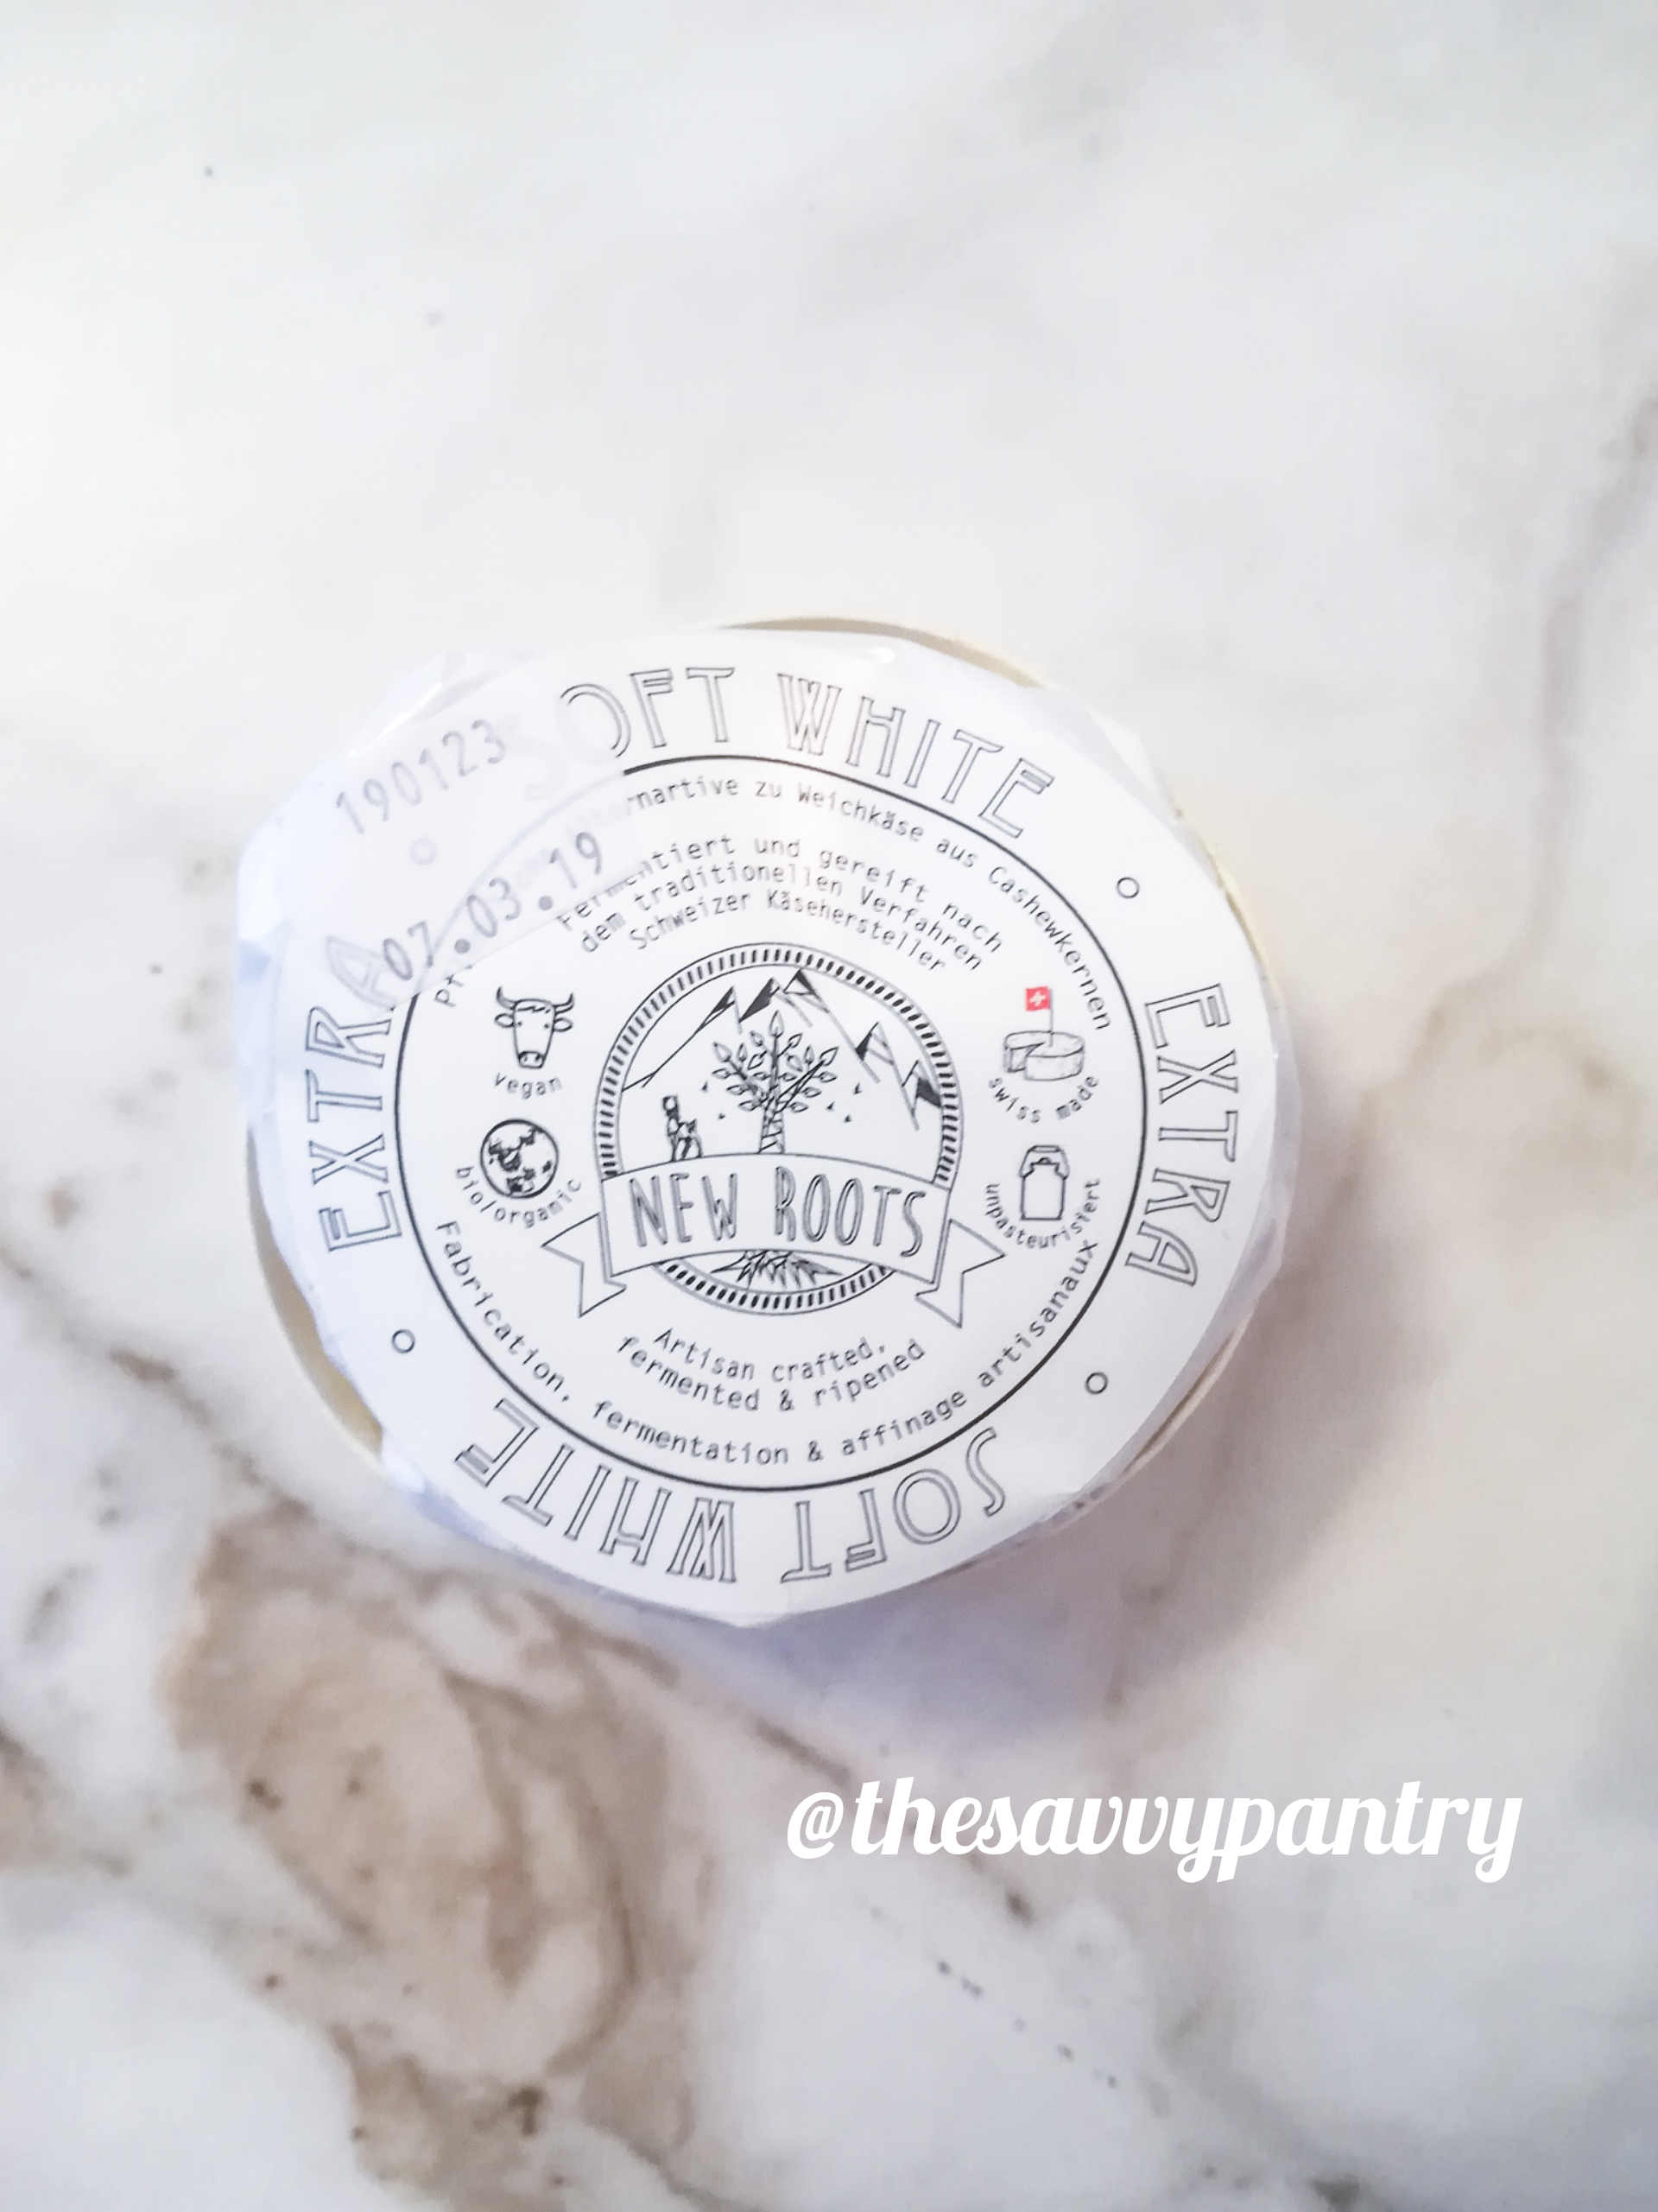
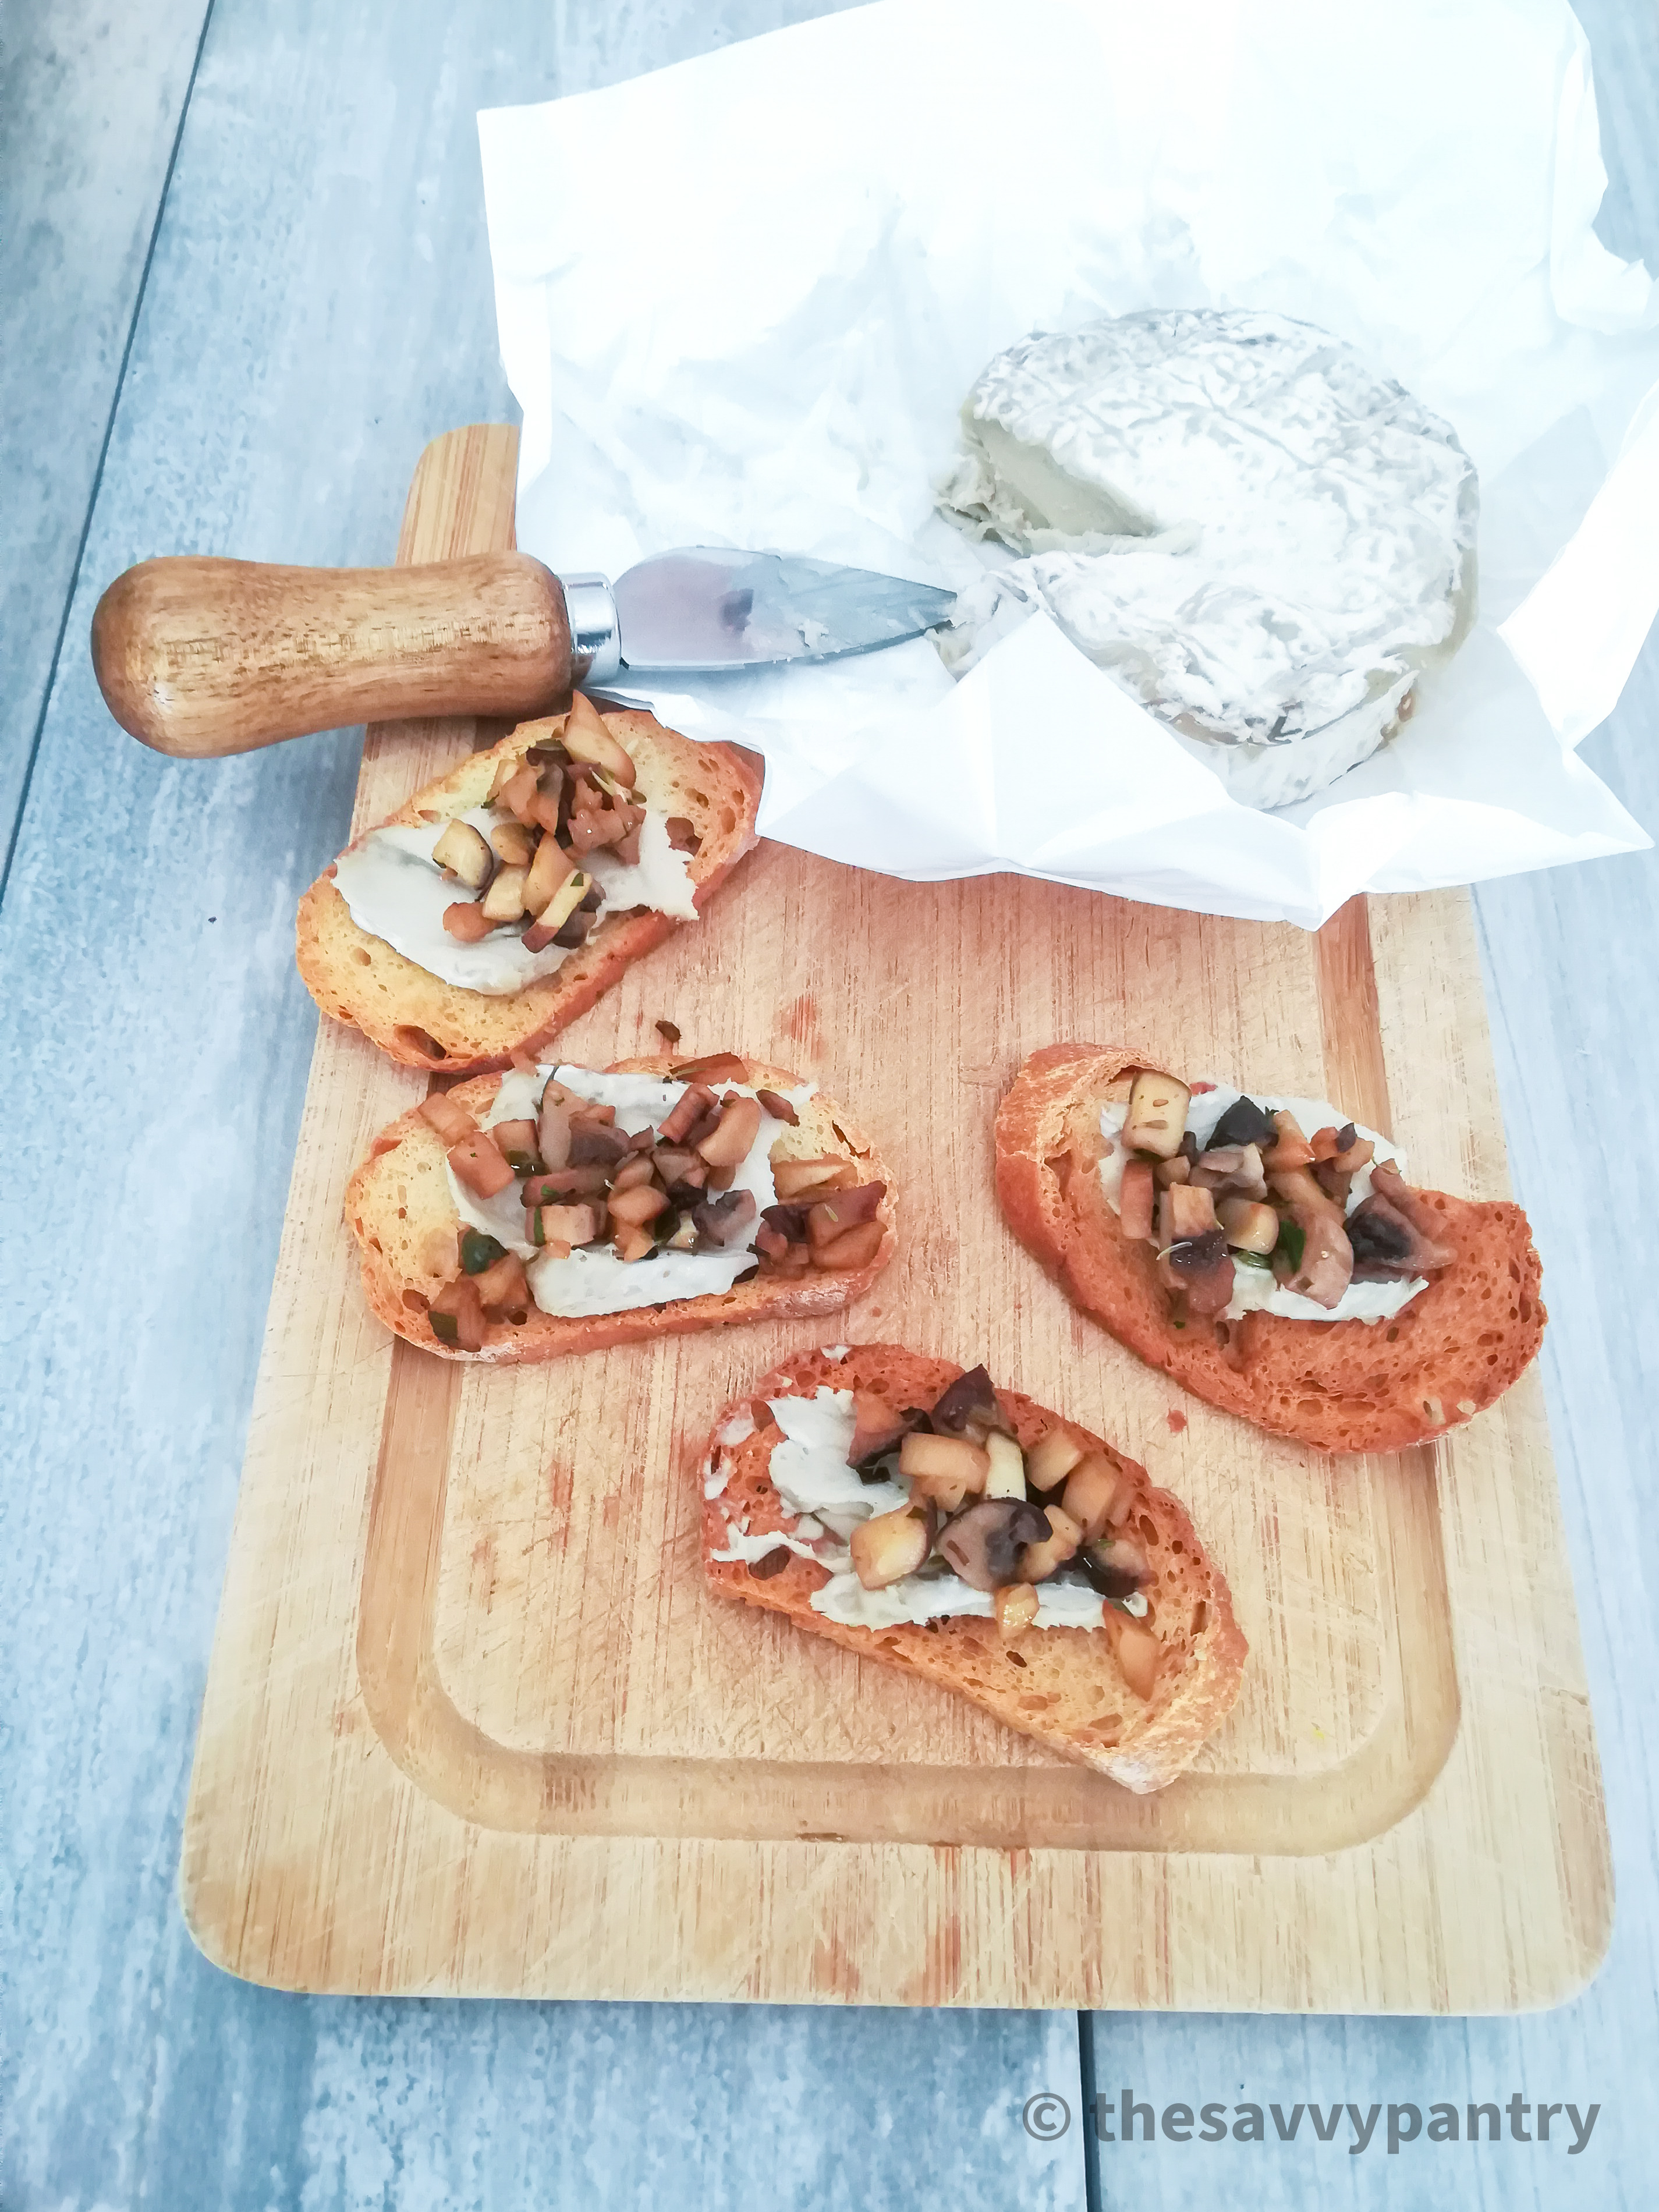
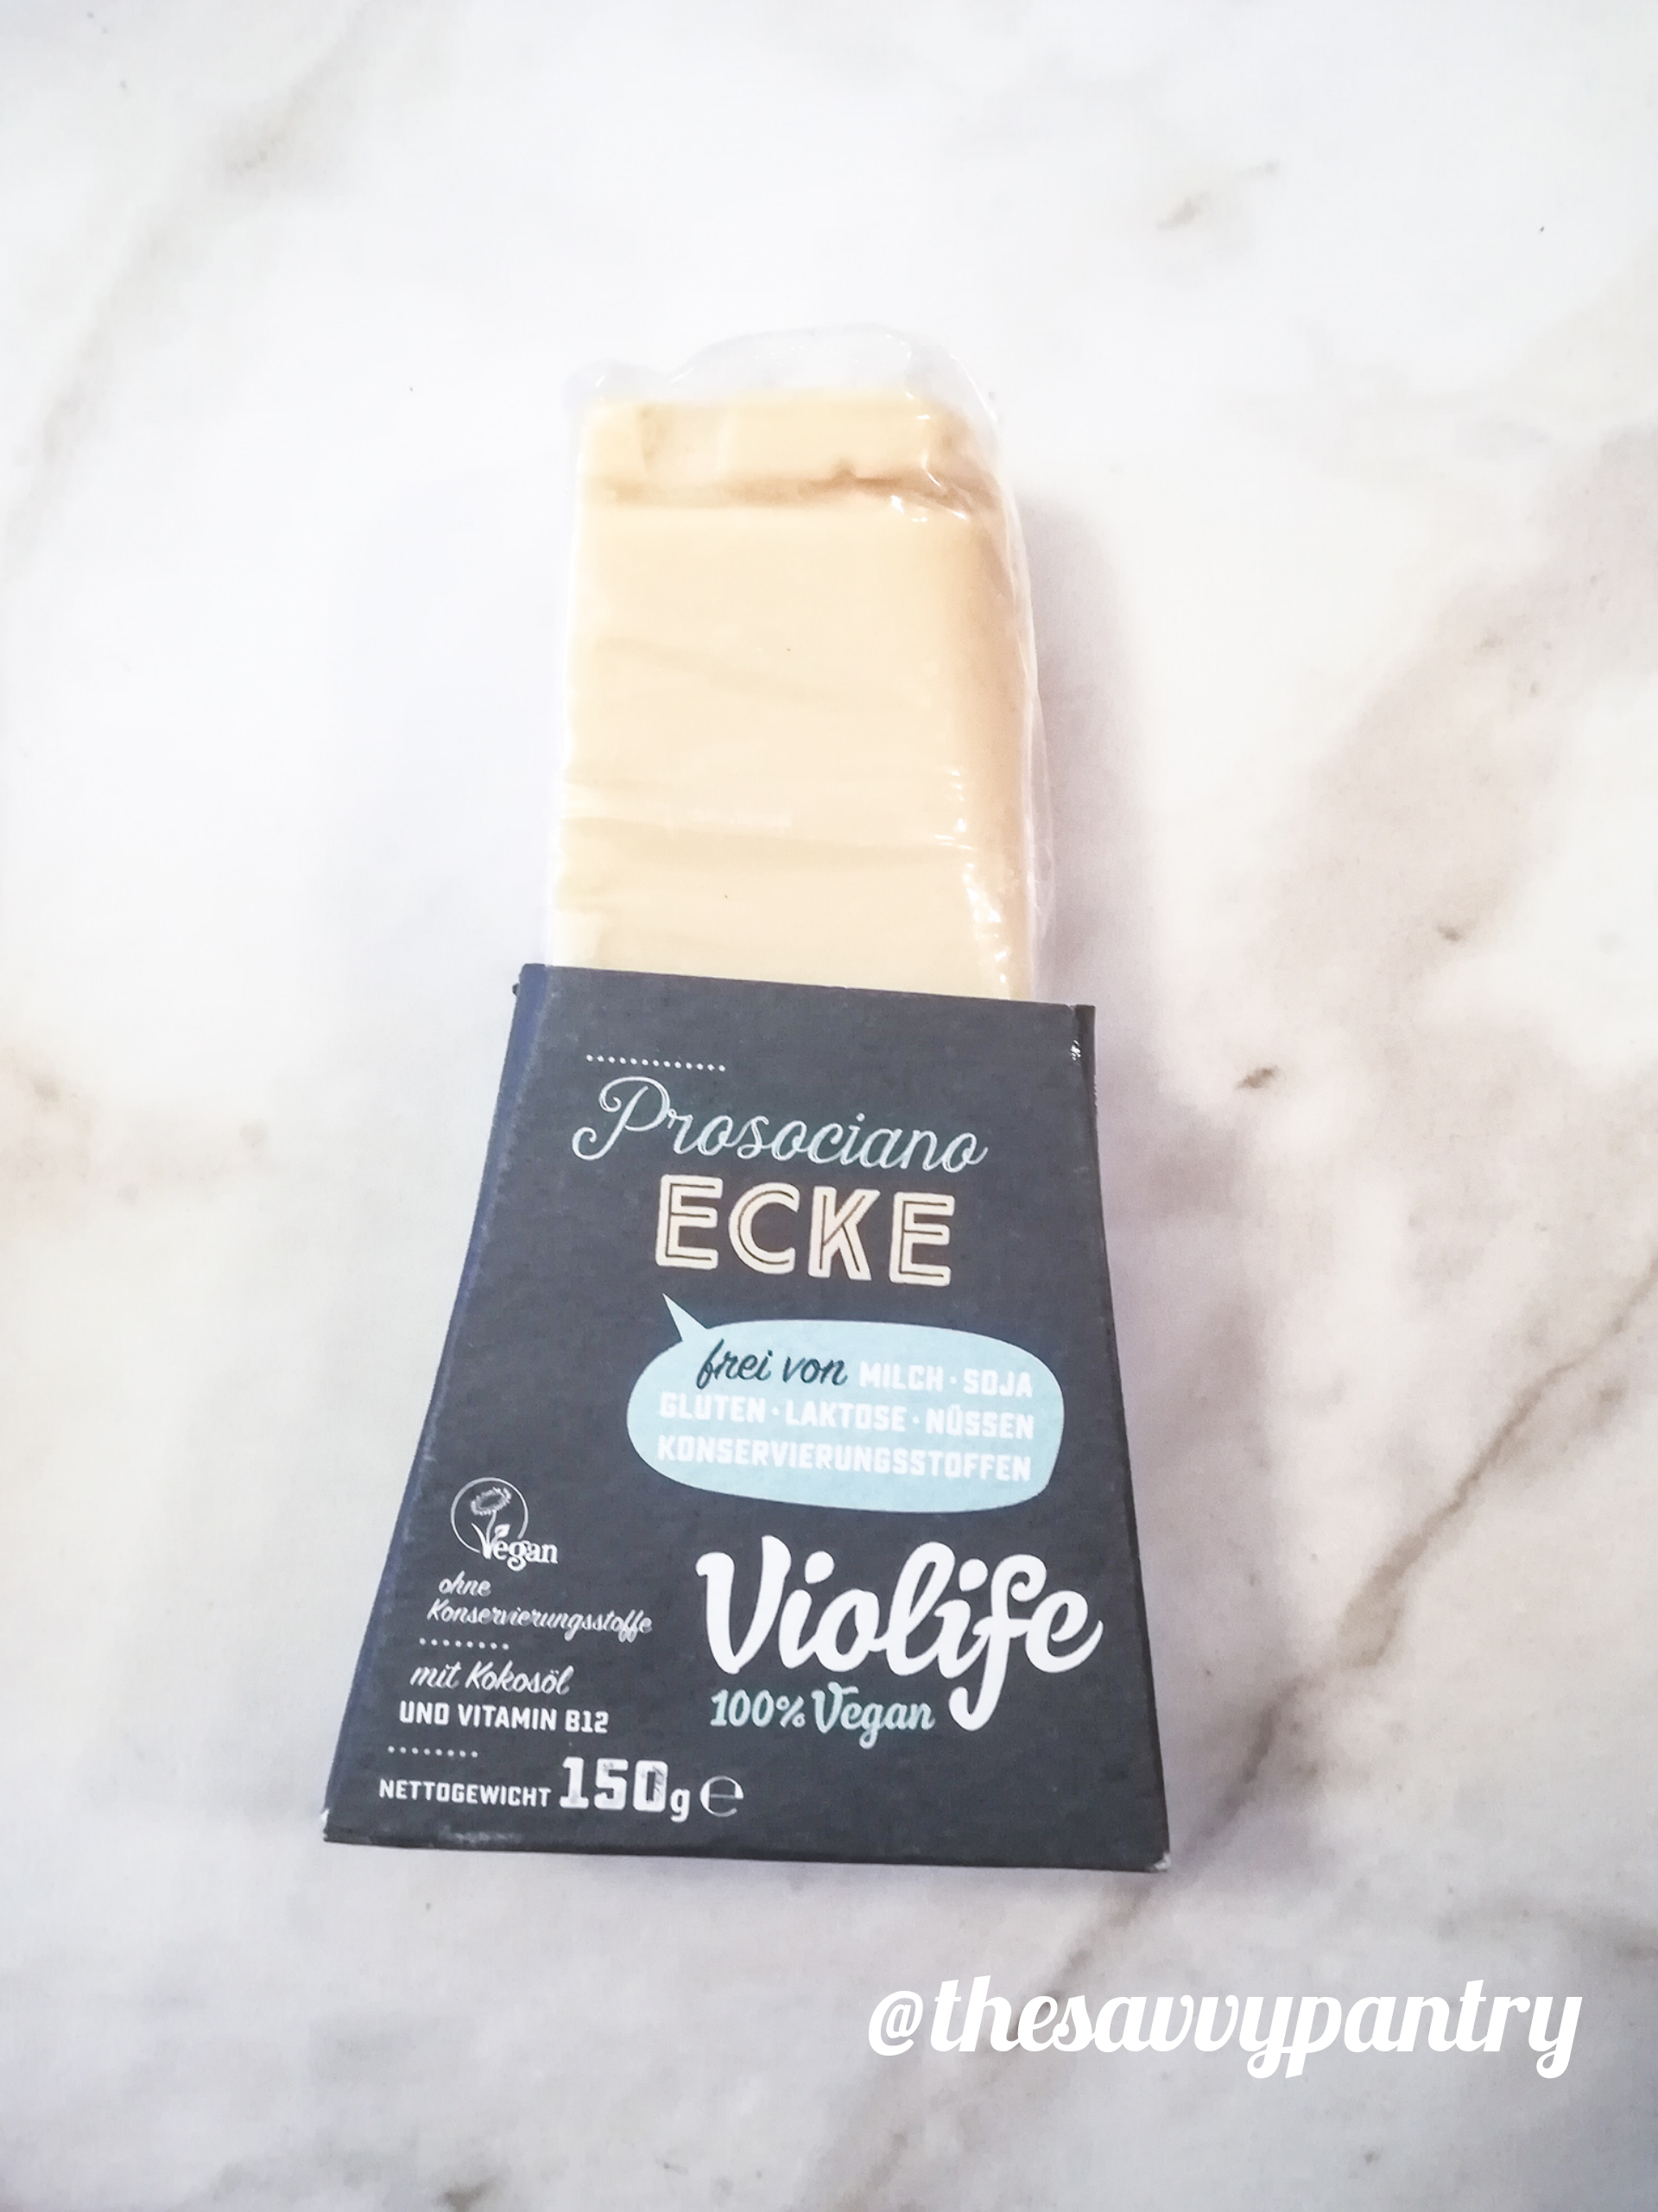
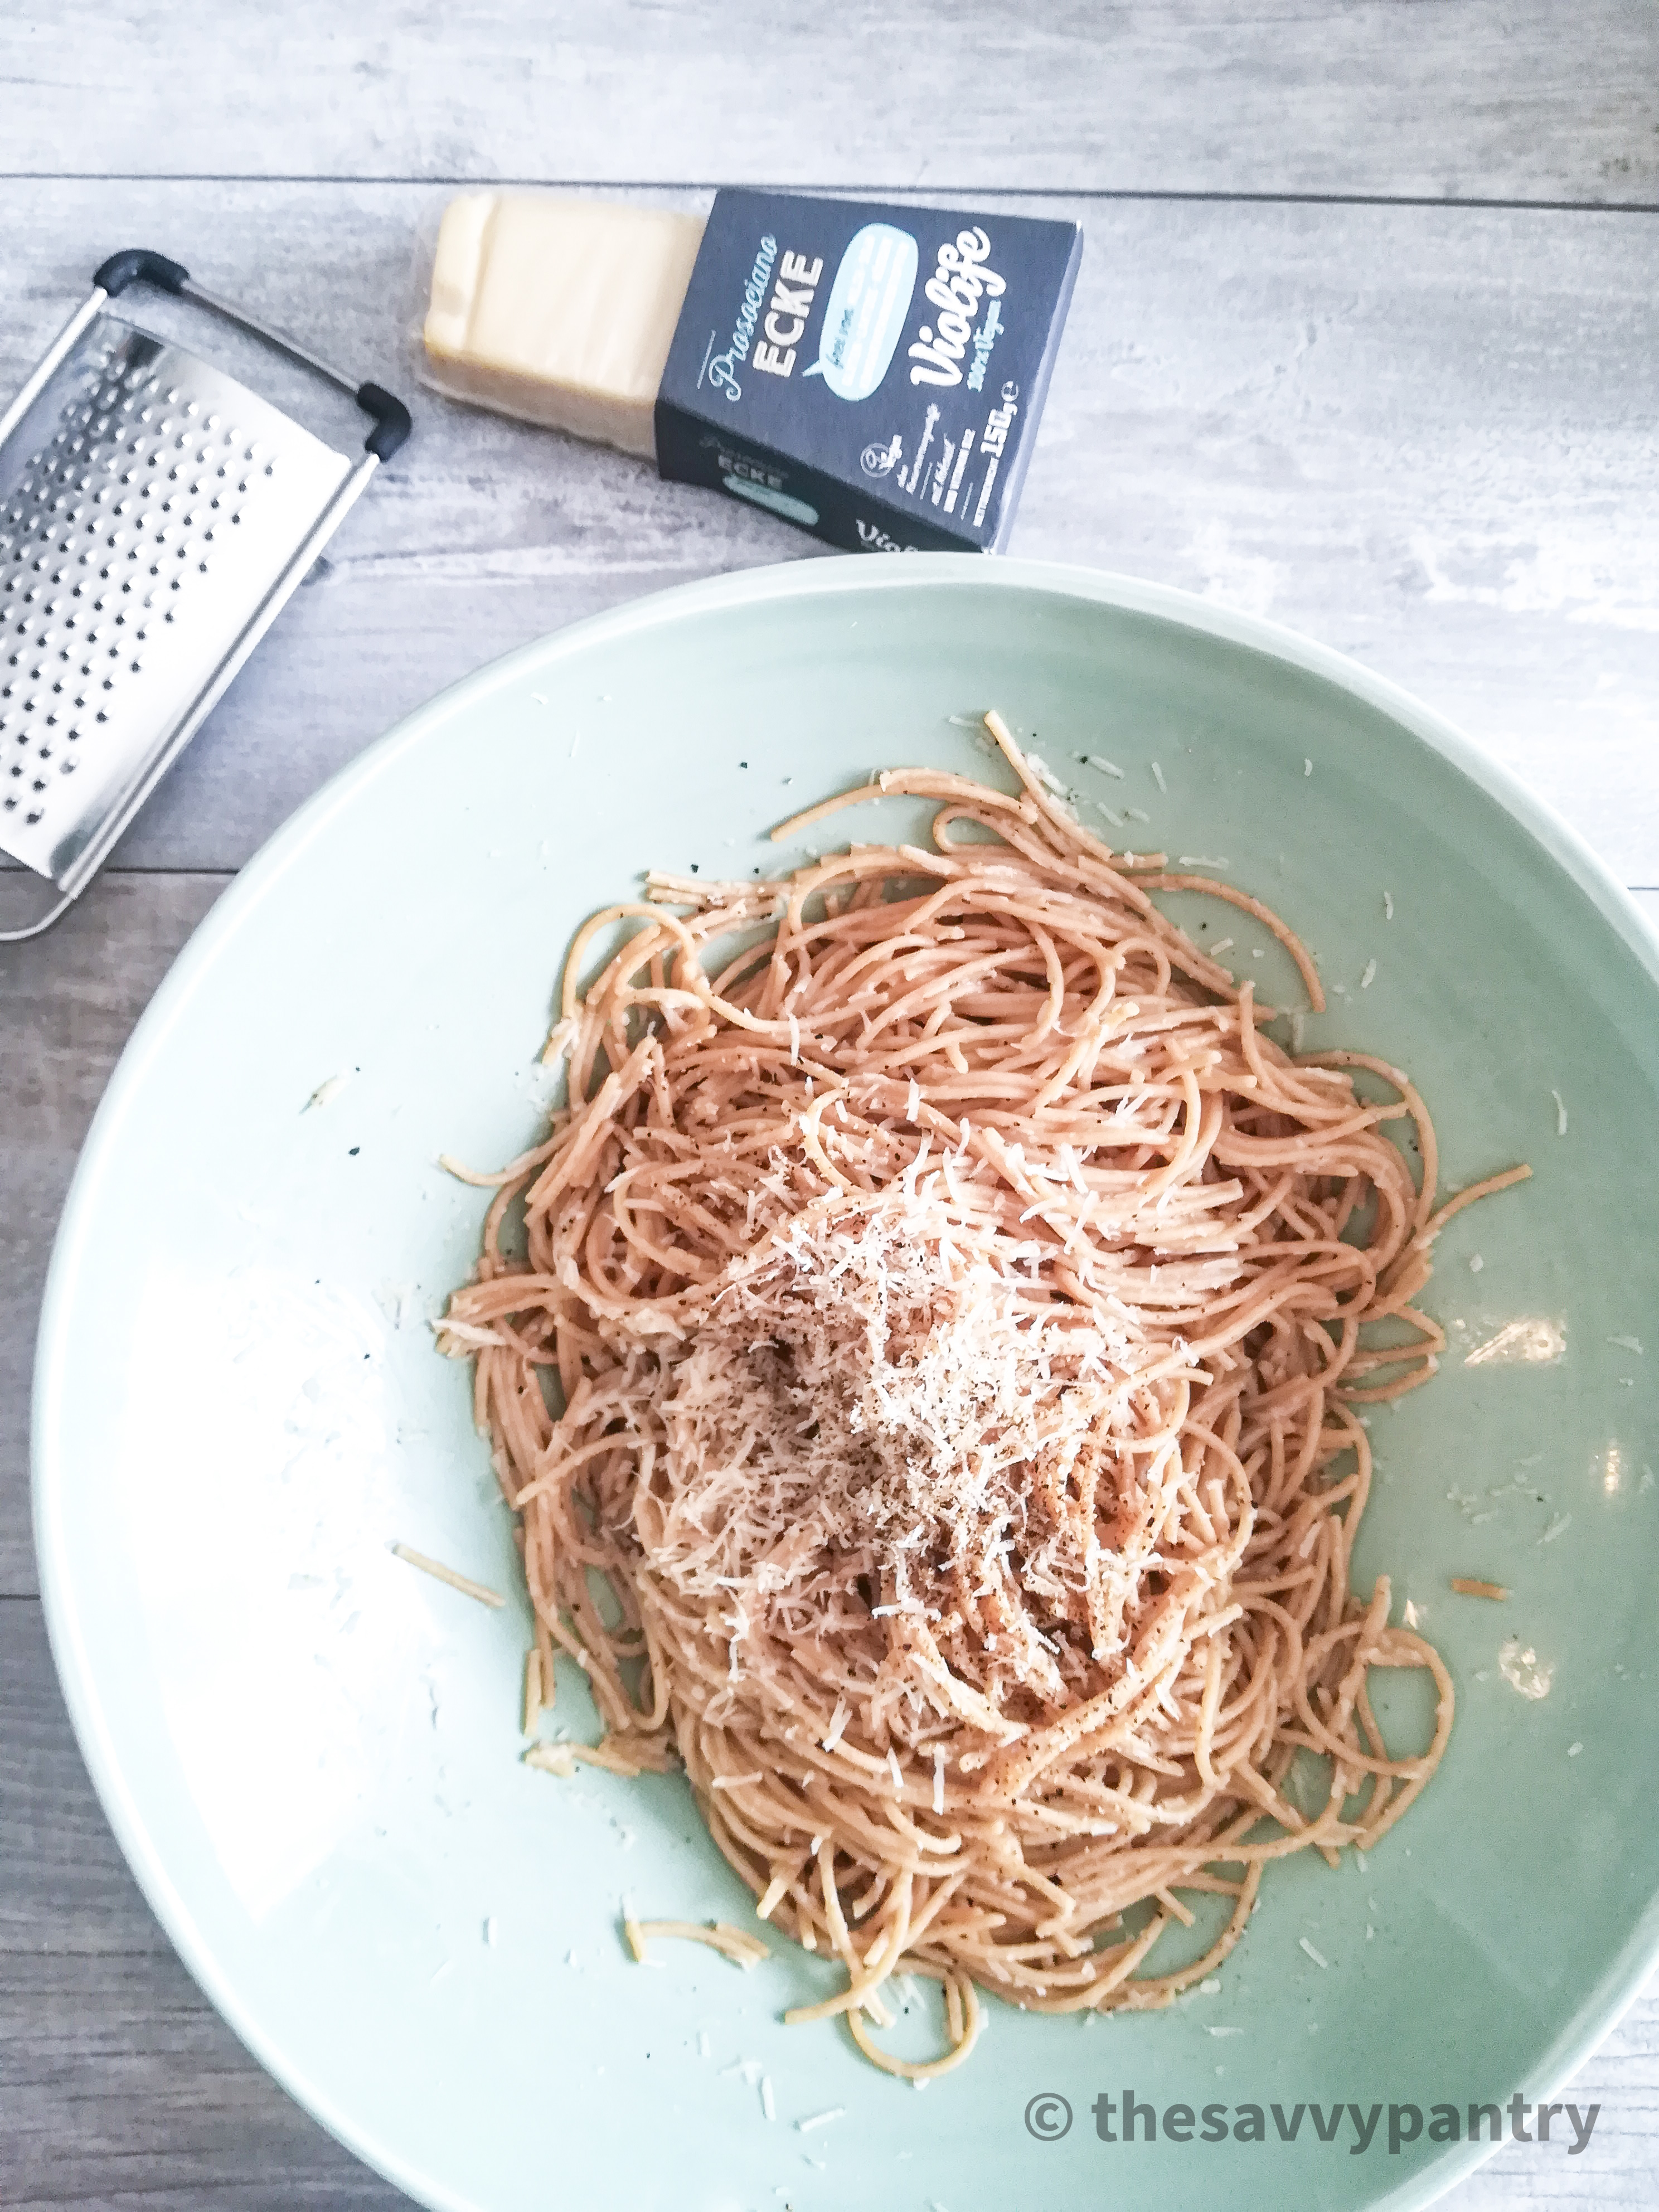

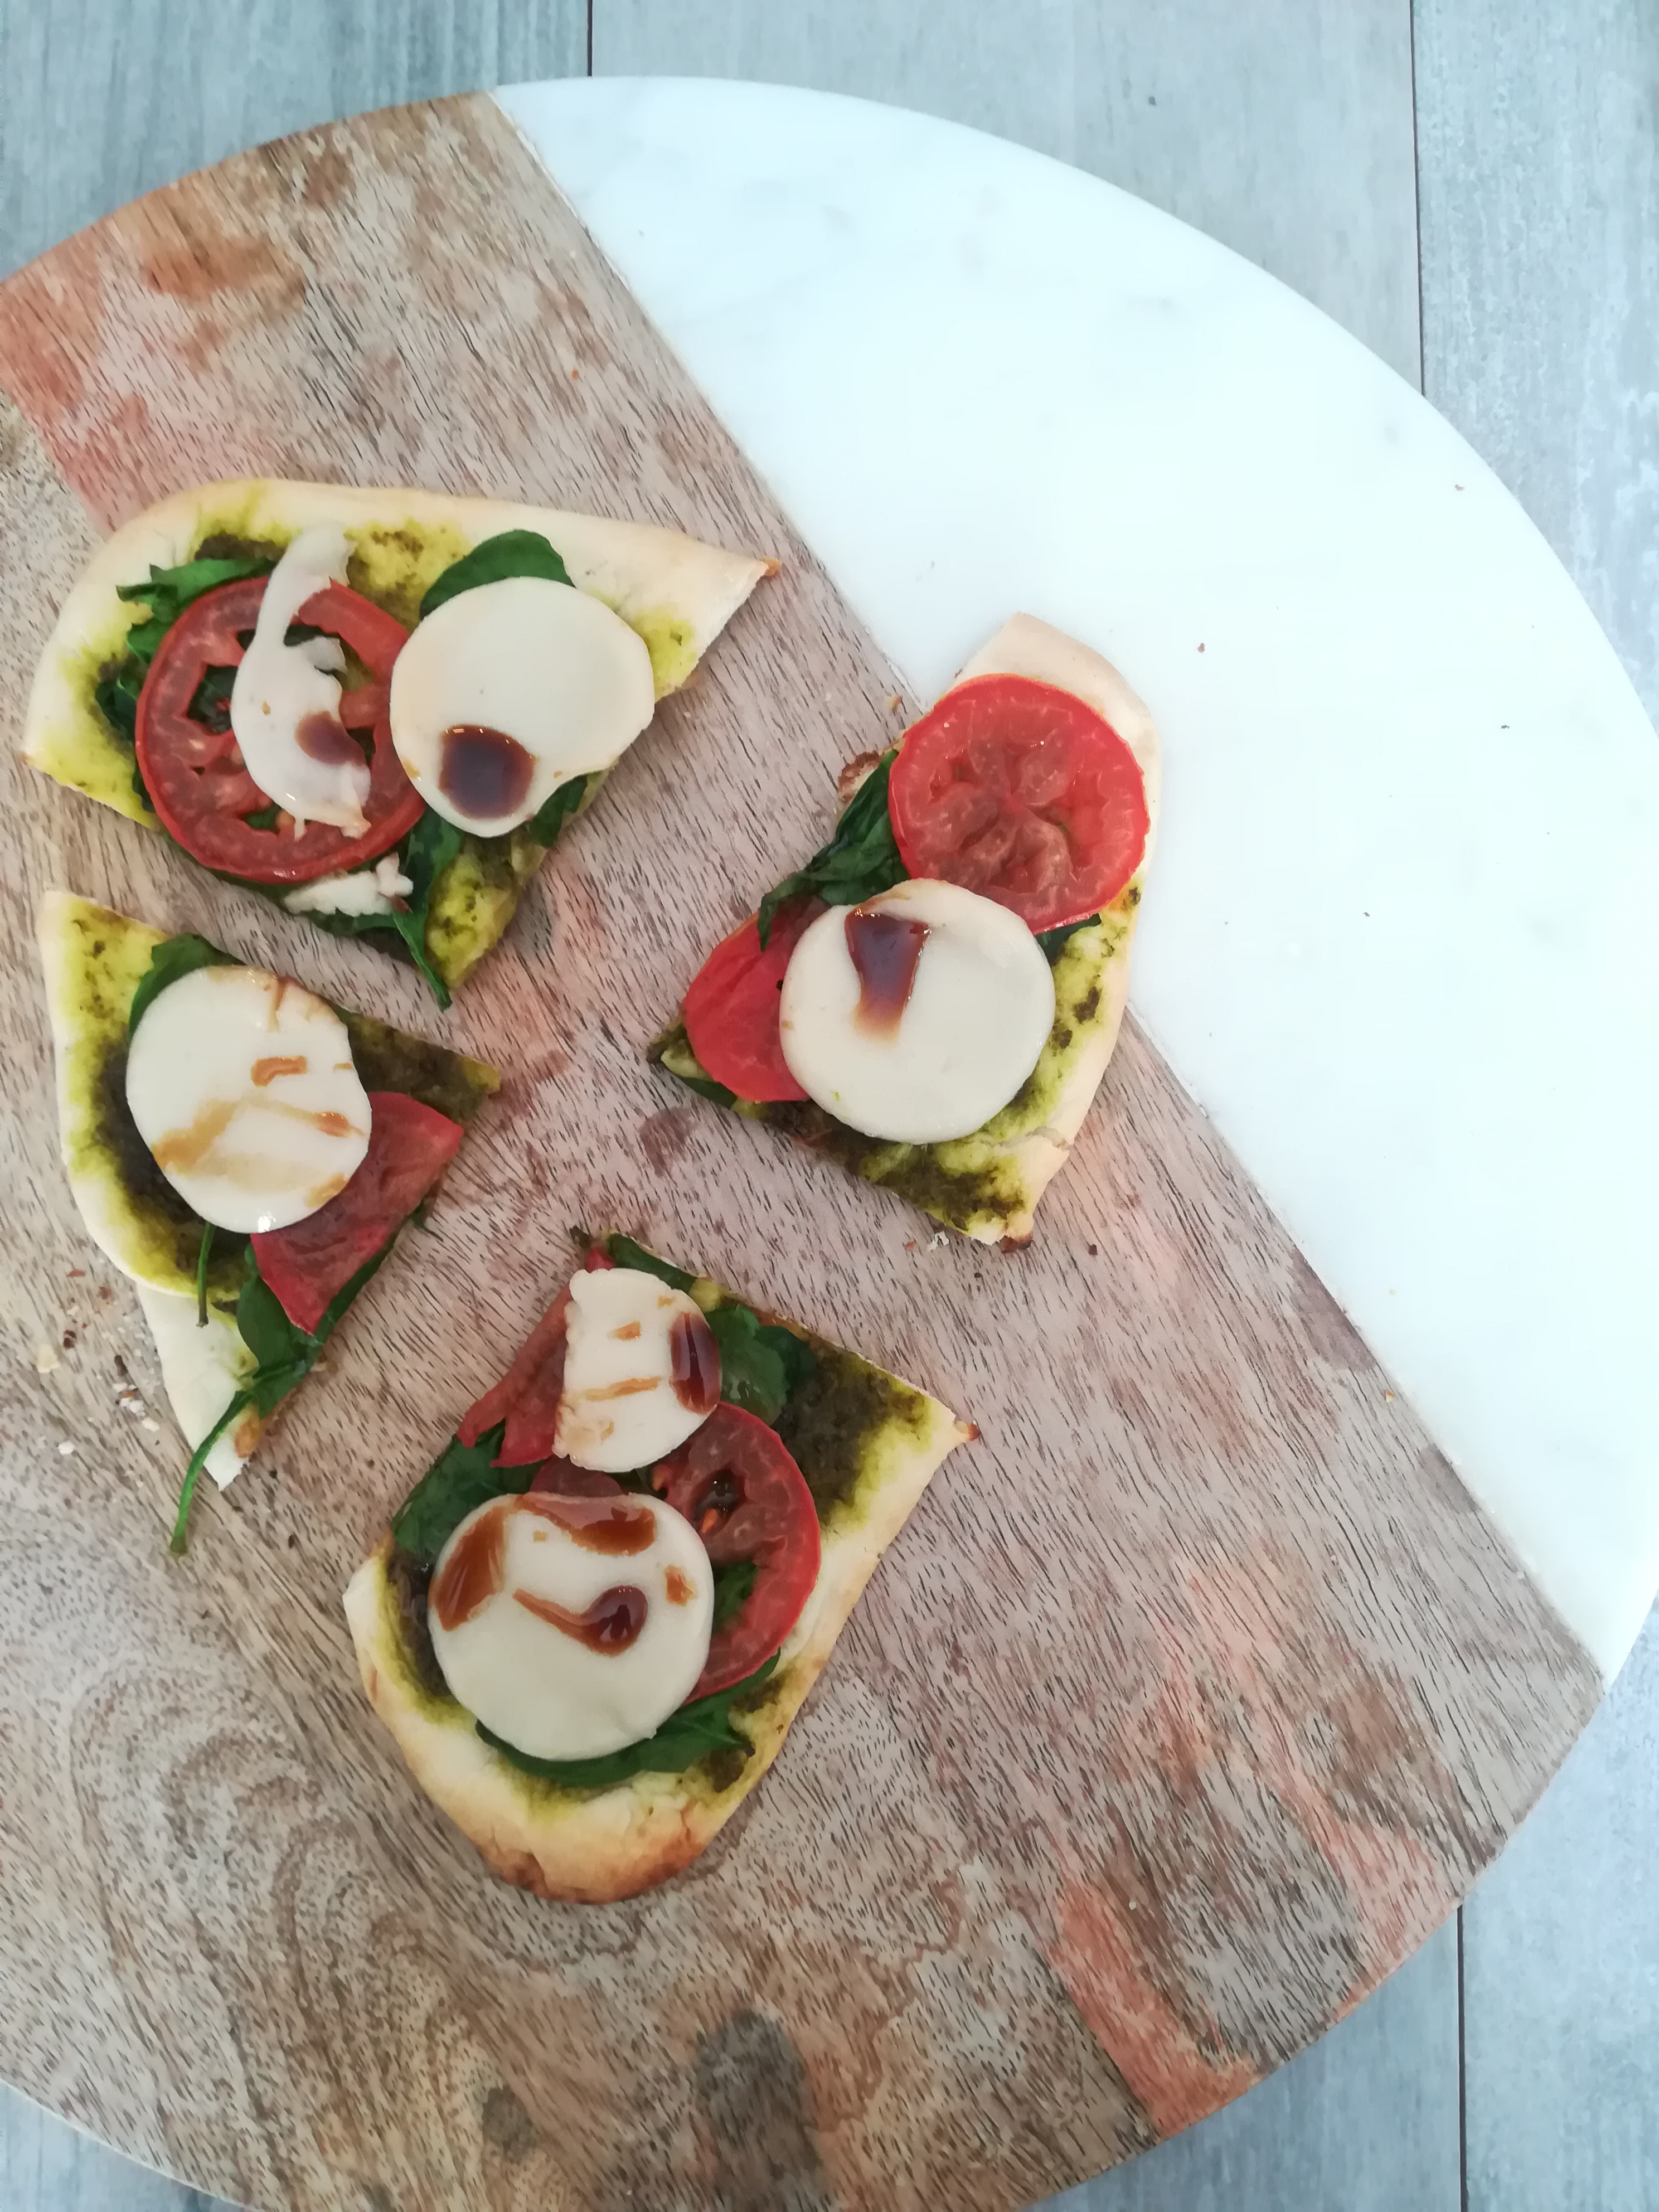
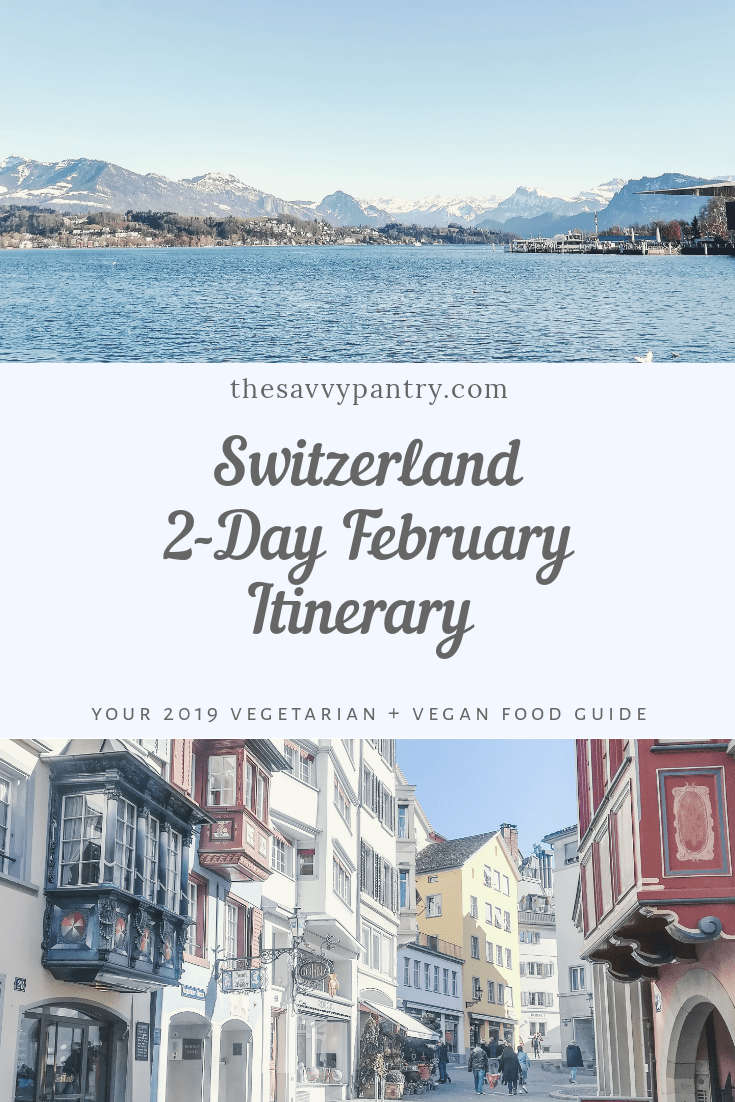


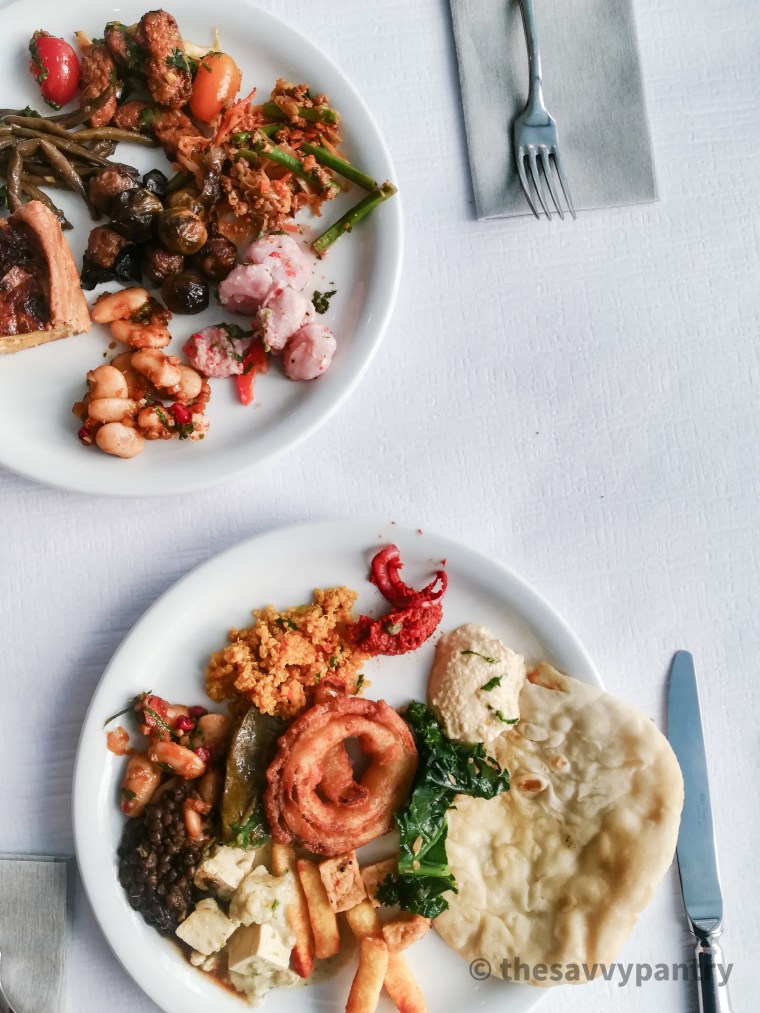
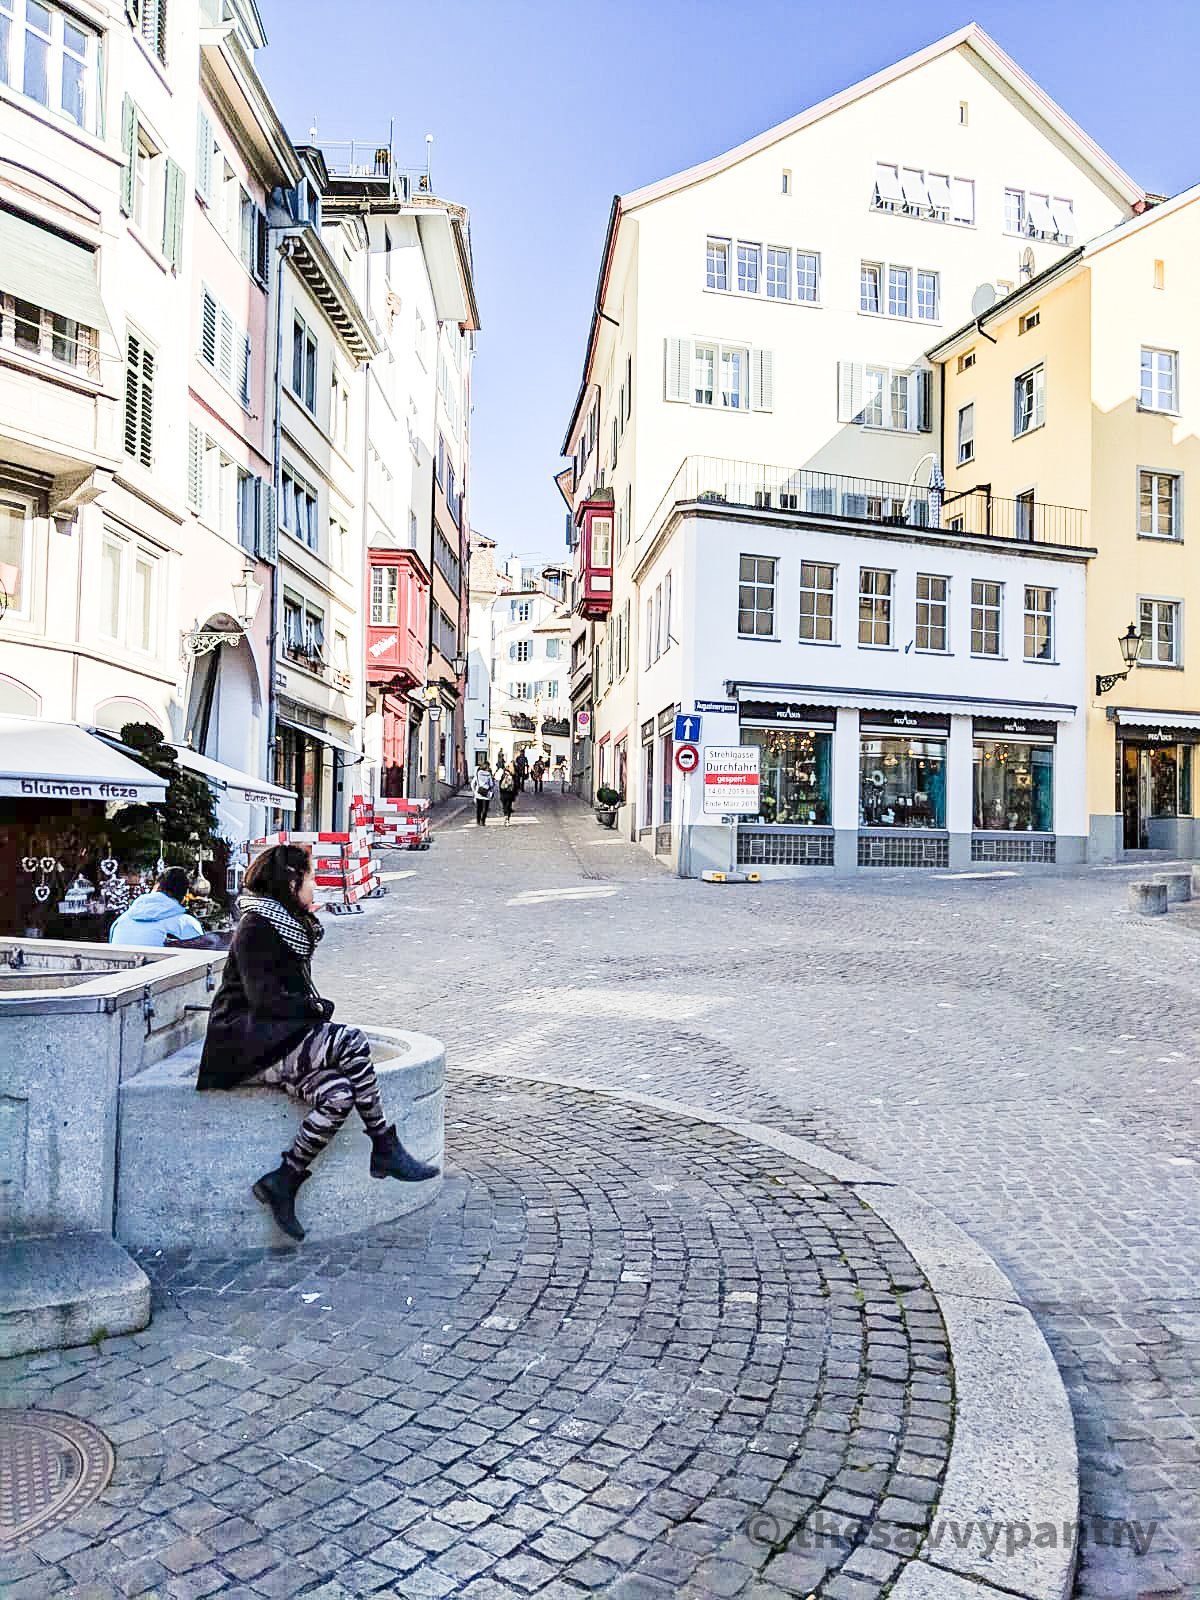
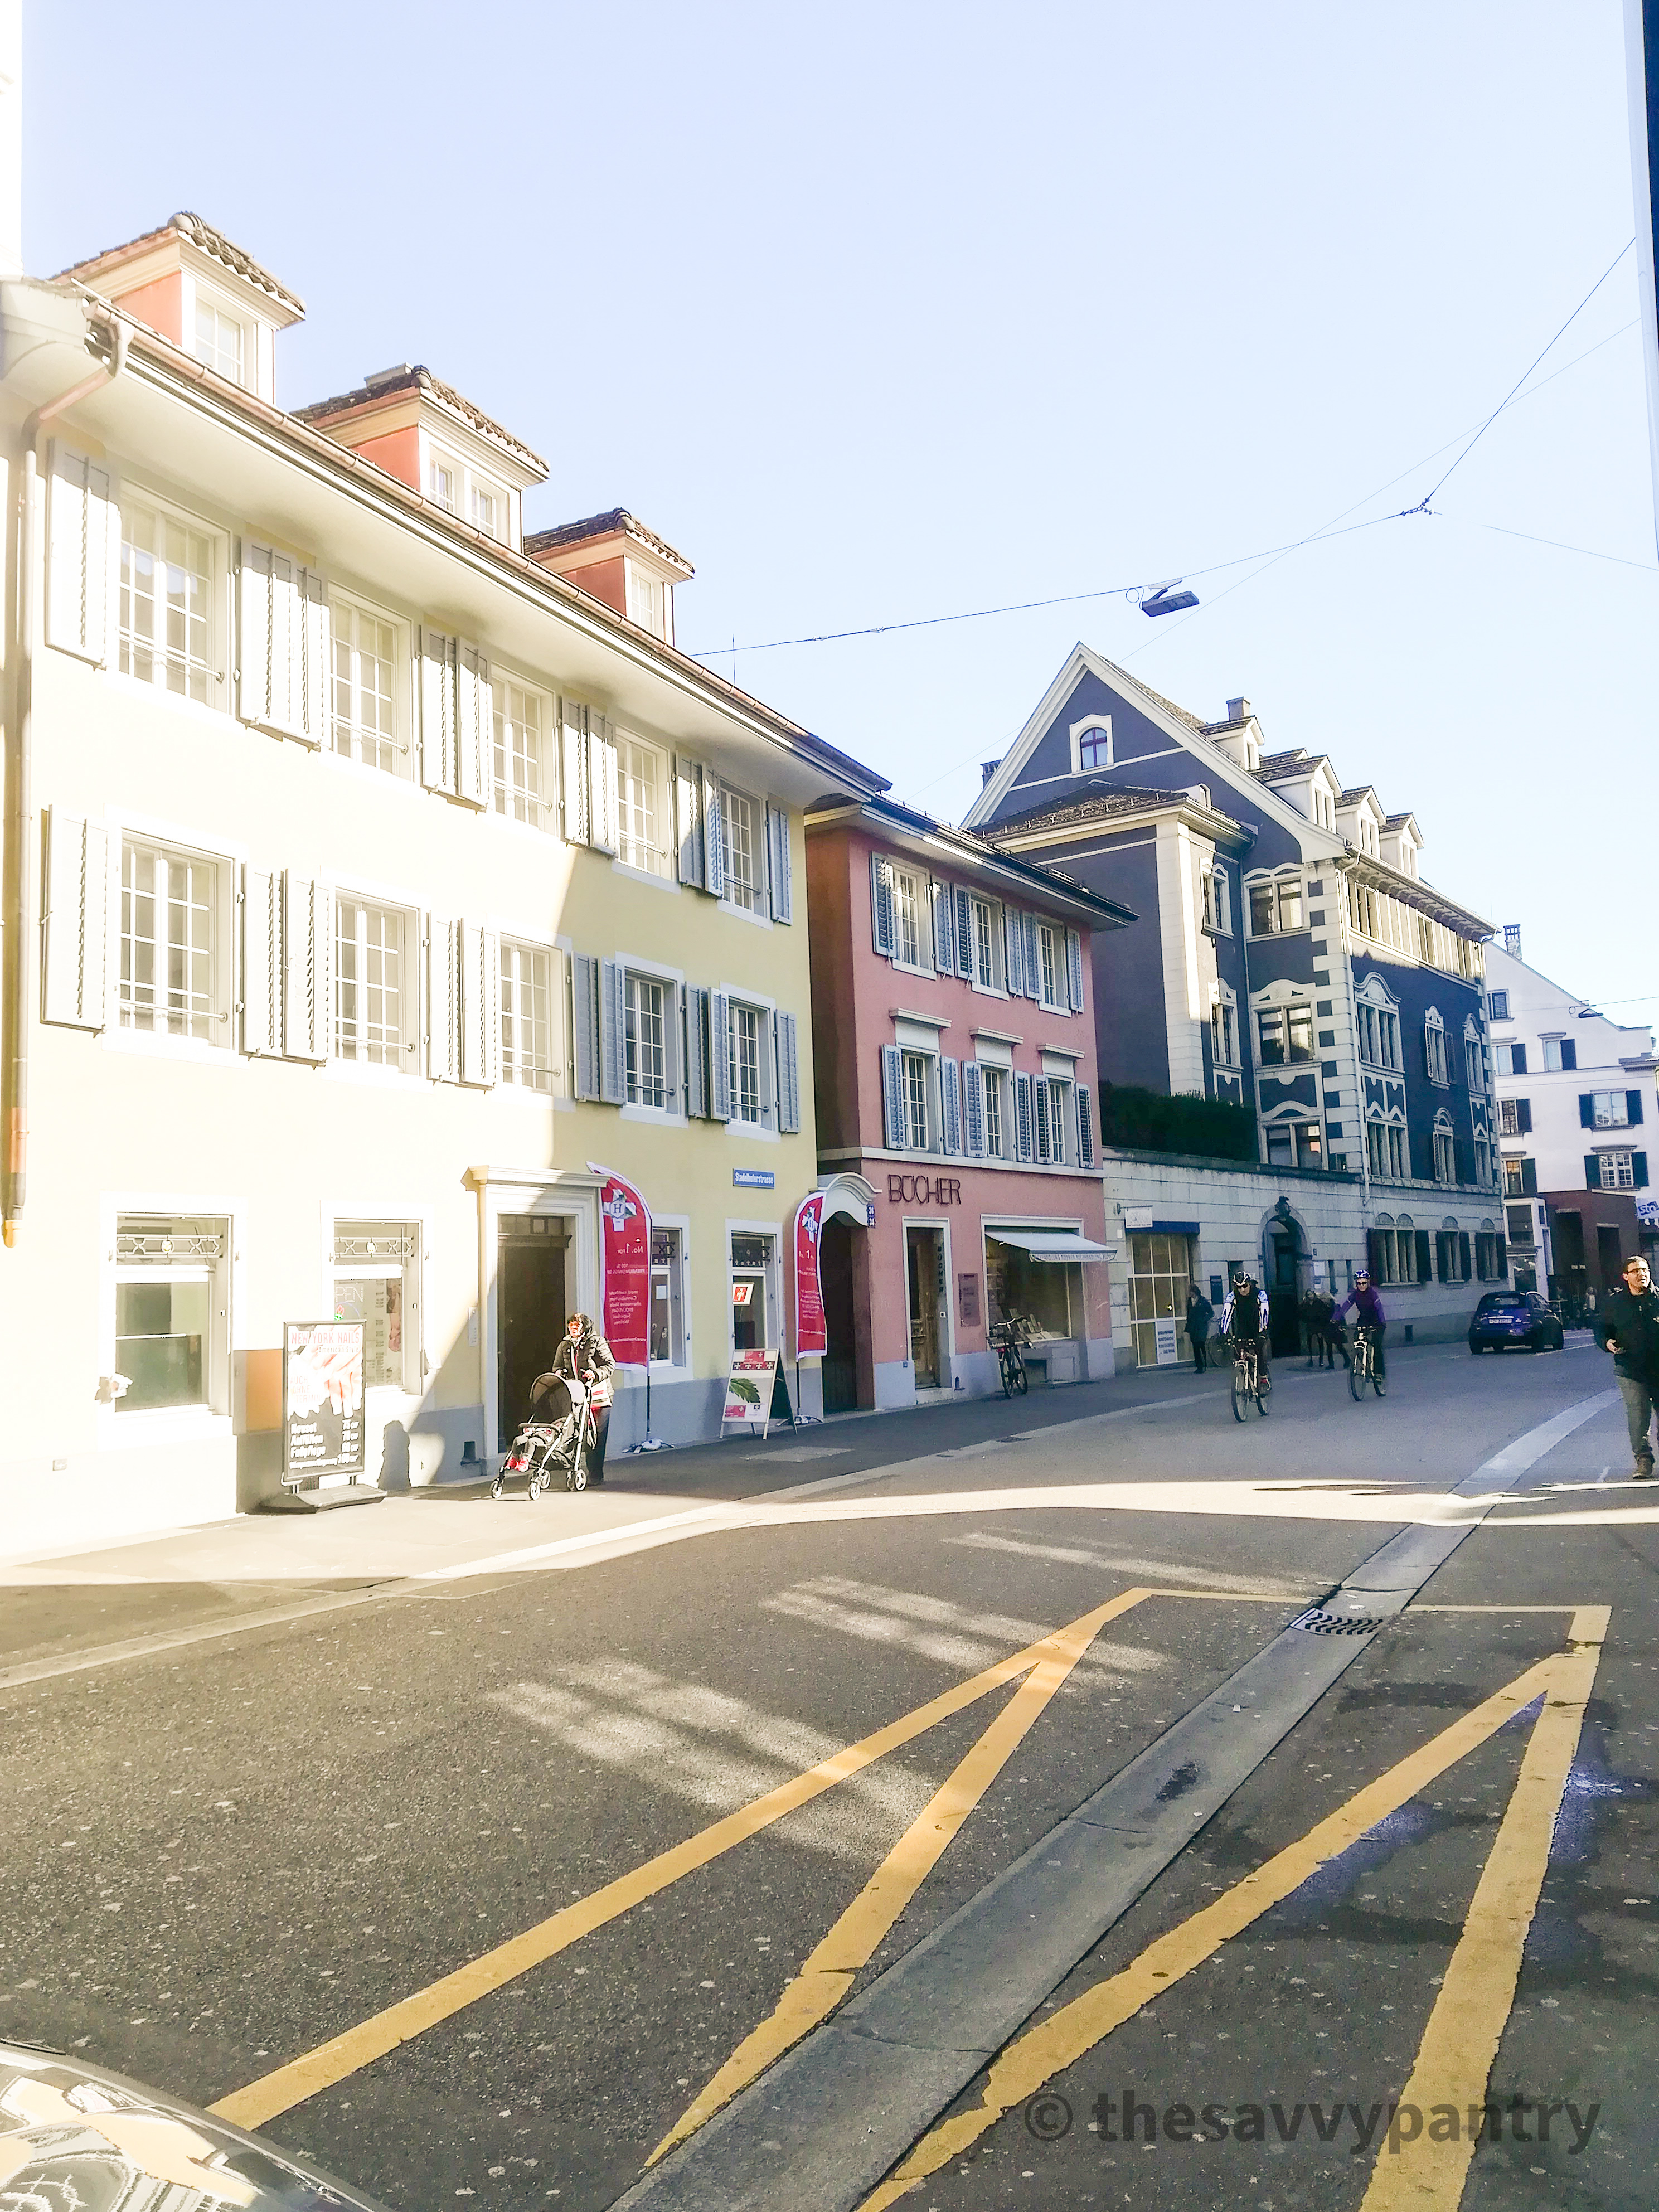
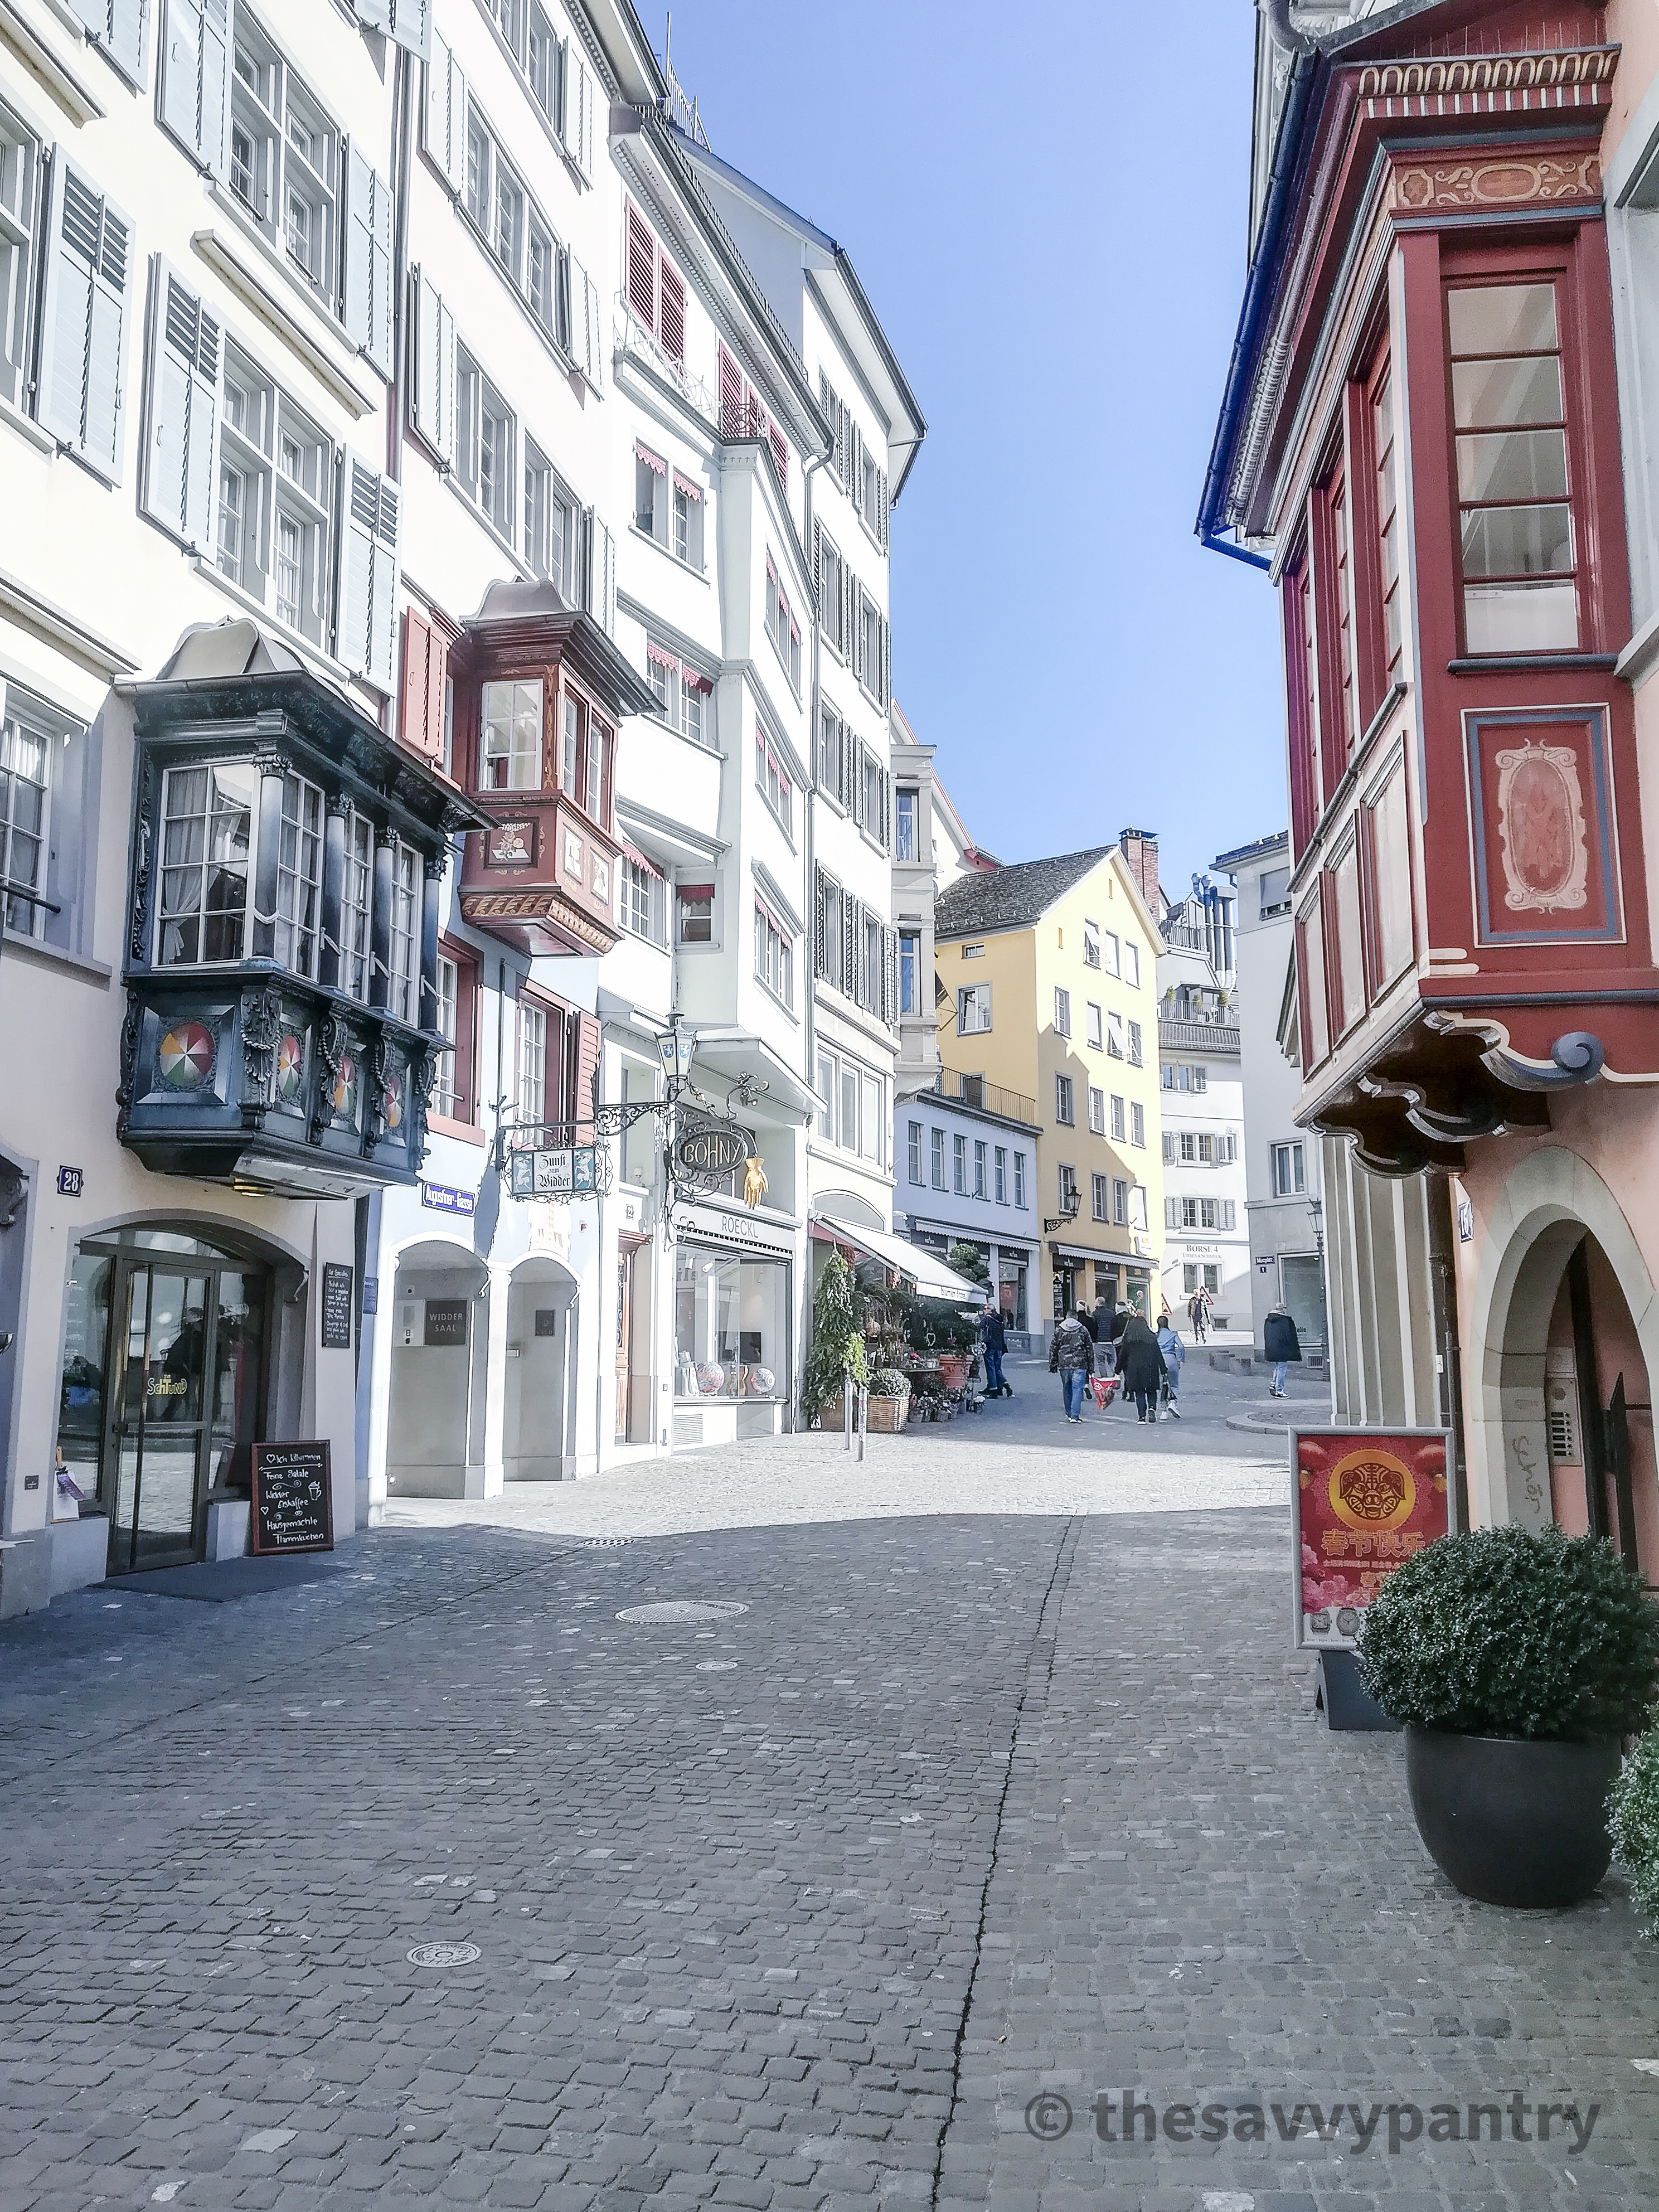
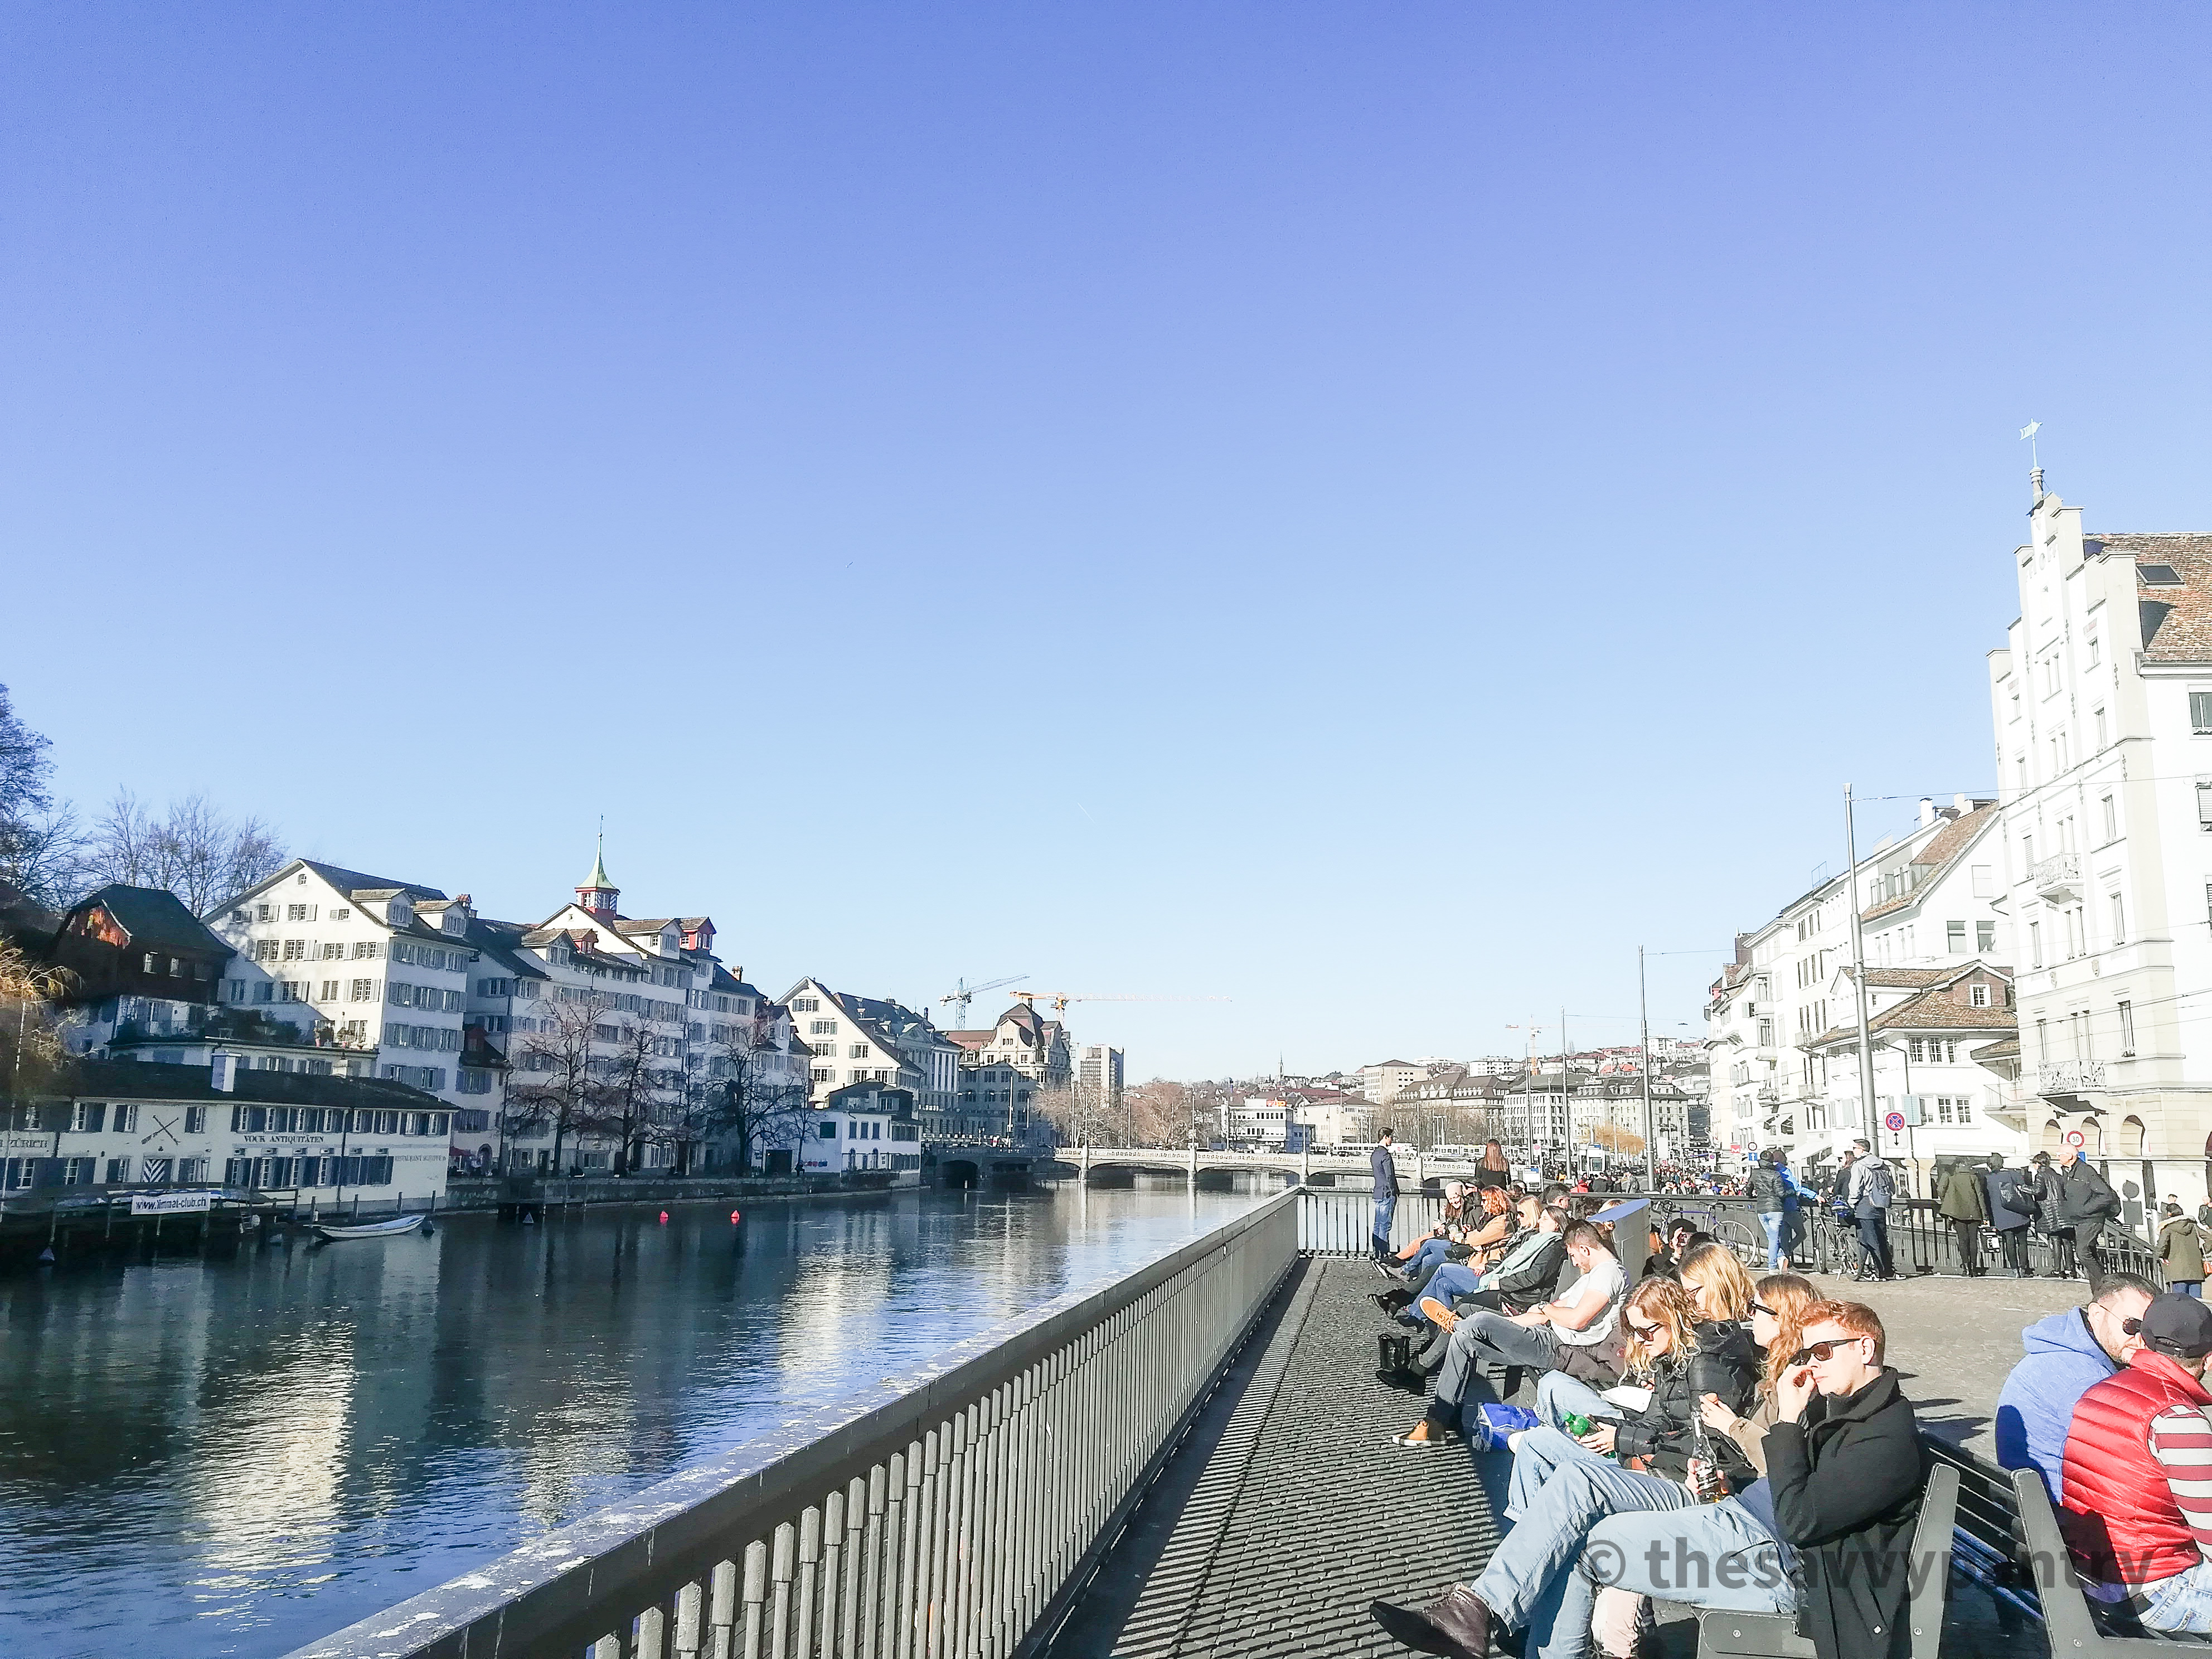
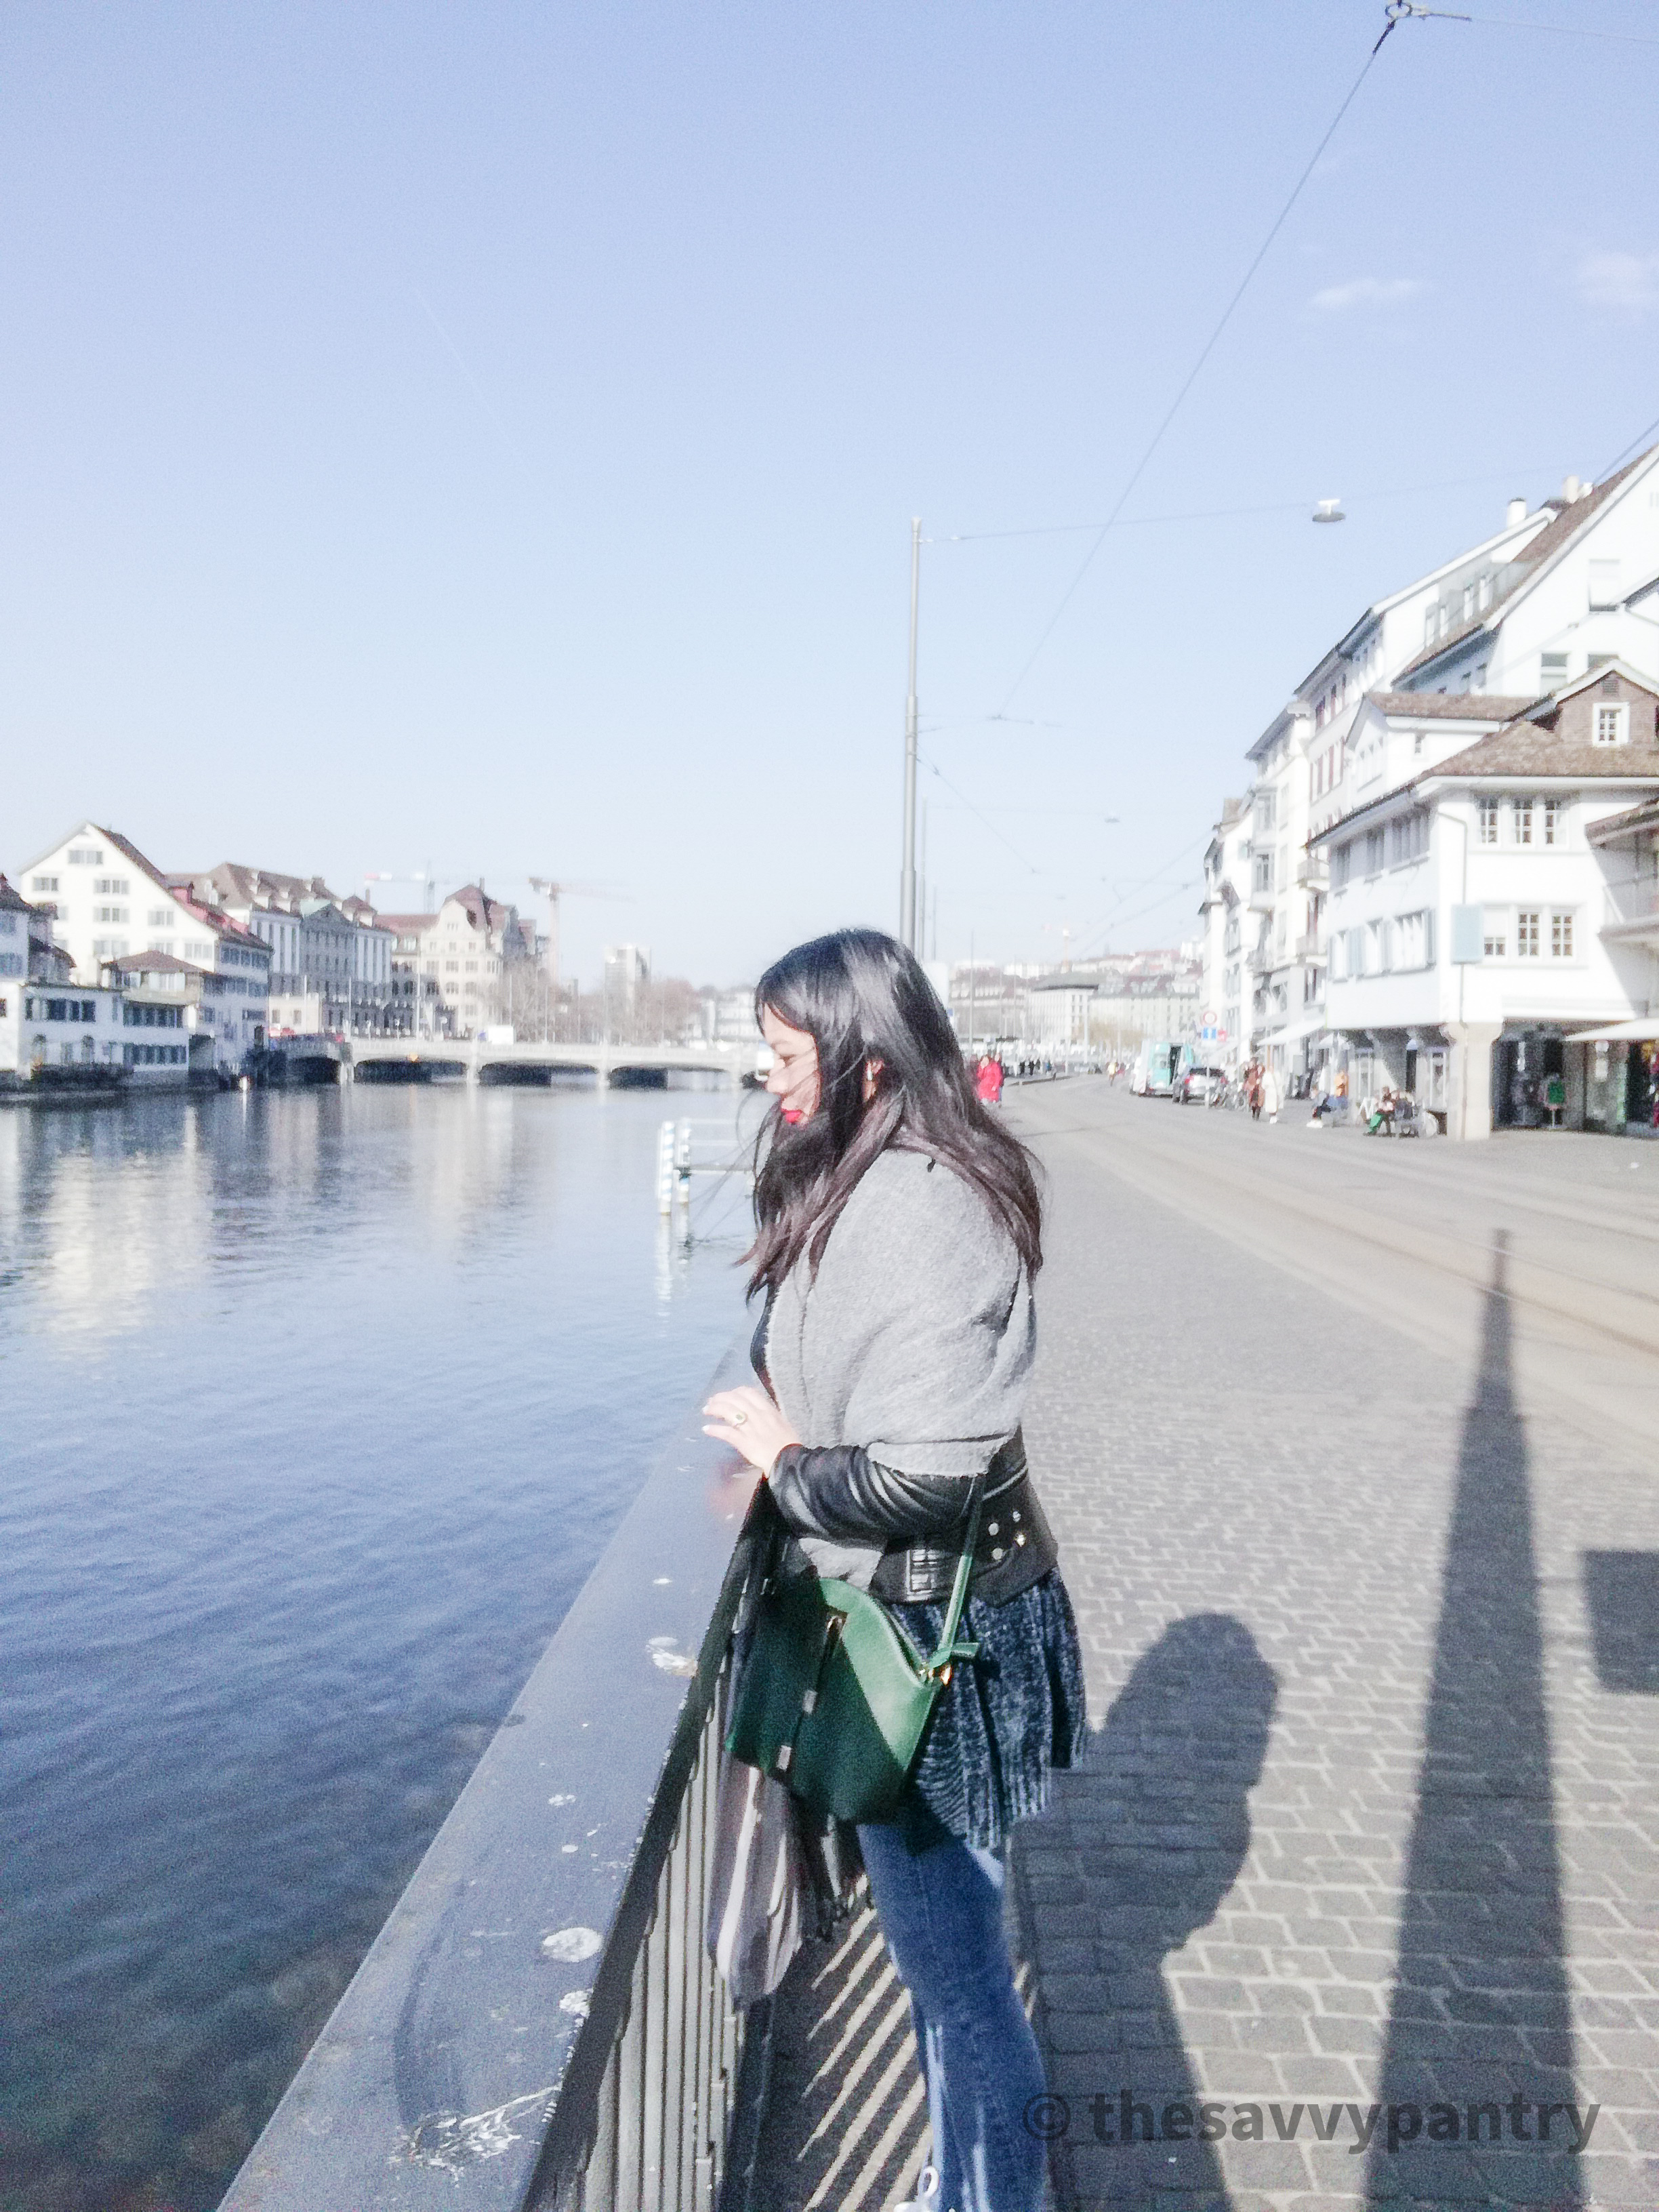
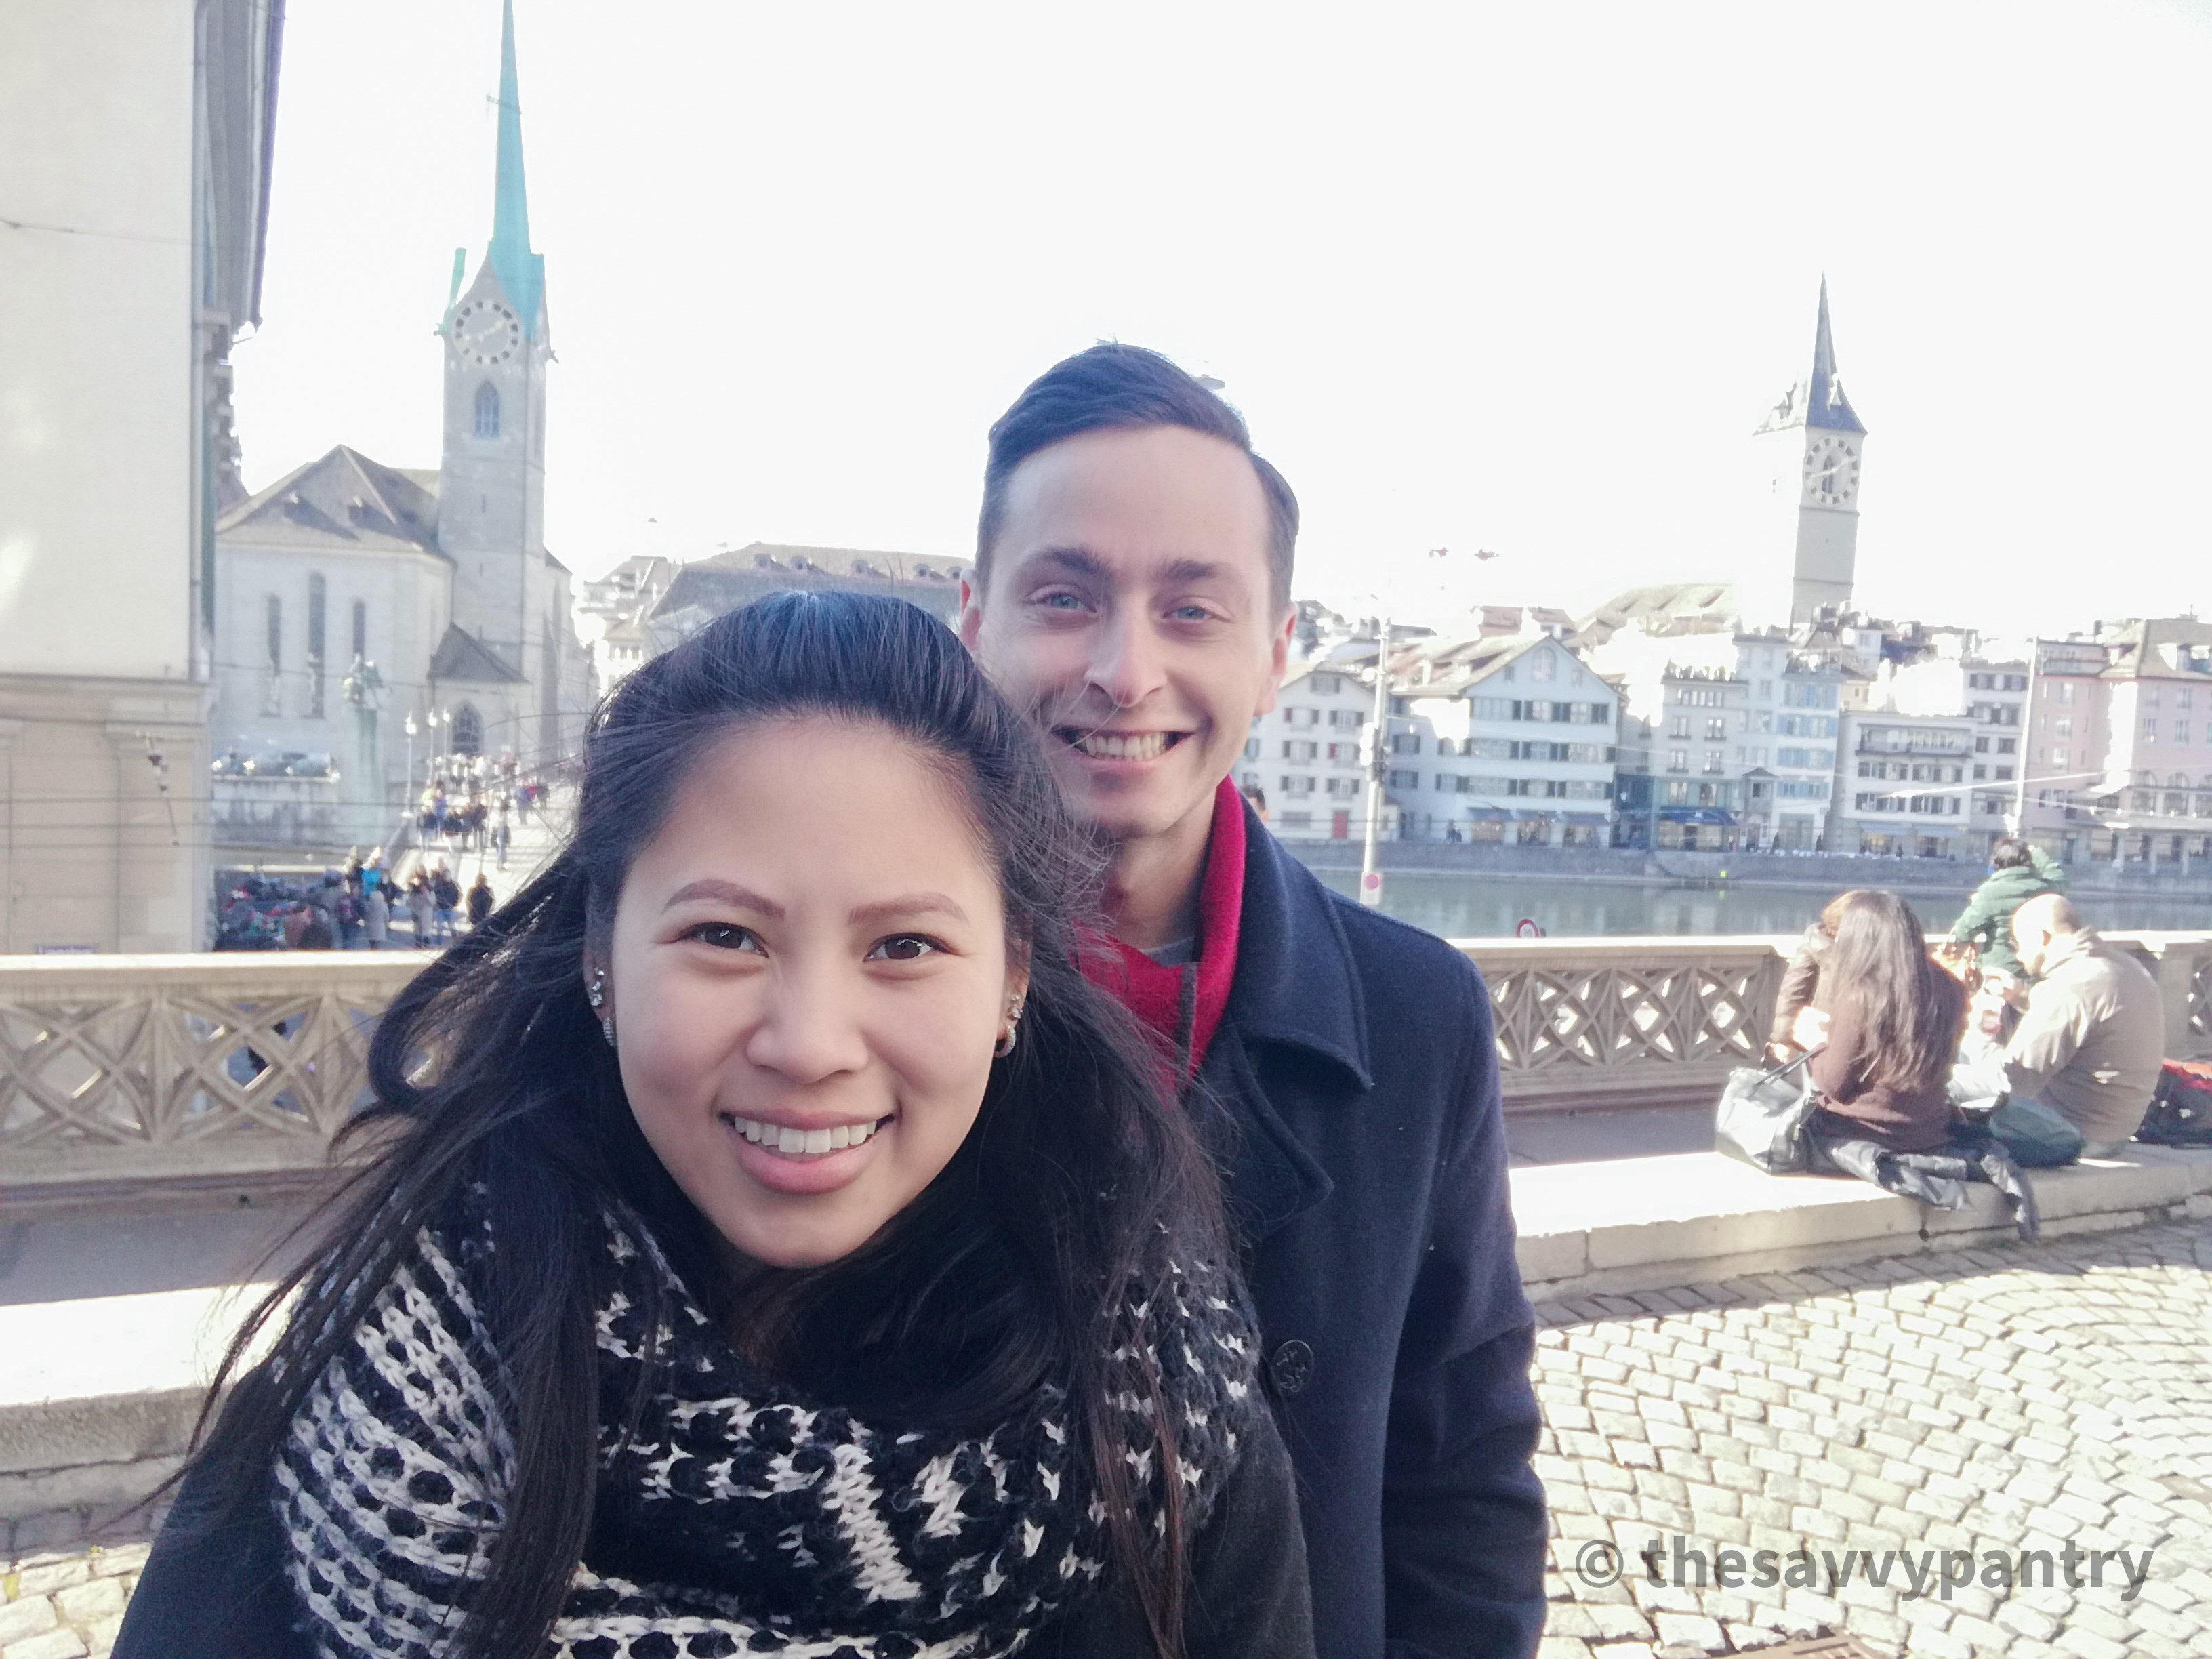
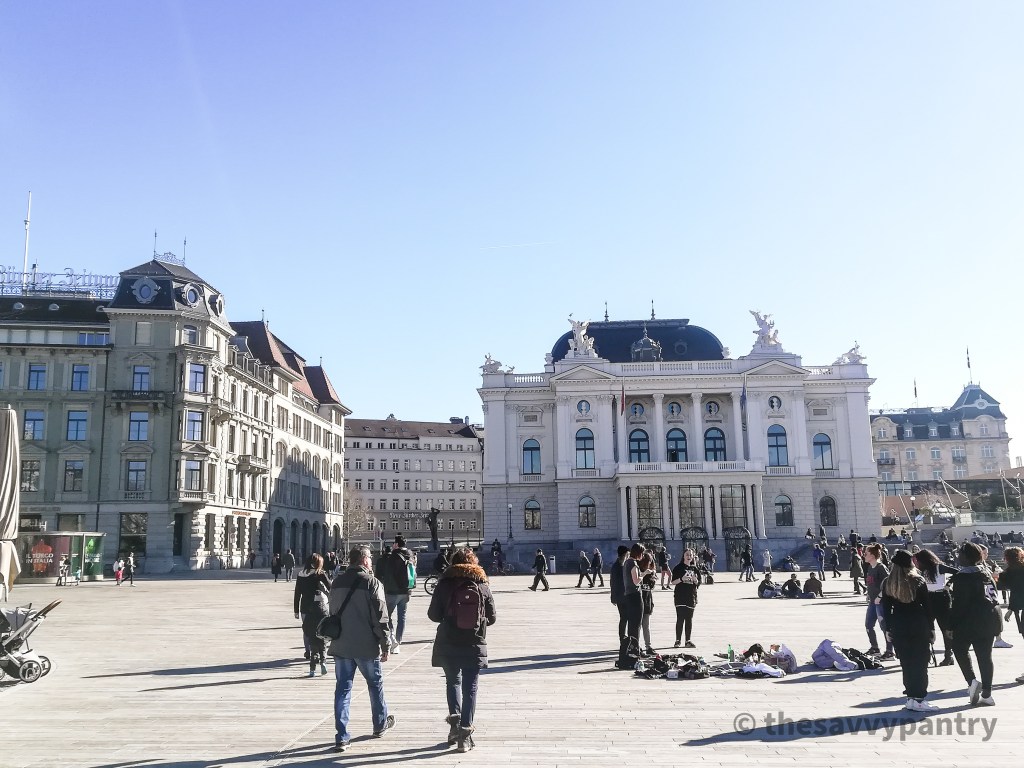

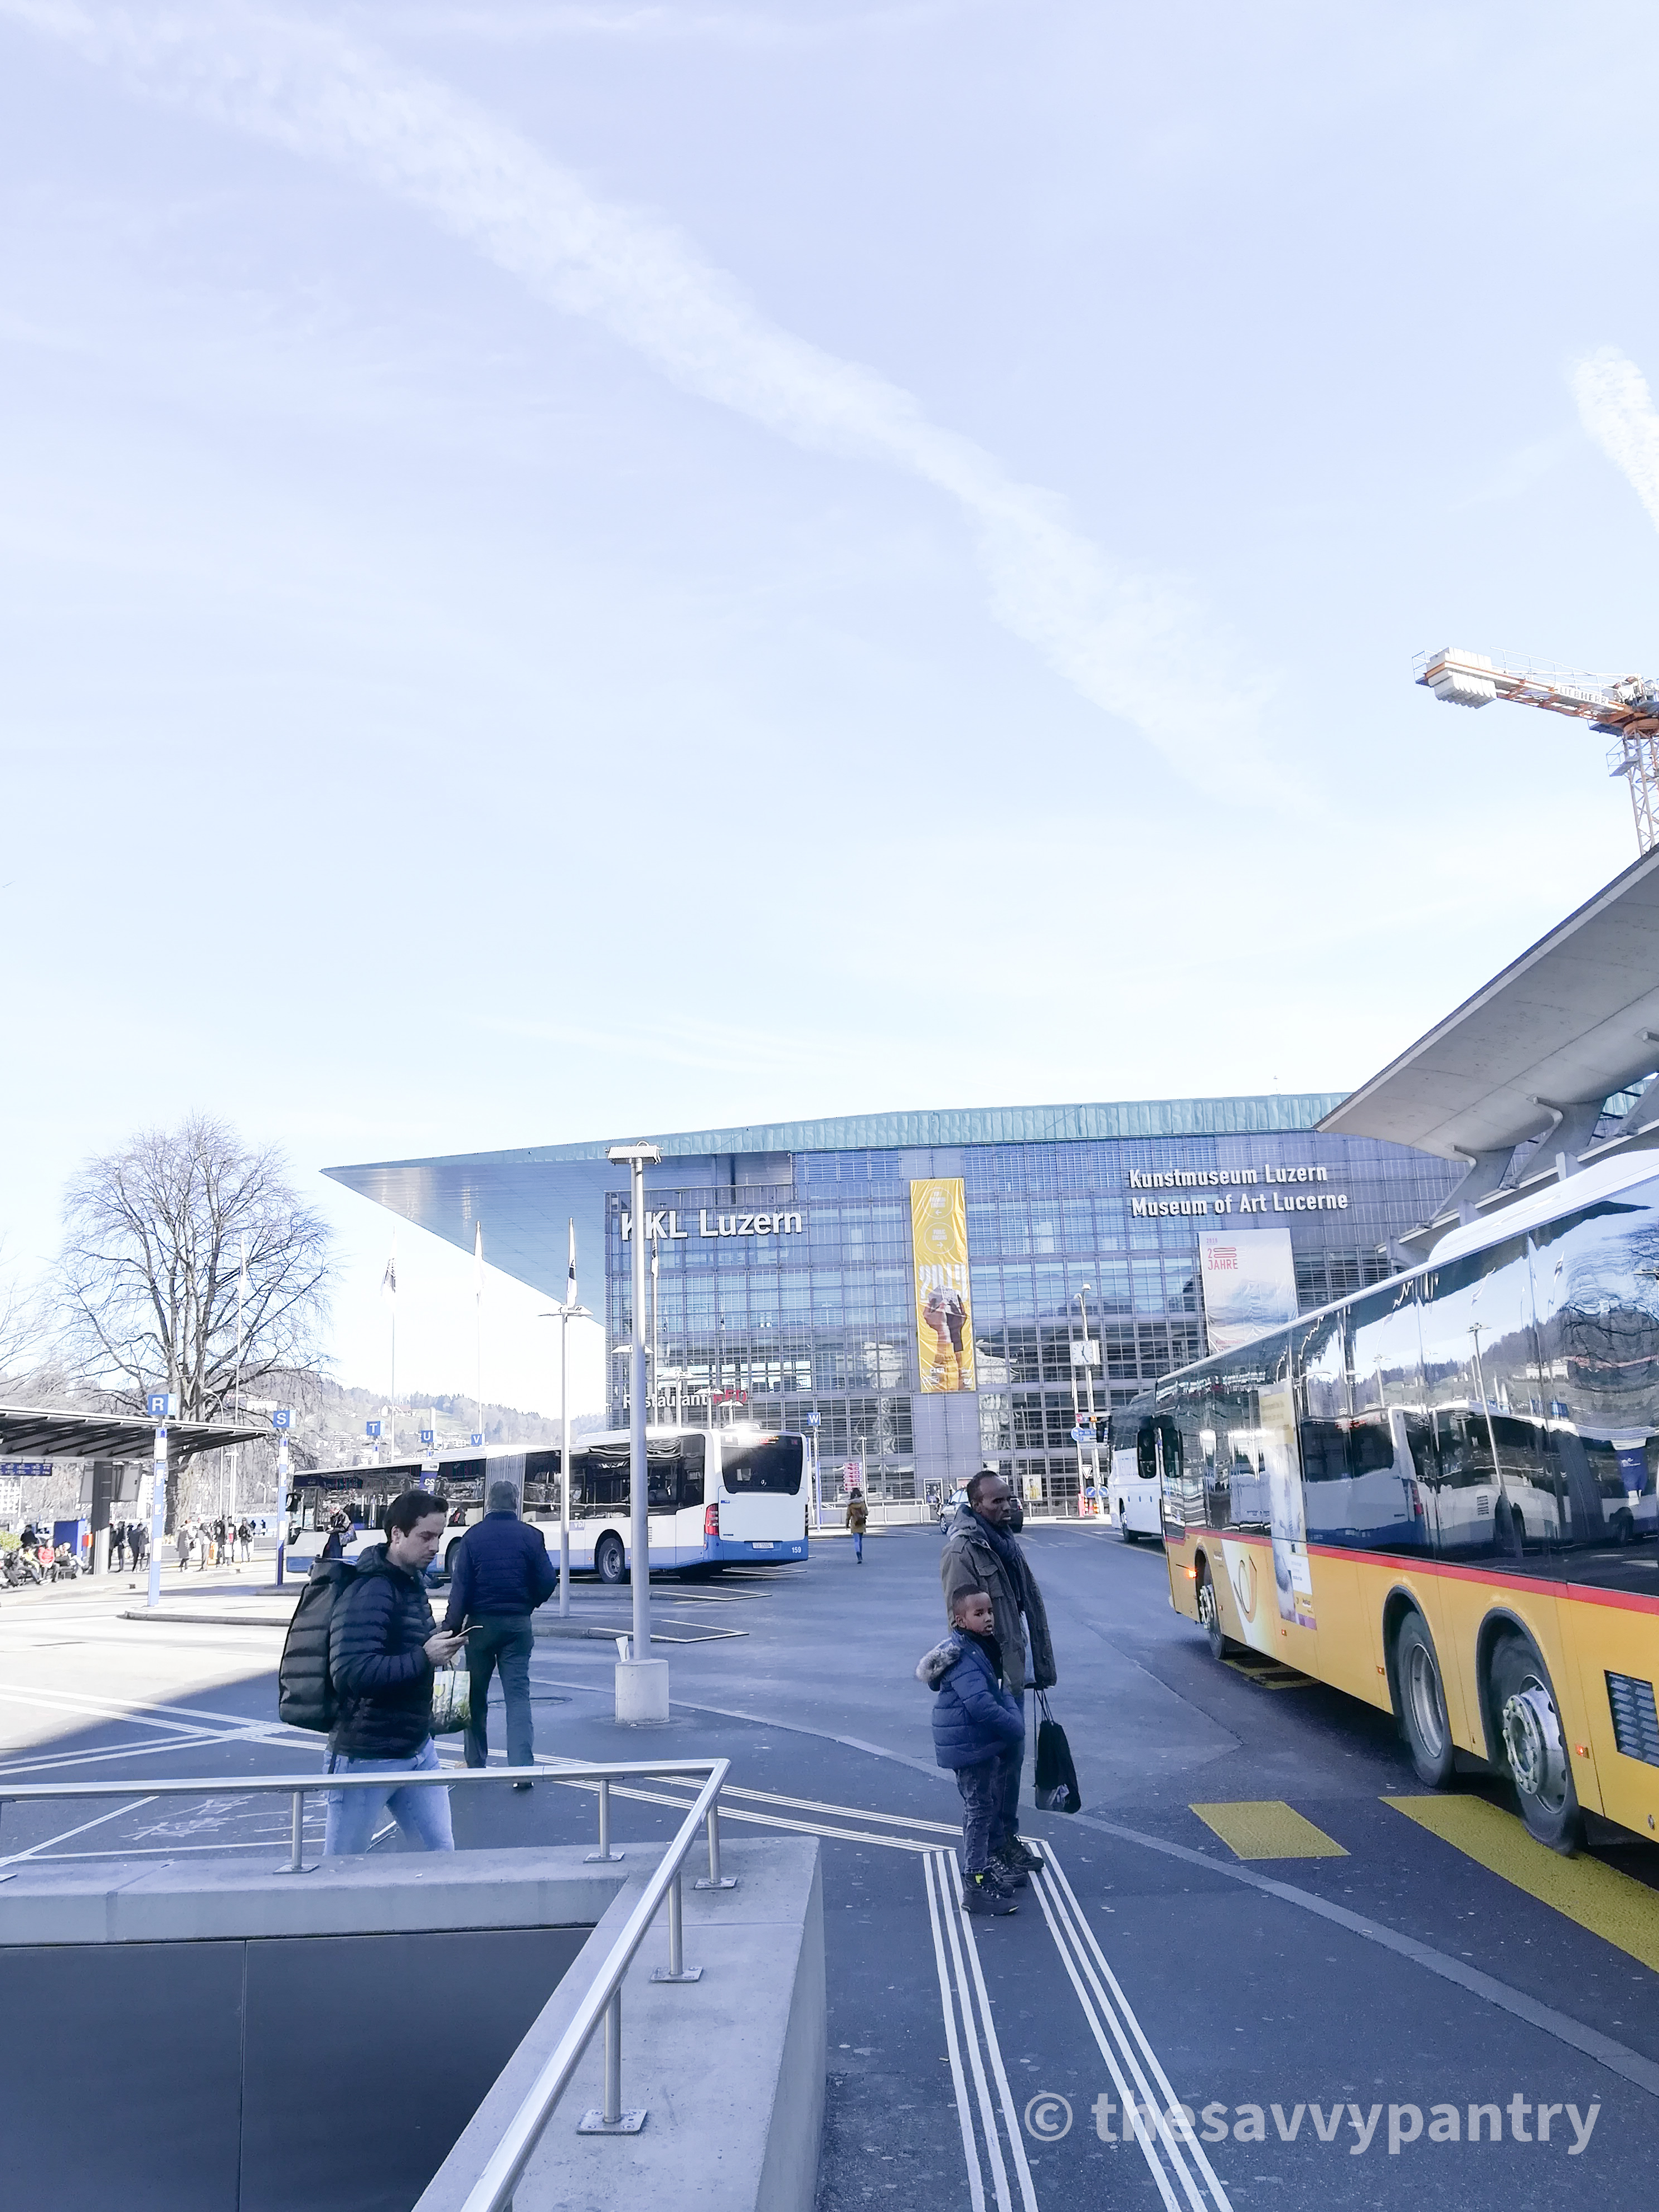
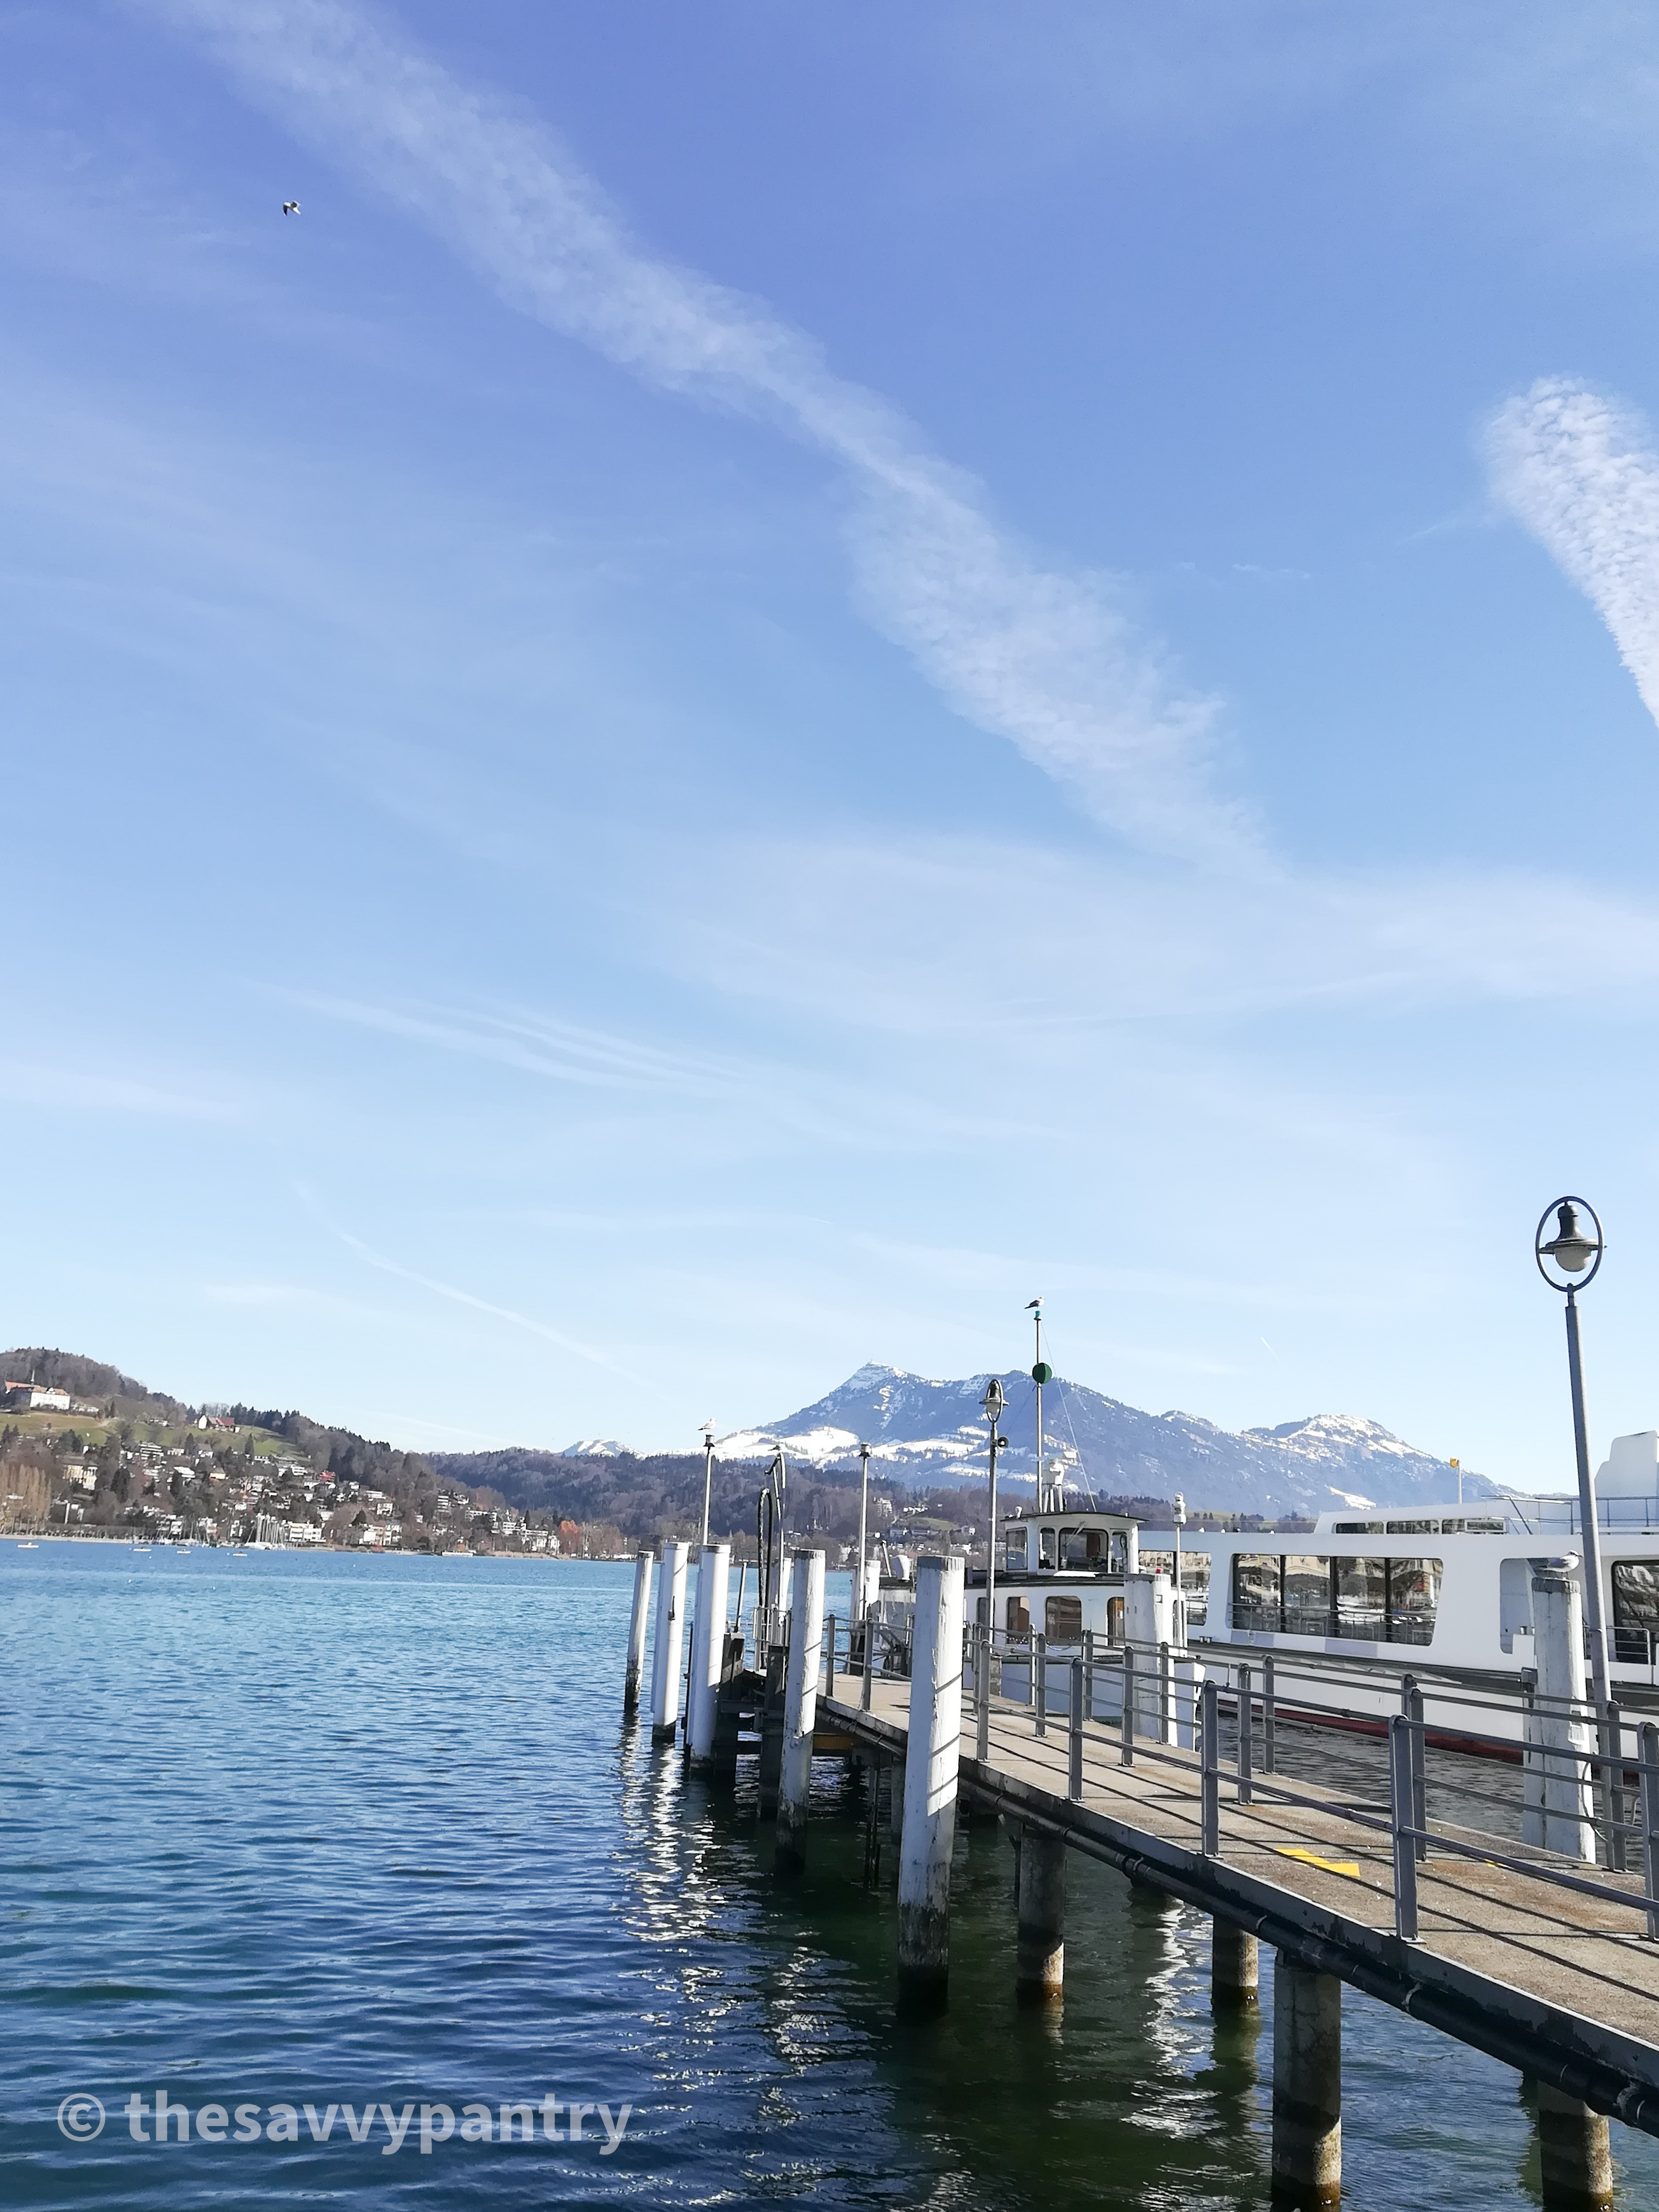
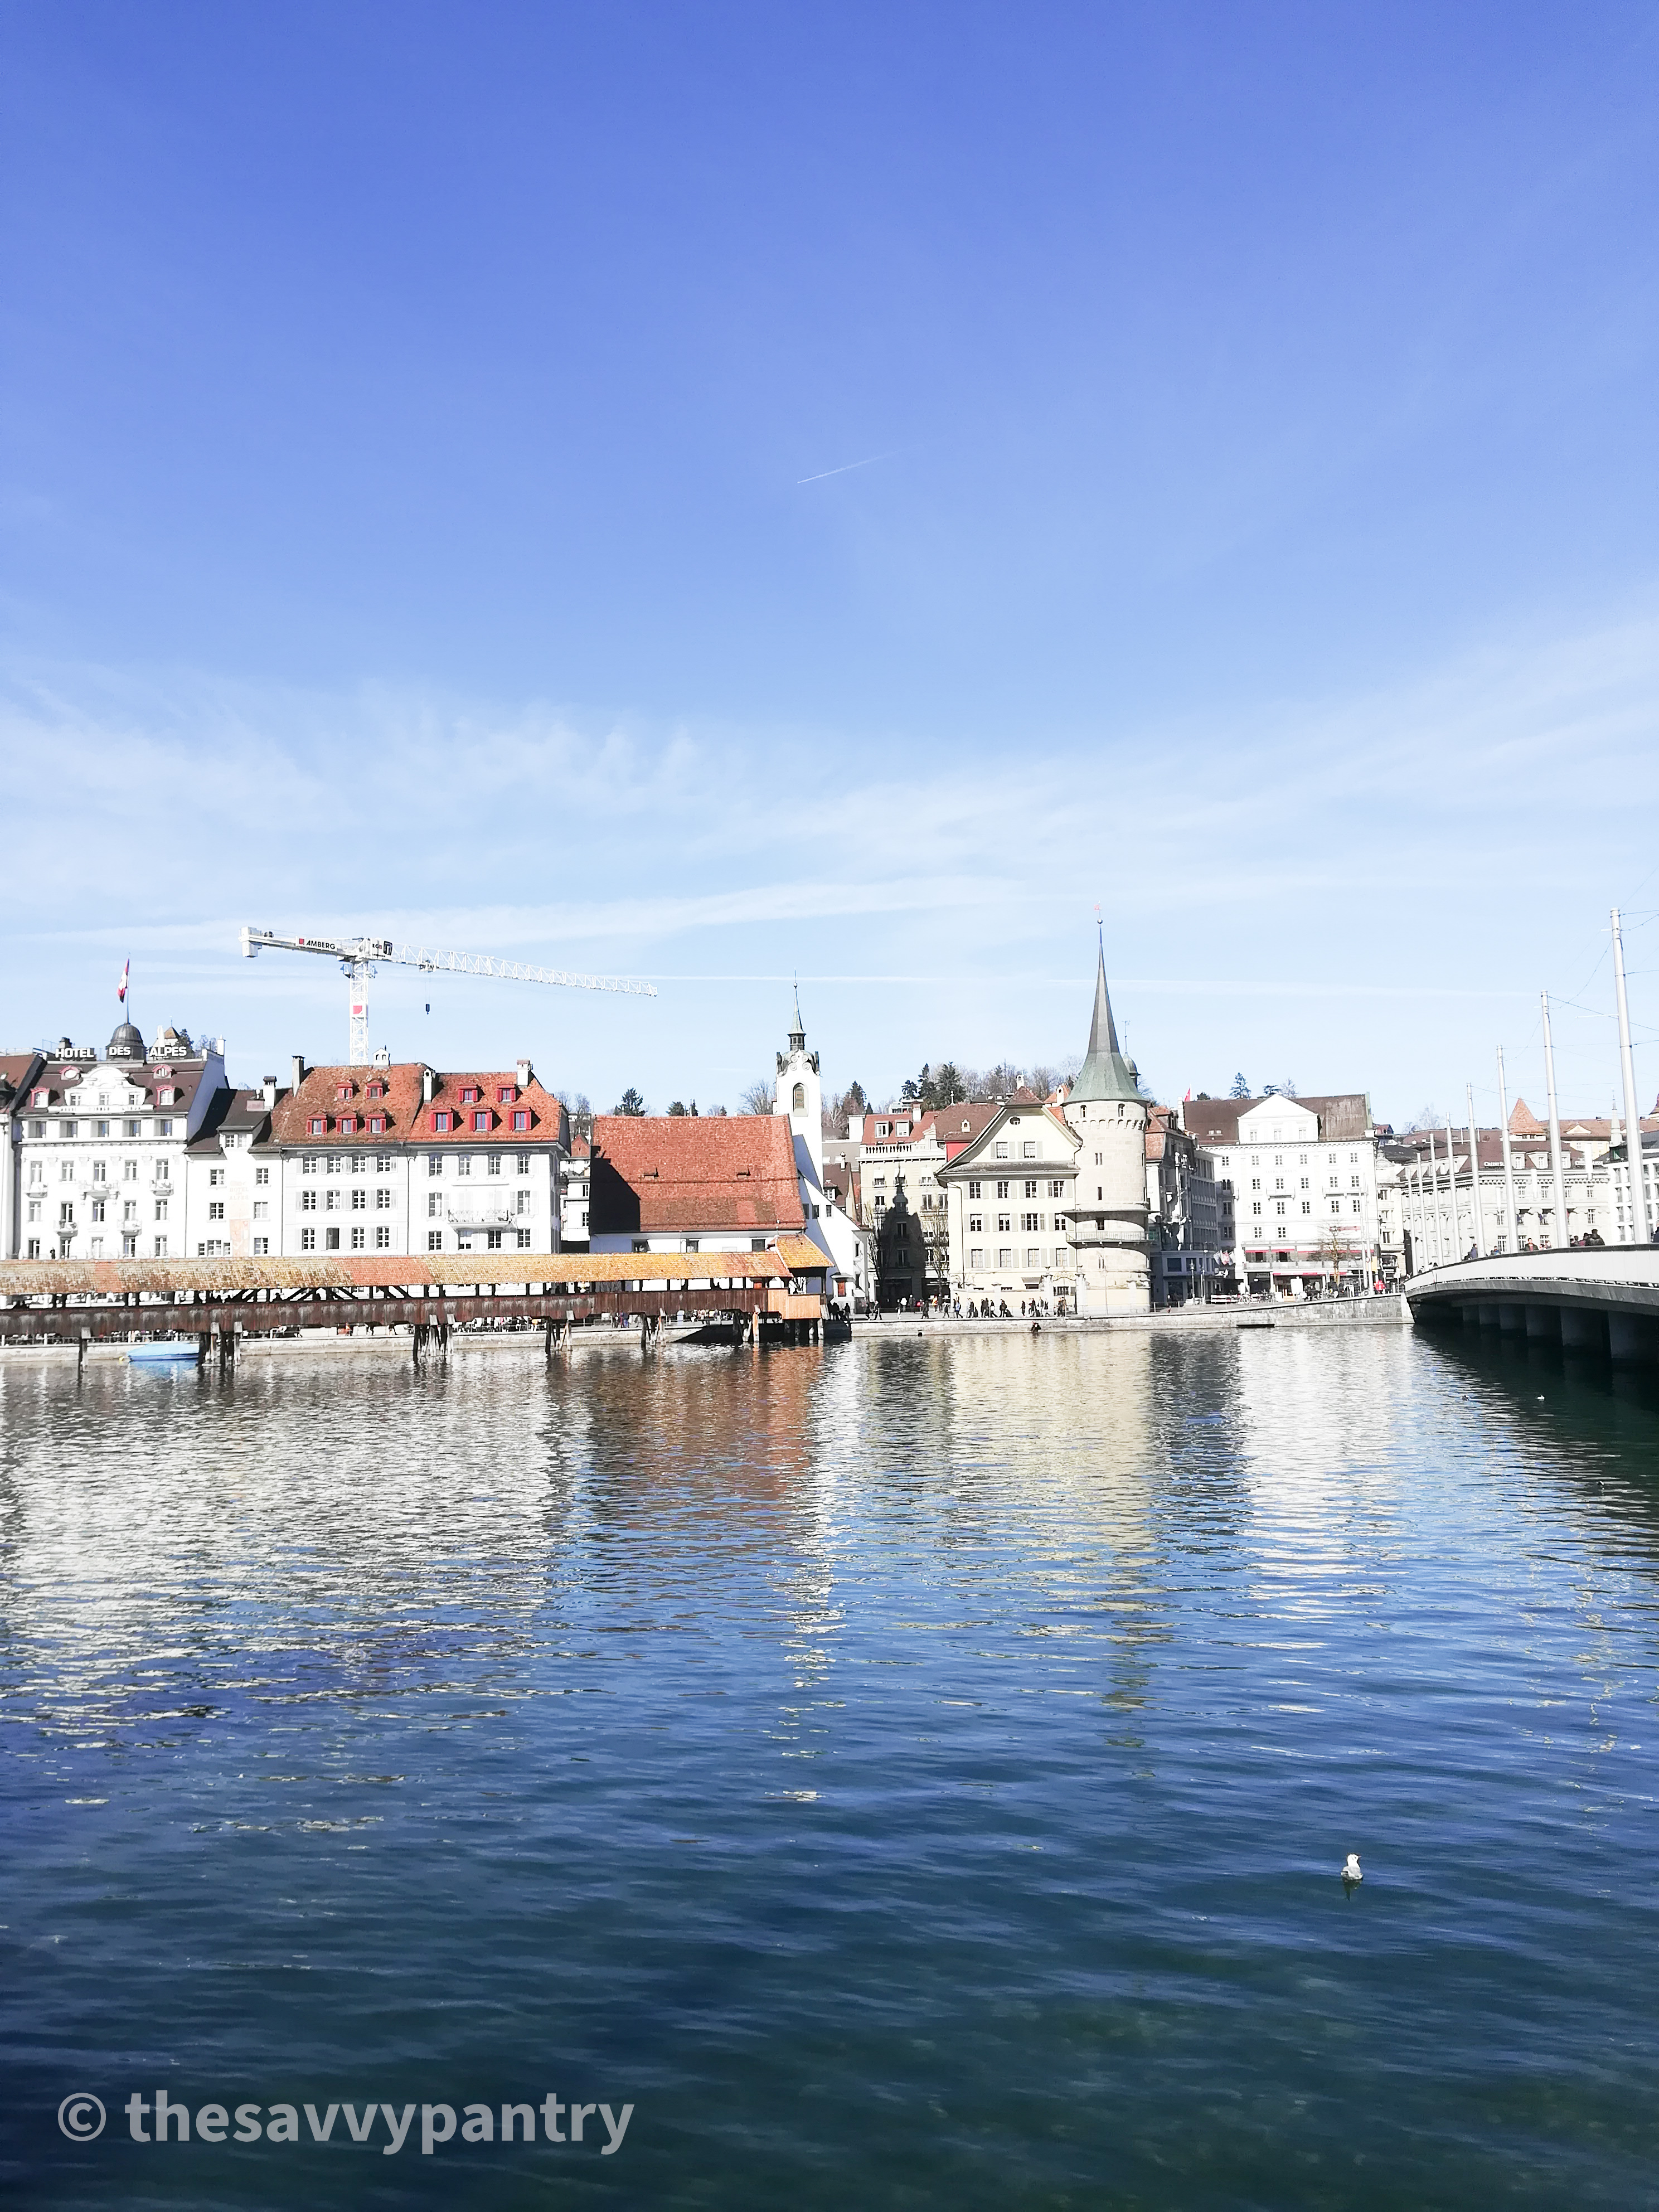

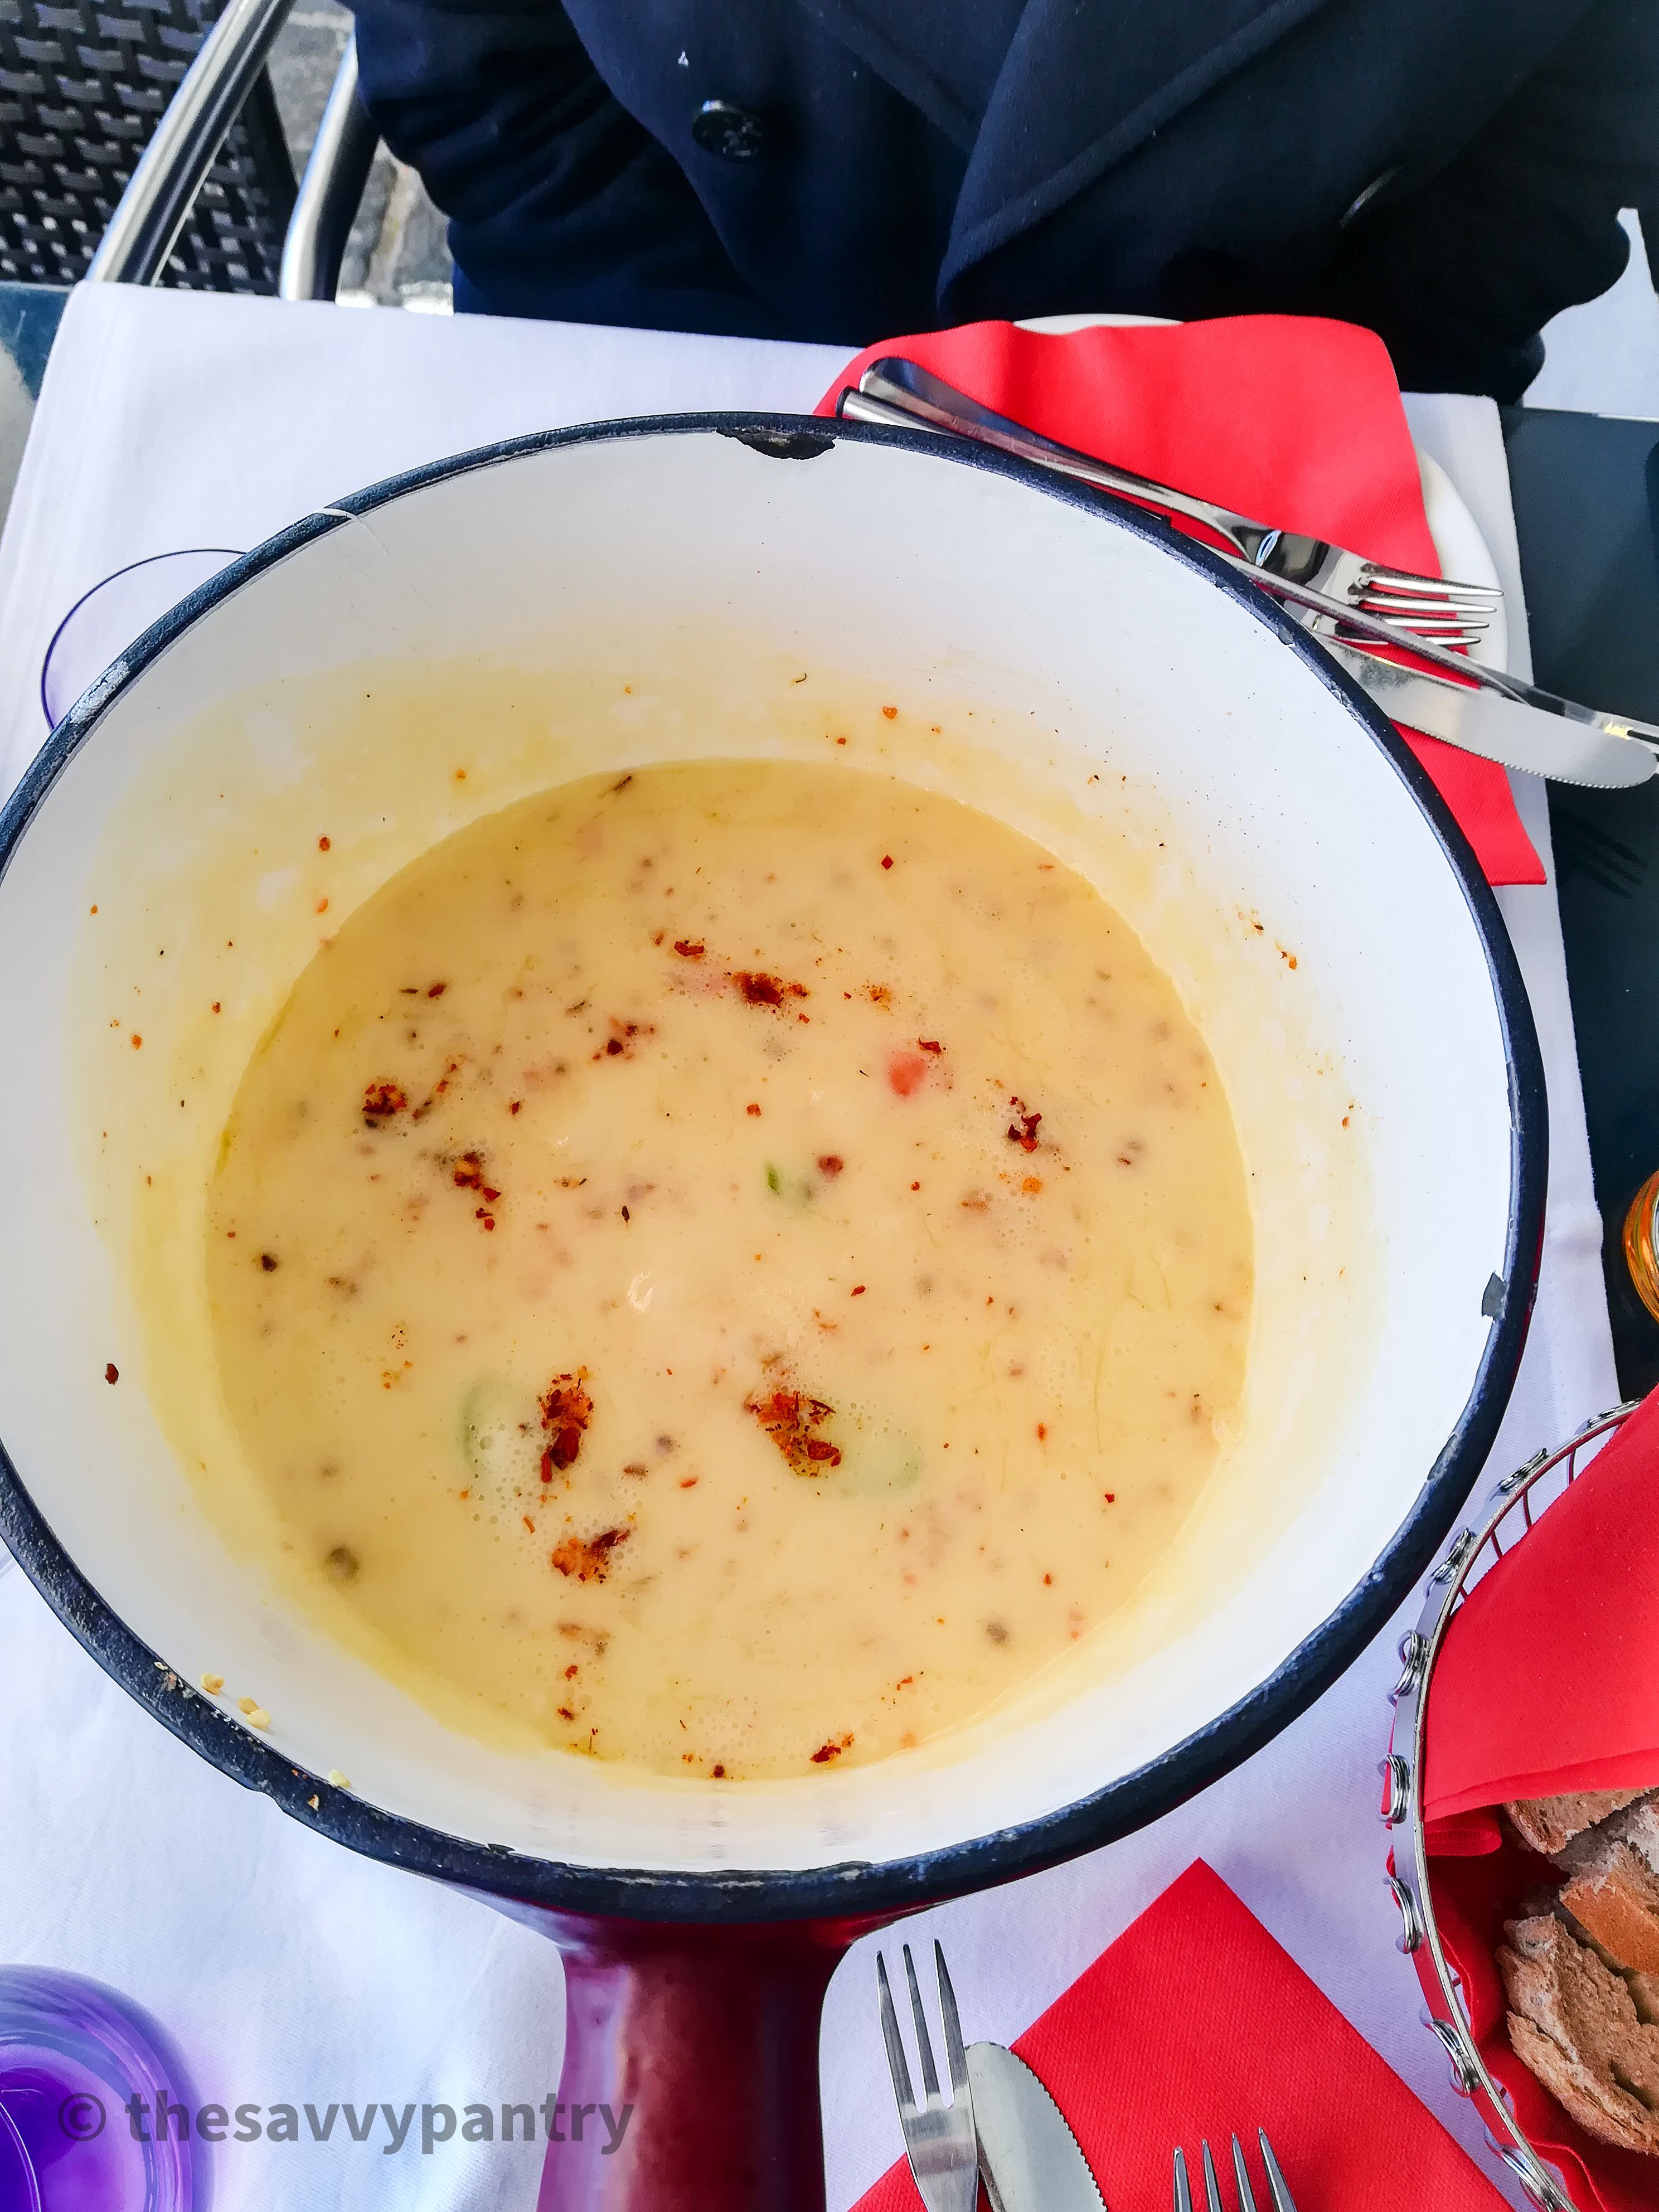
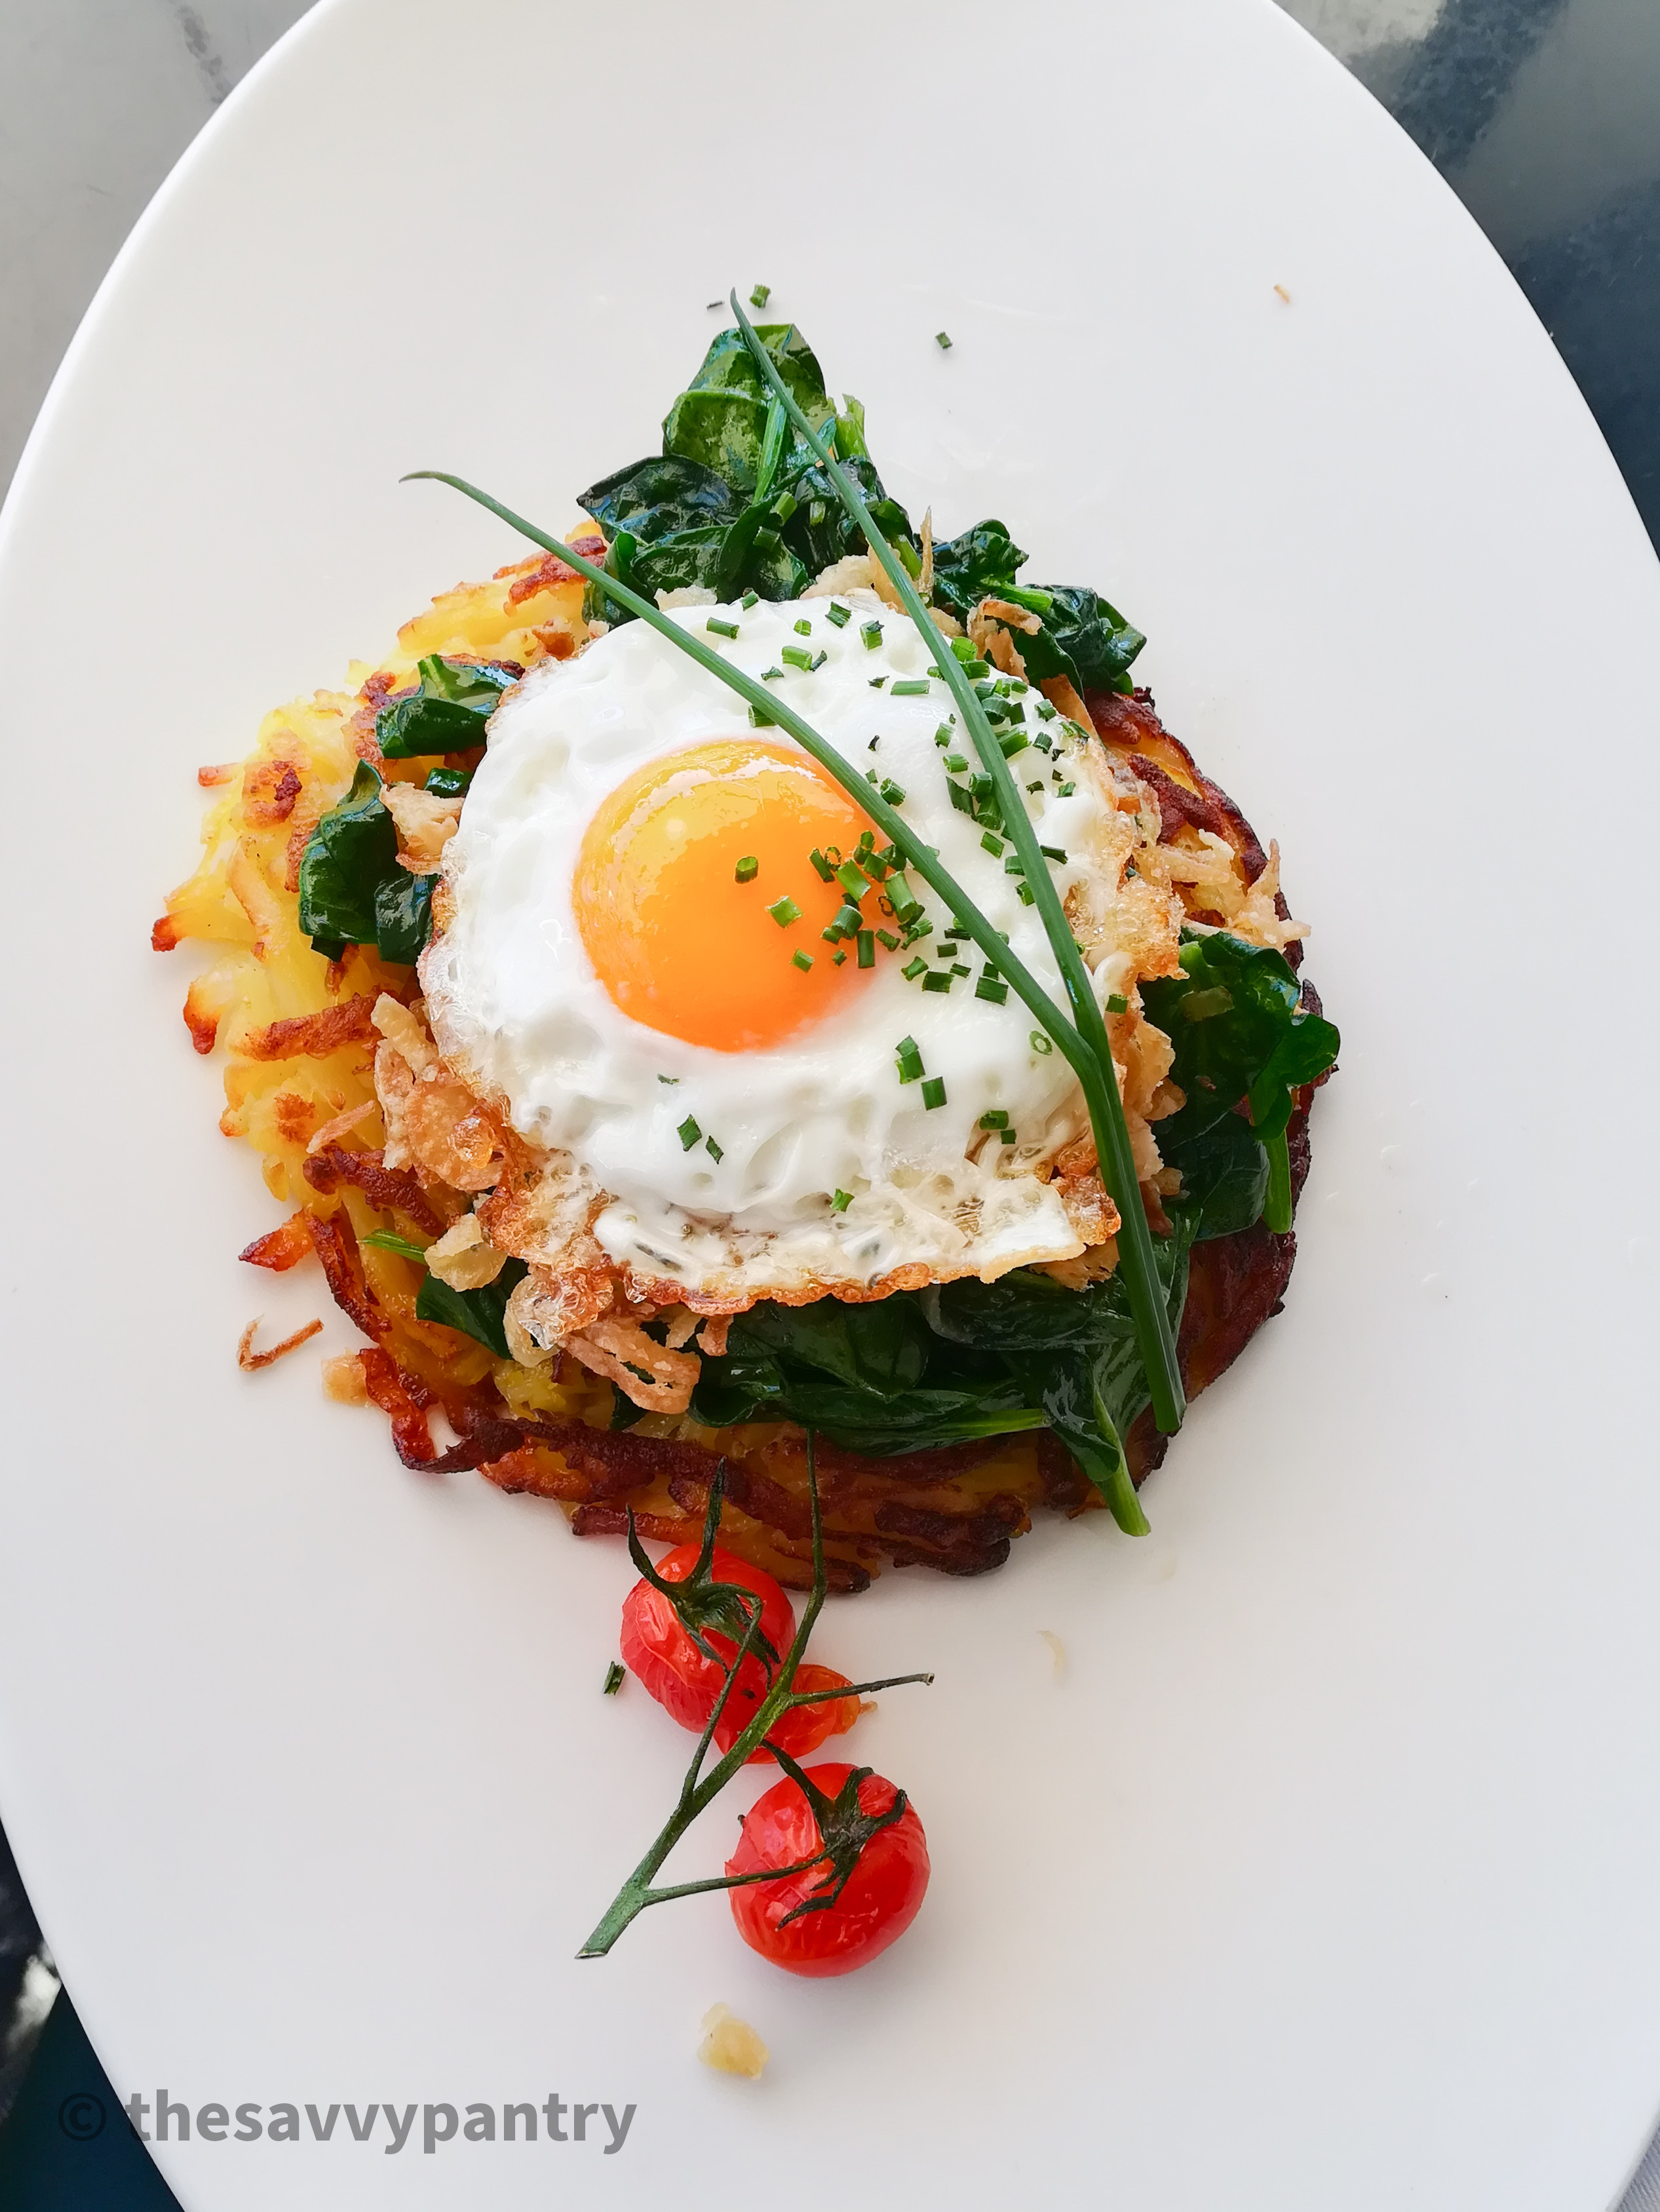
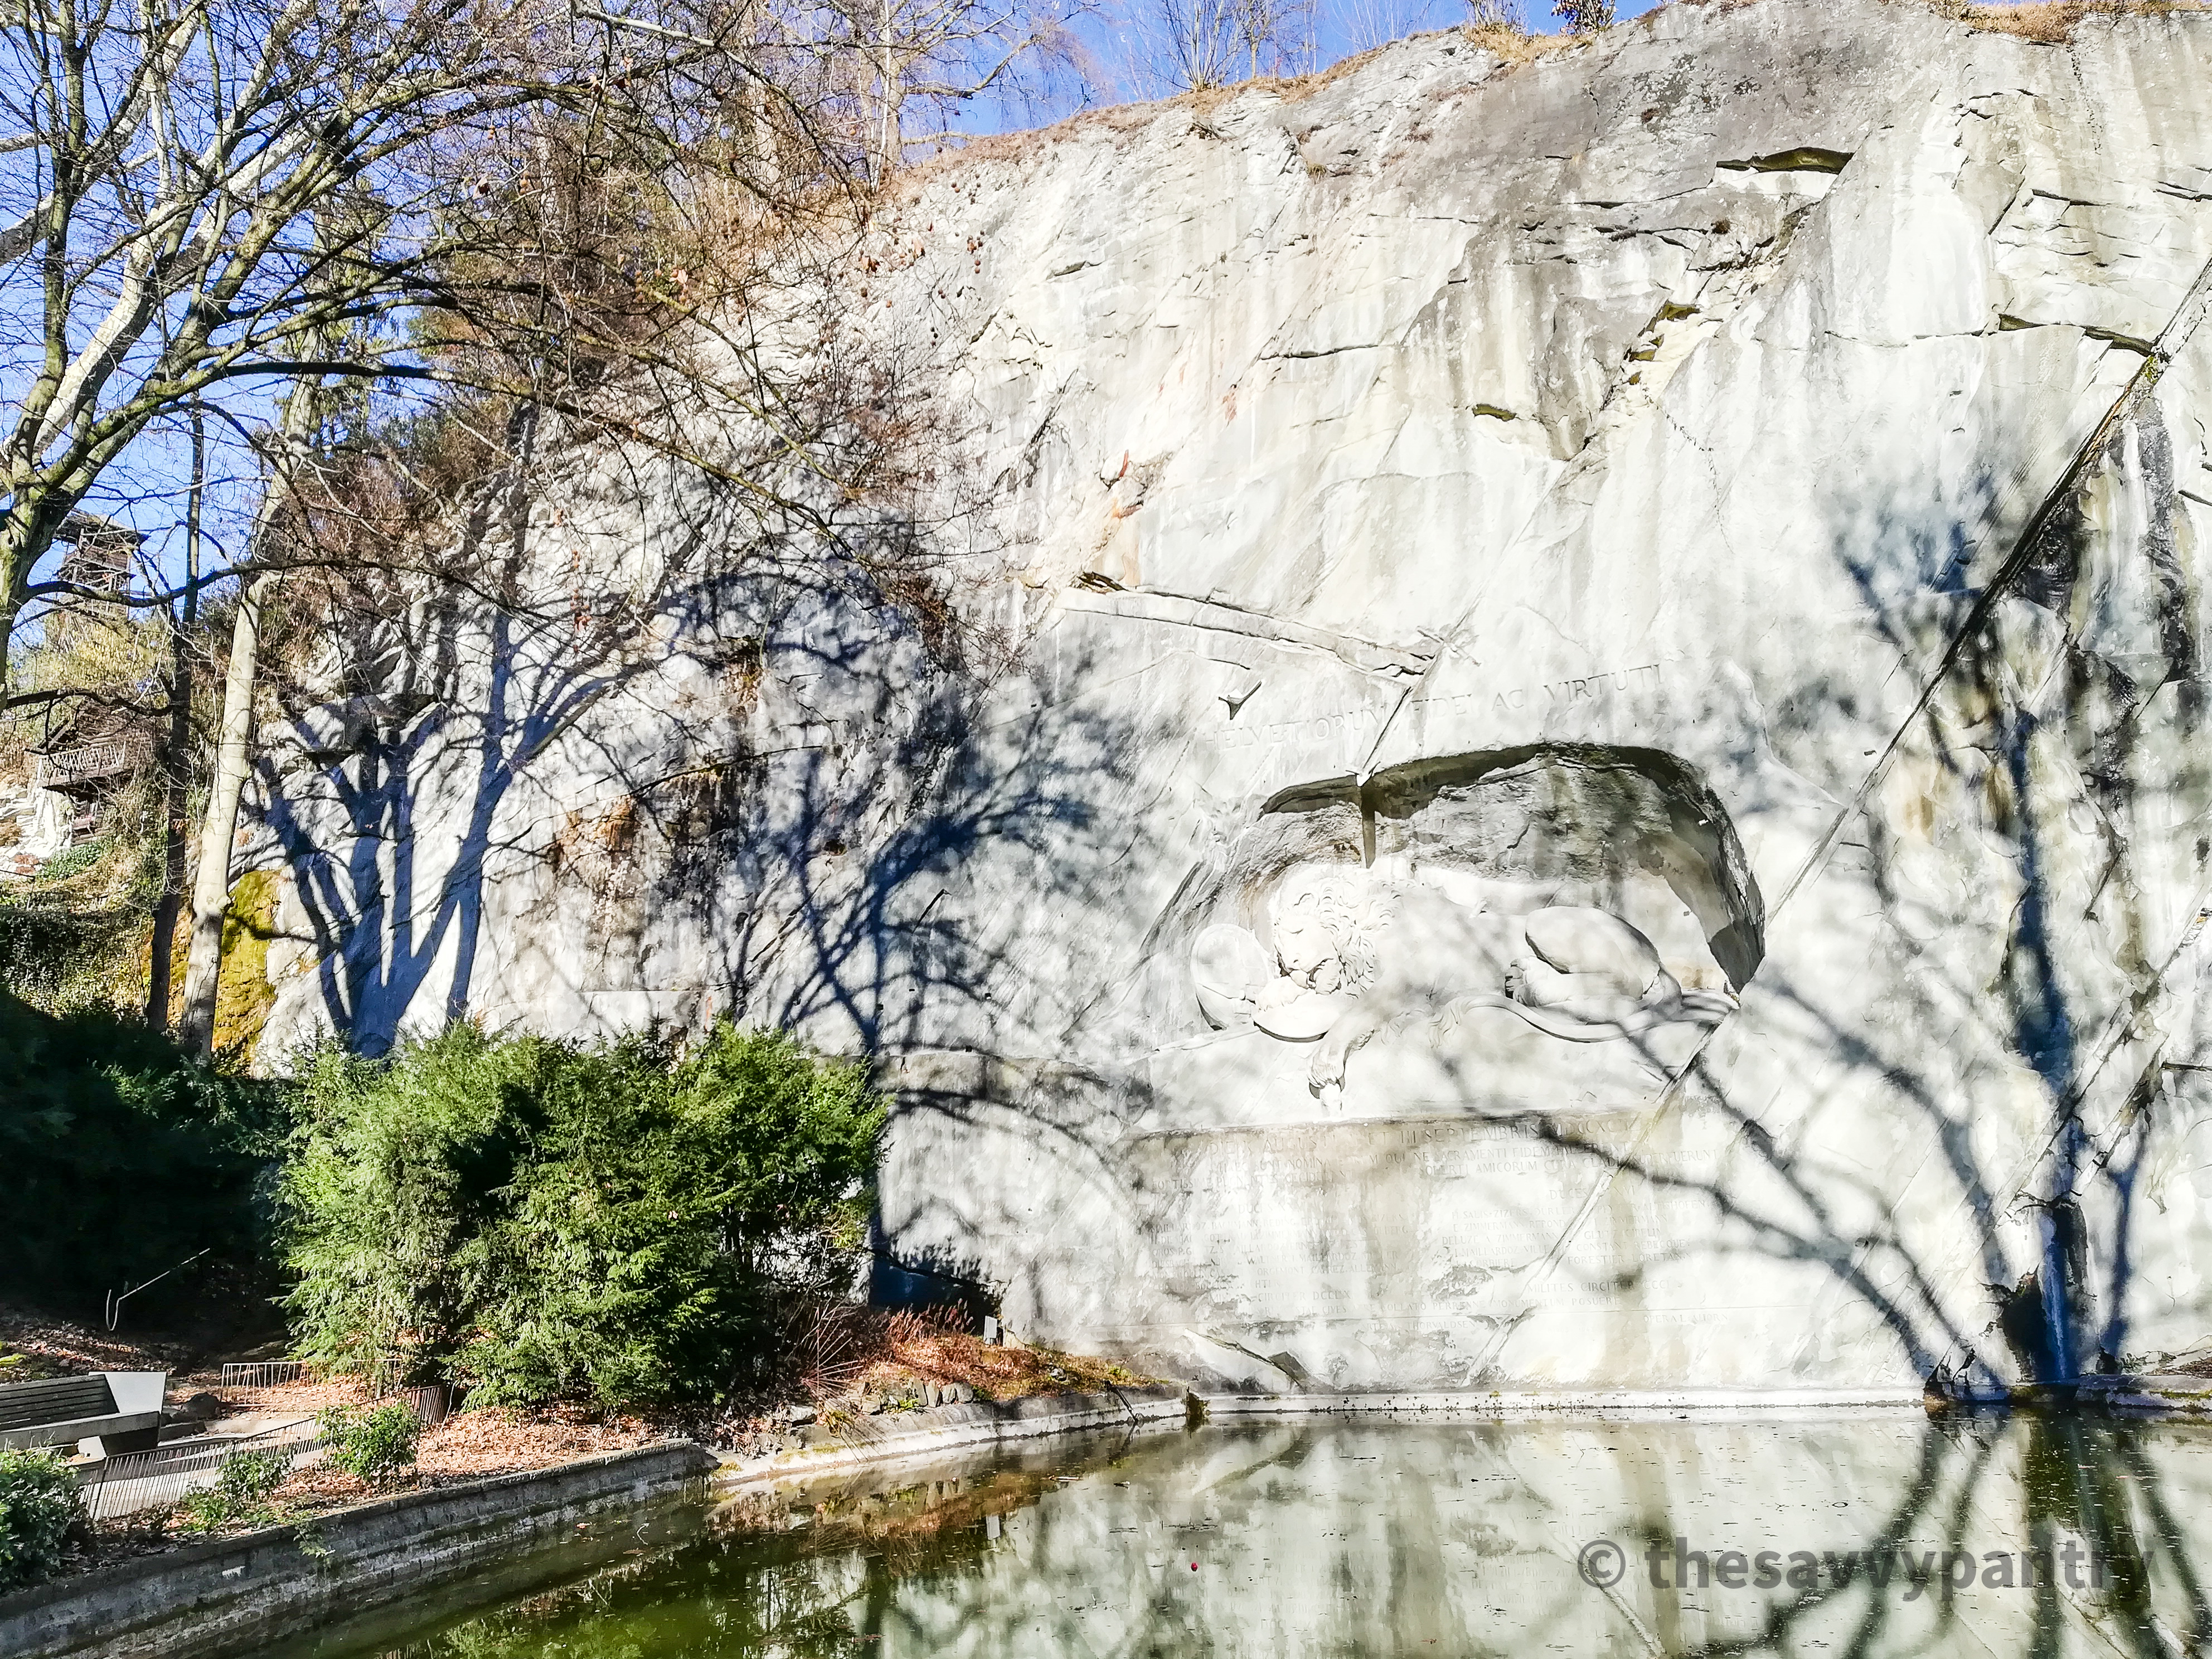
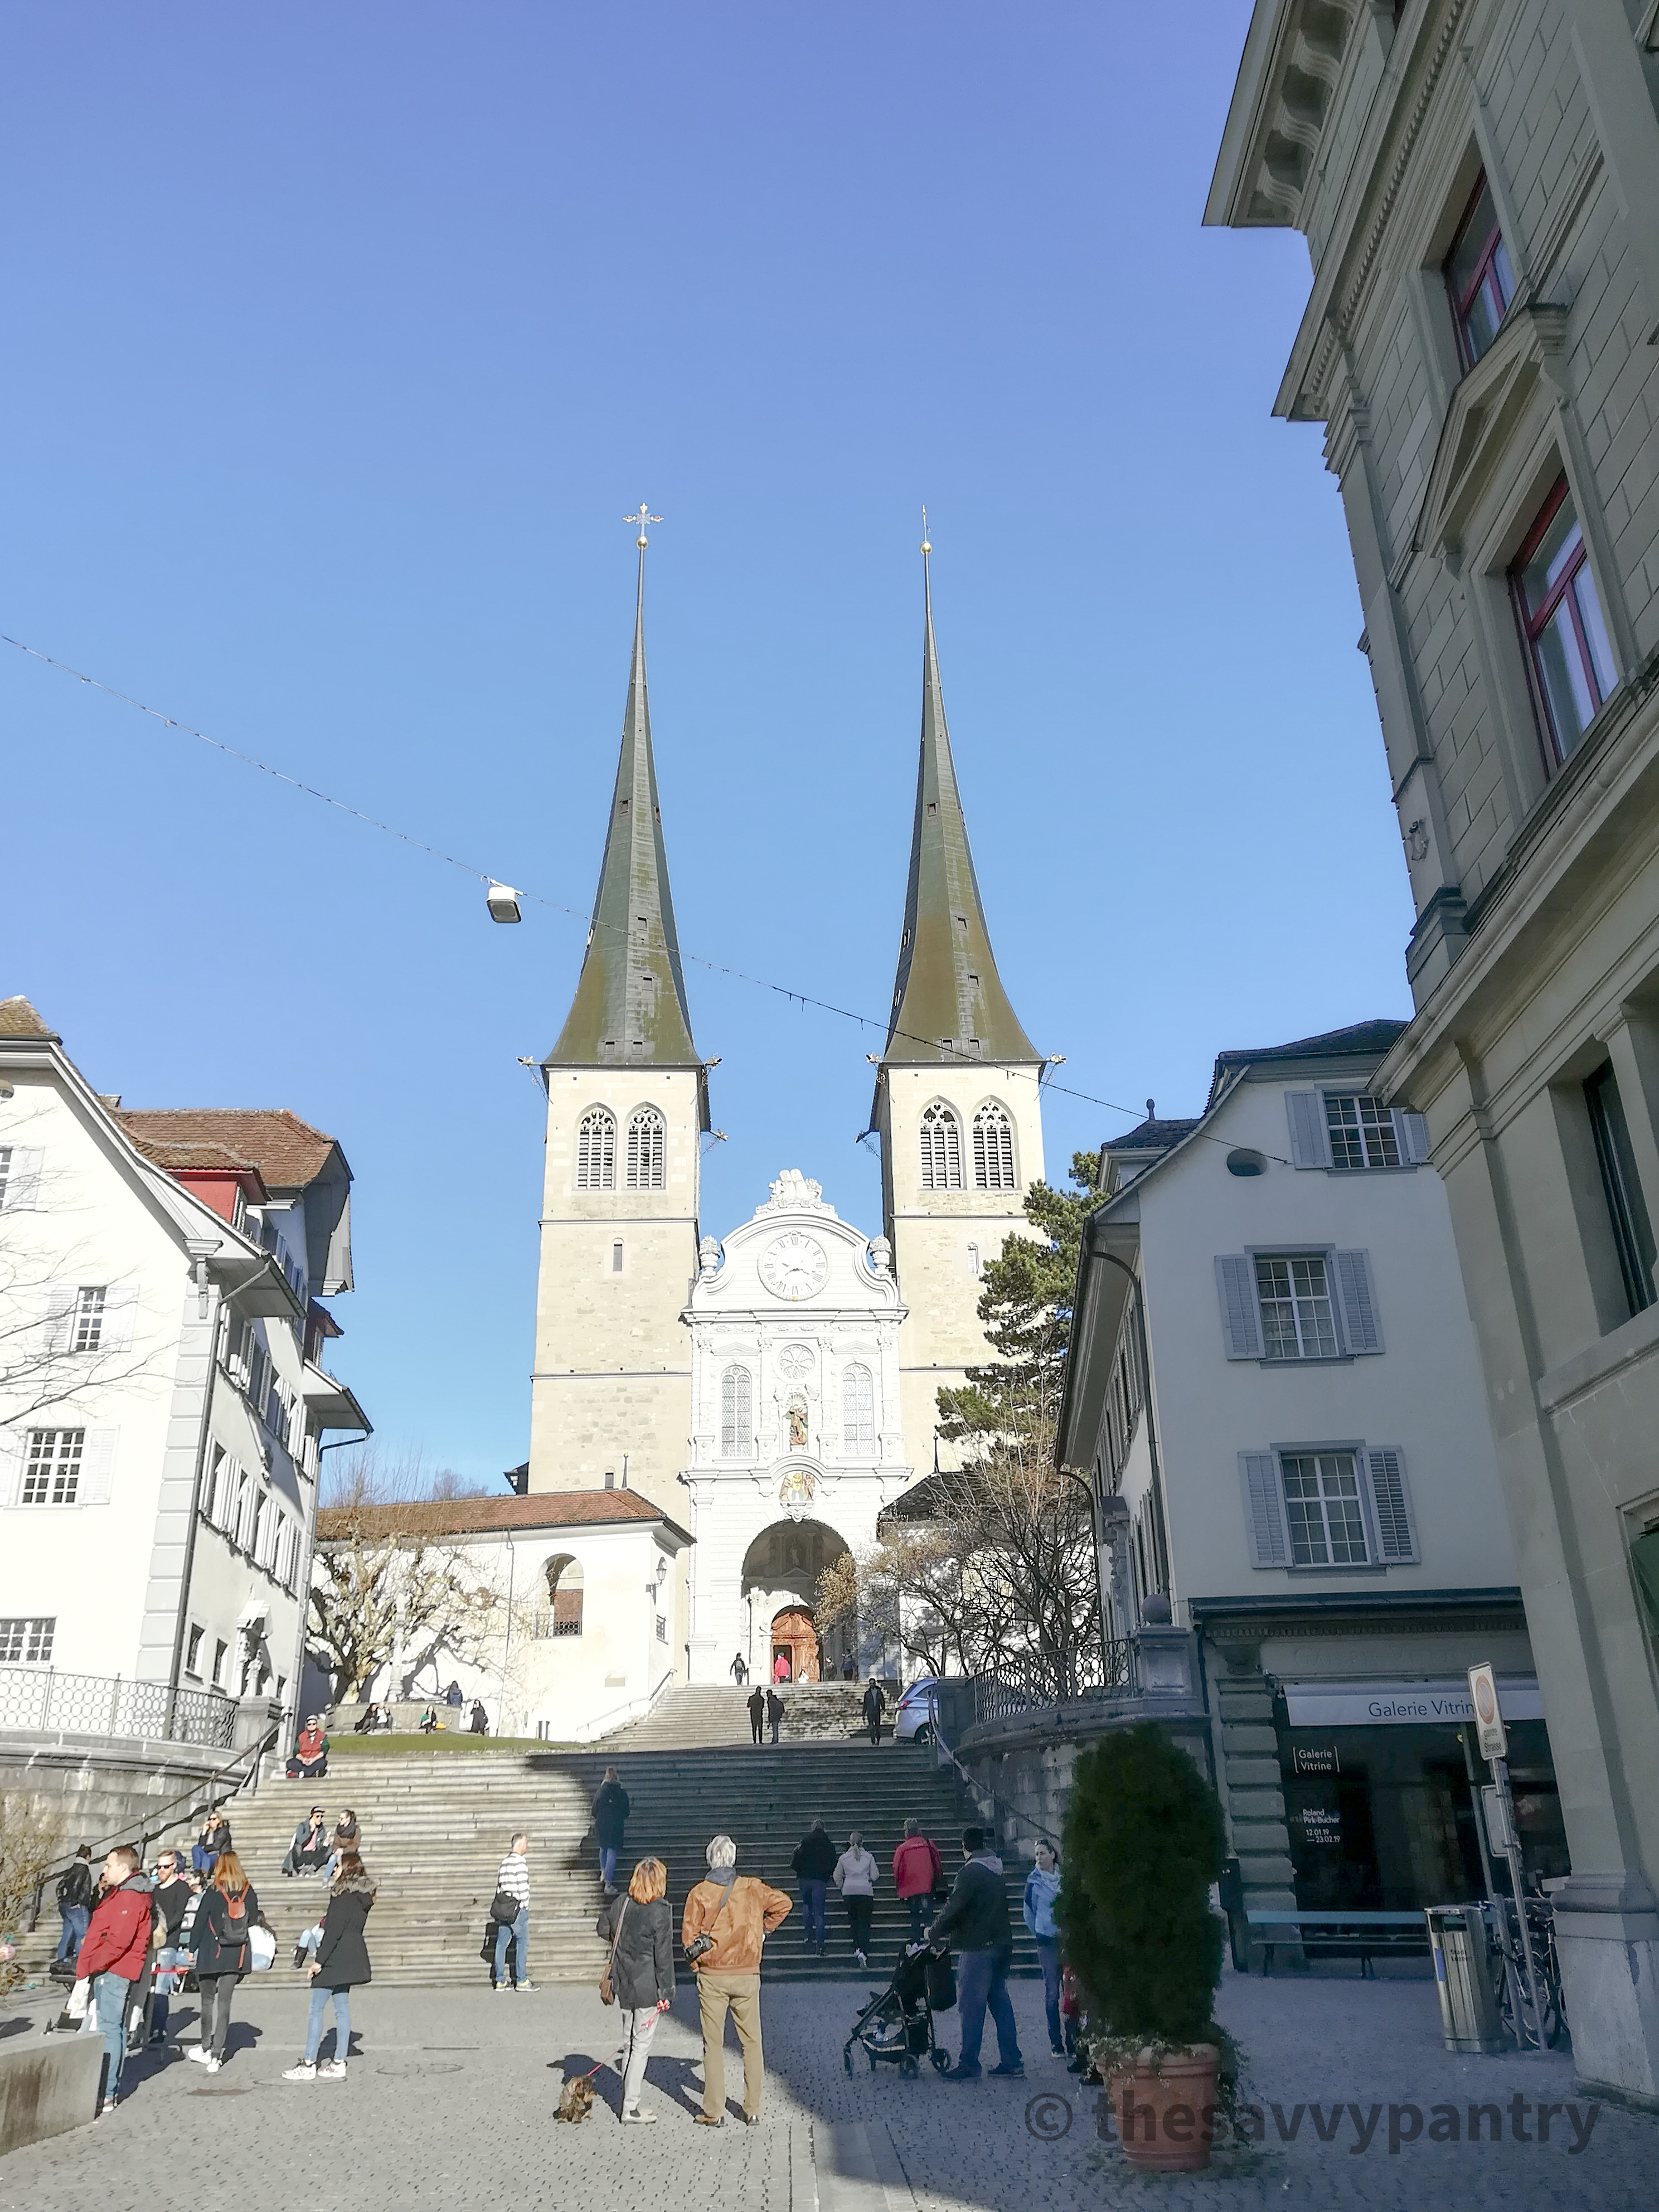


")
")

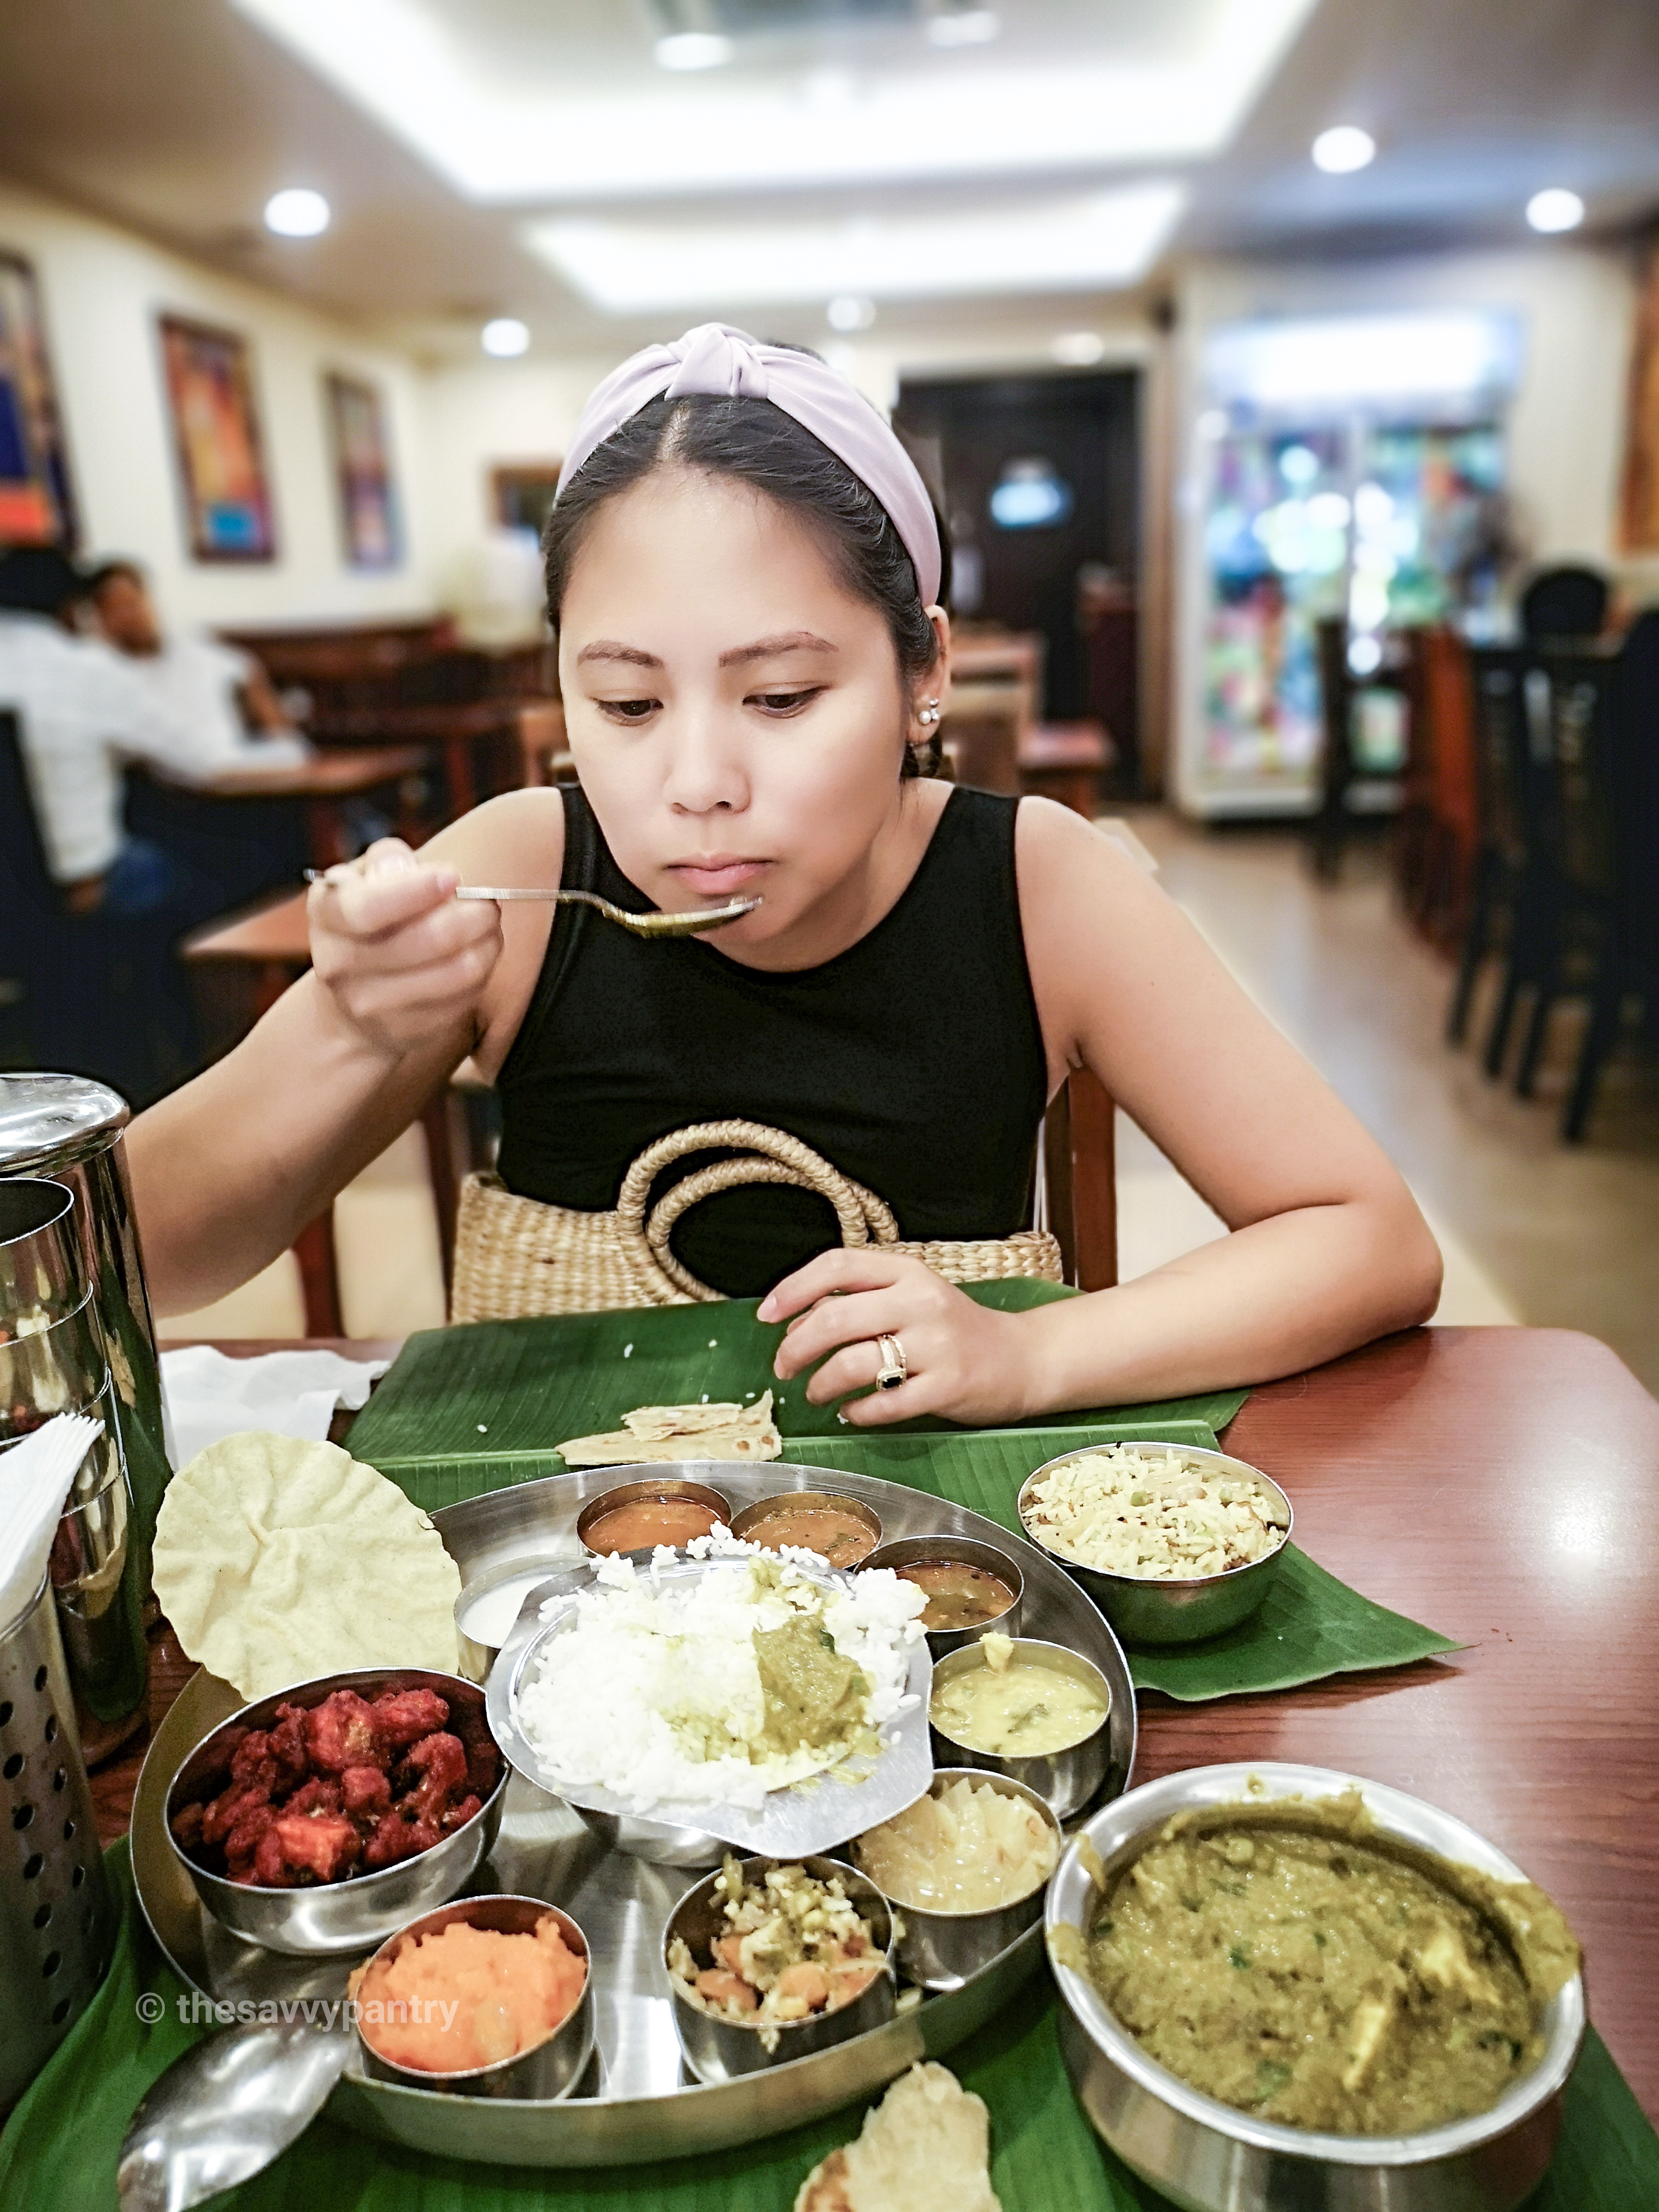
")
")
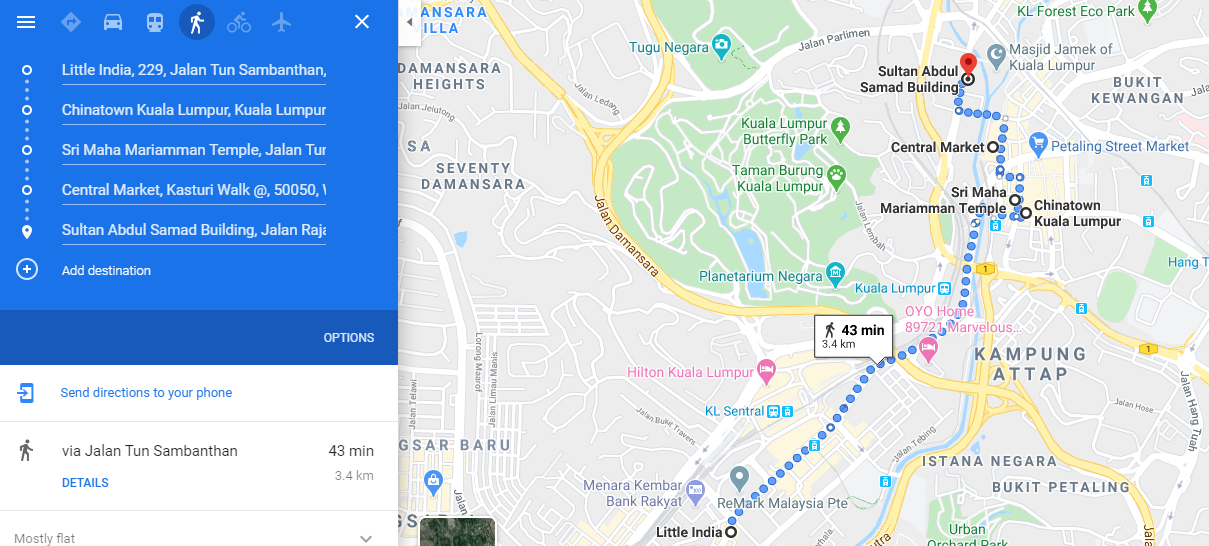


")
")
")
")

")
")
")
")
")
")
")
")
")
")
")
")
")
")
")
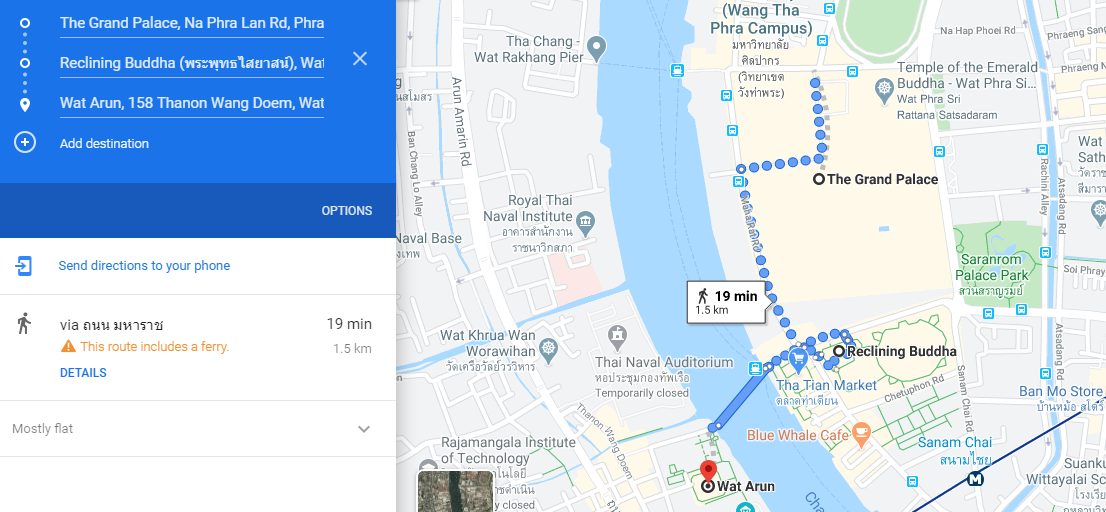

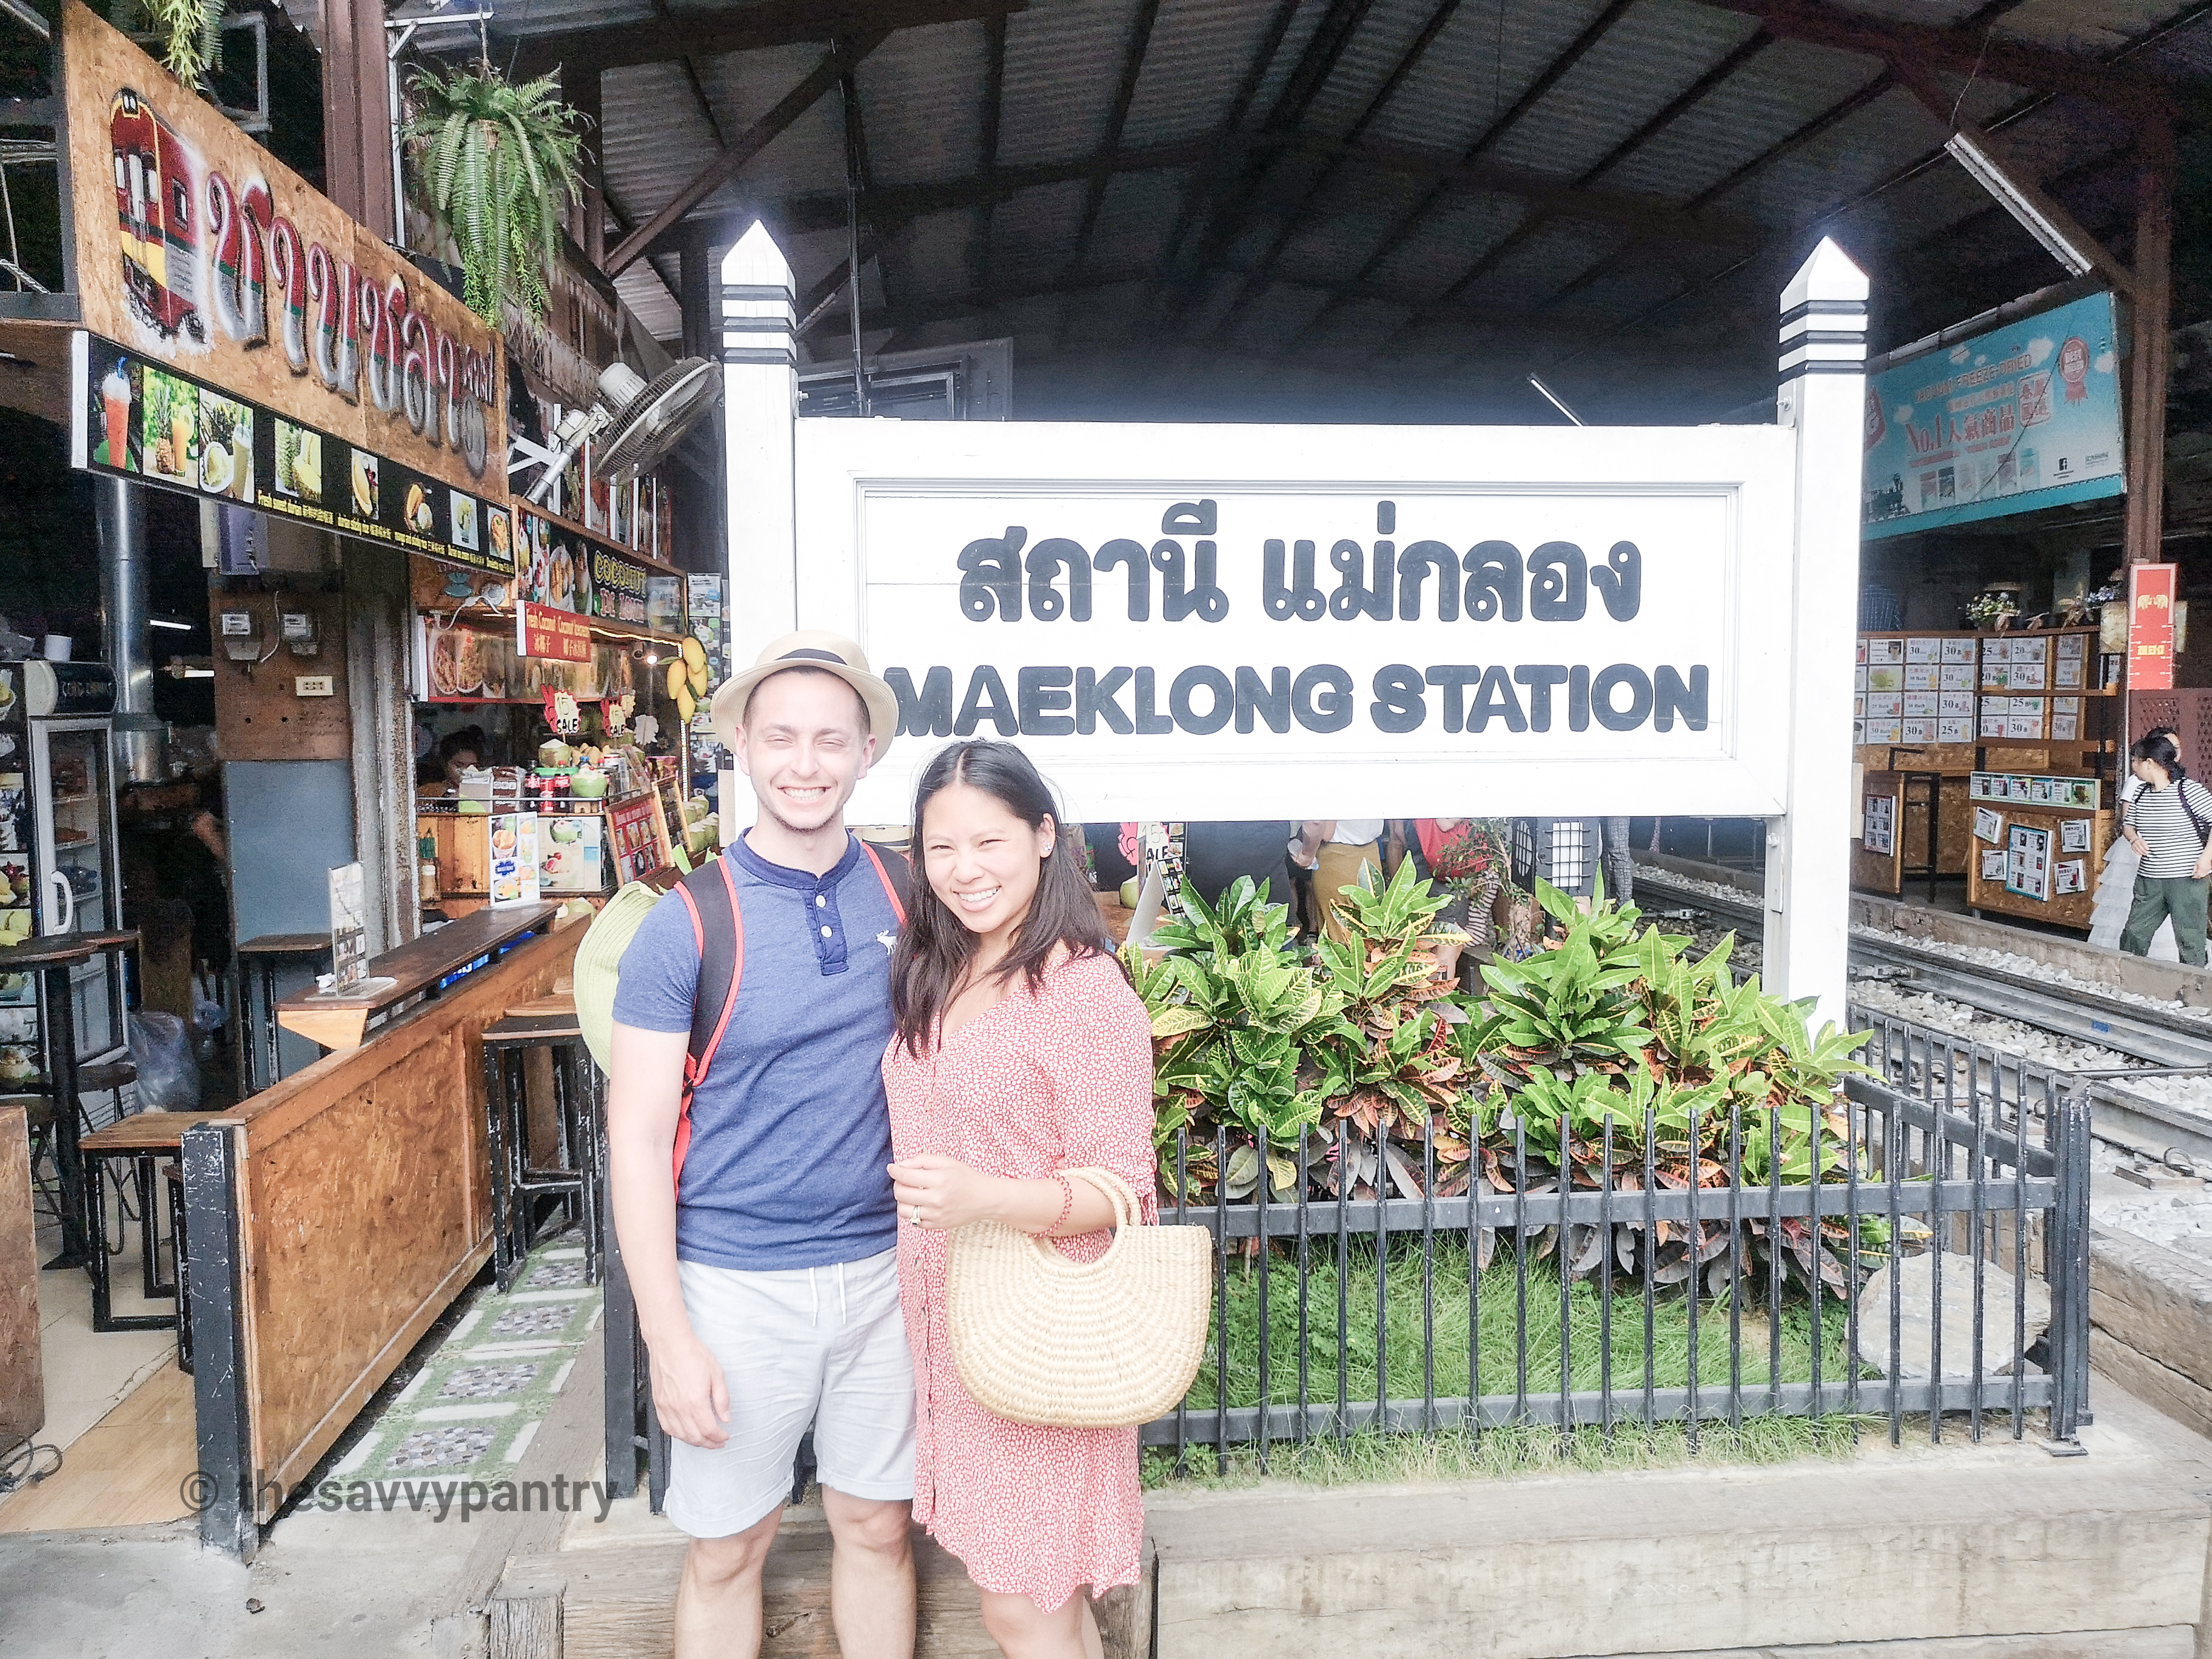
")
")
")
")
")
")
")
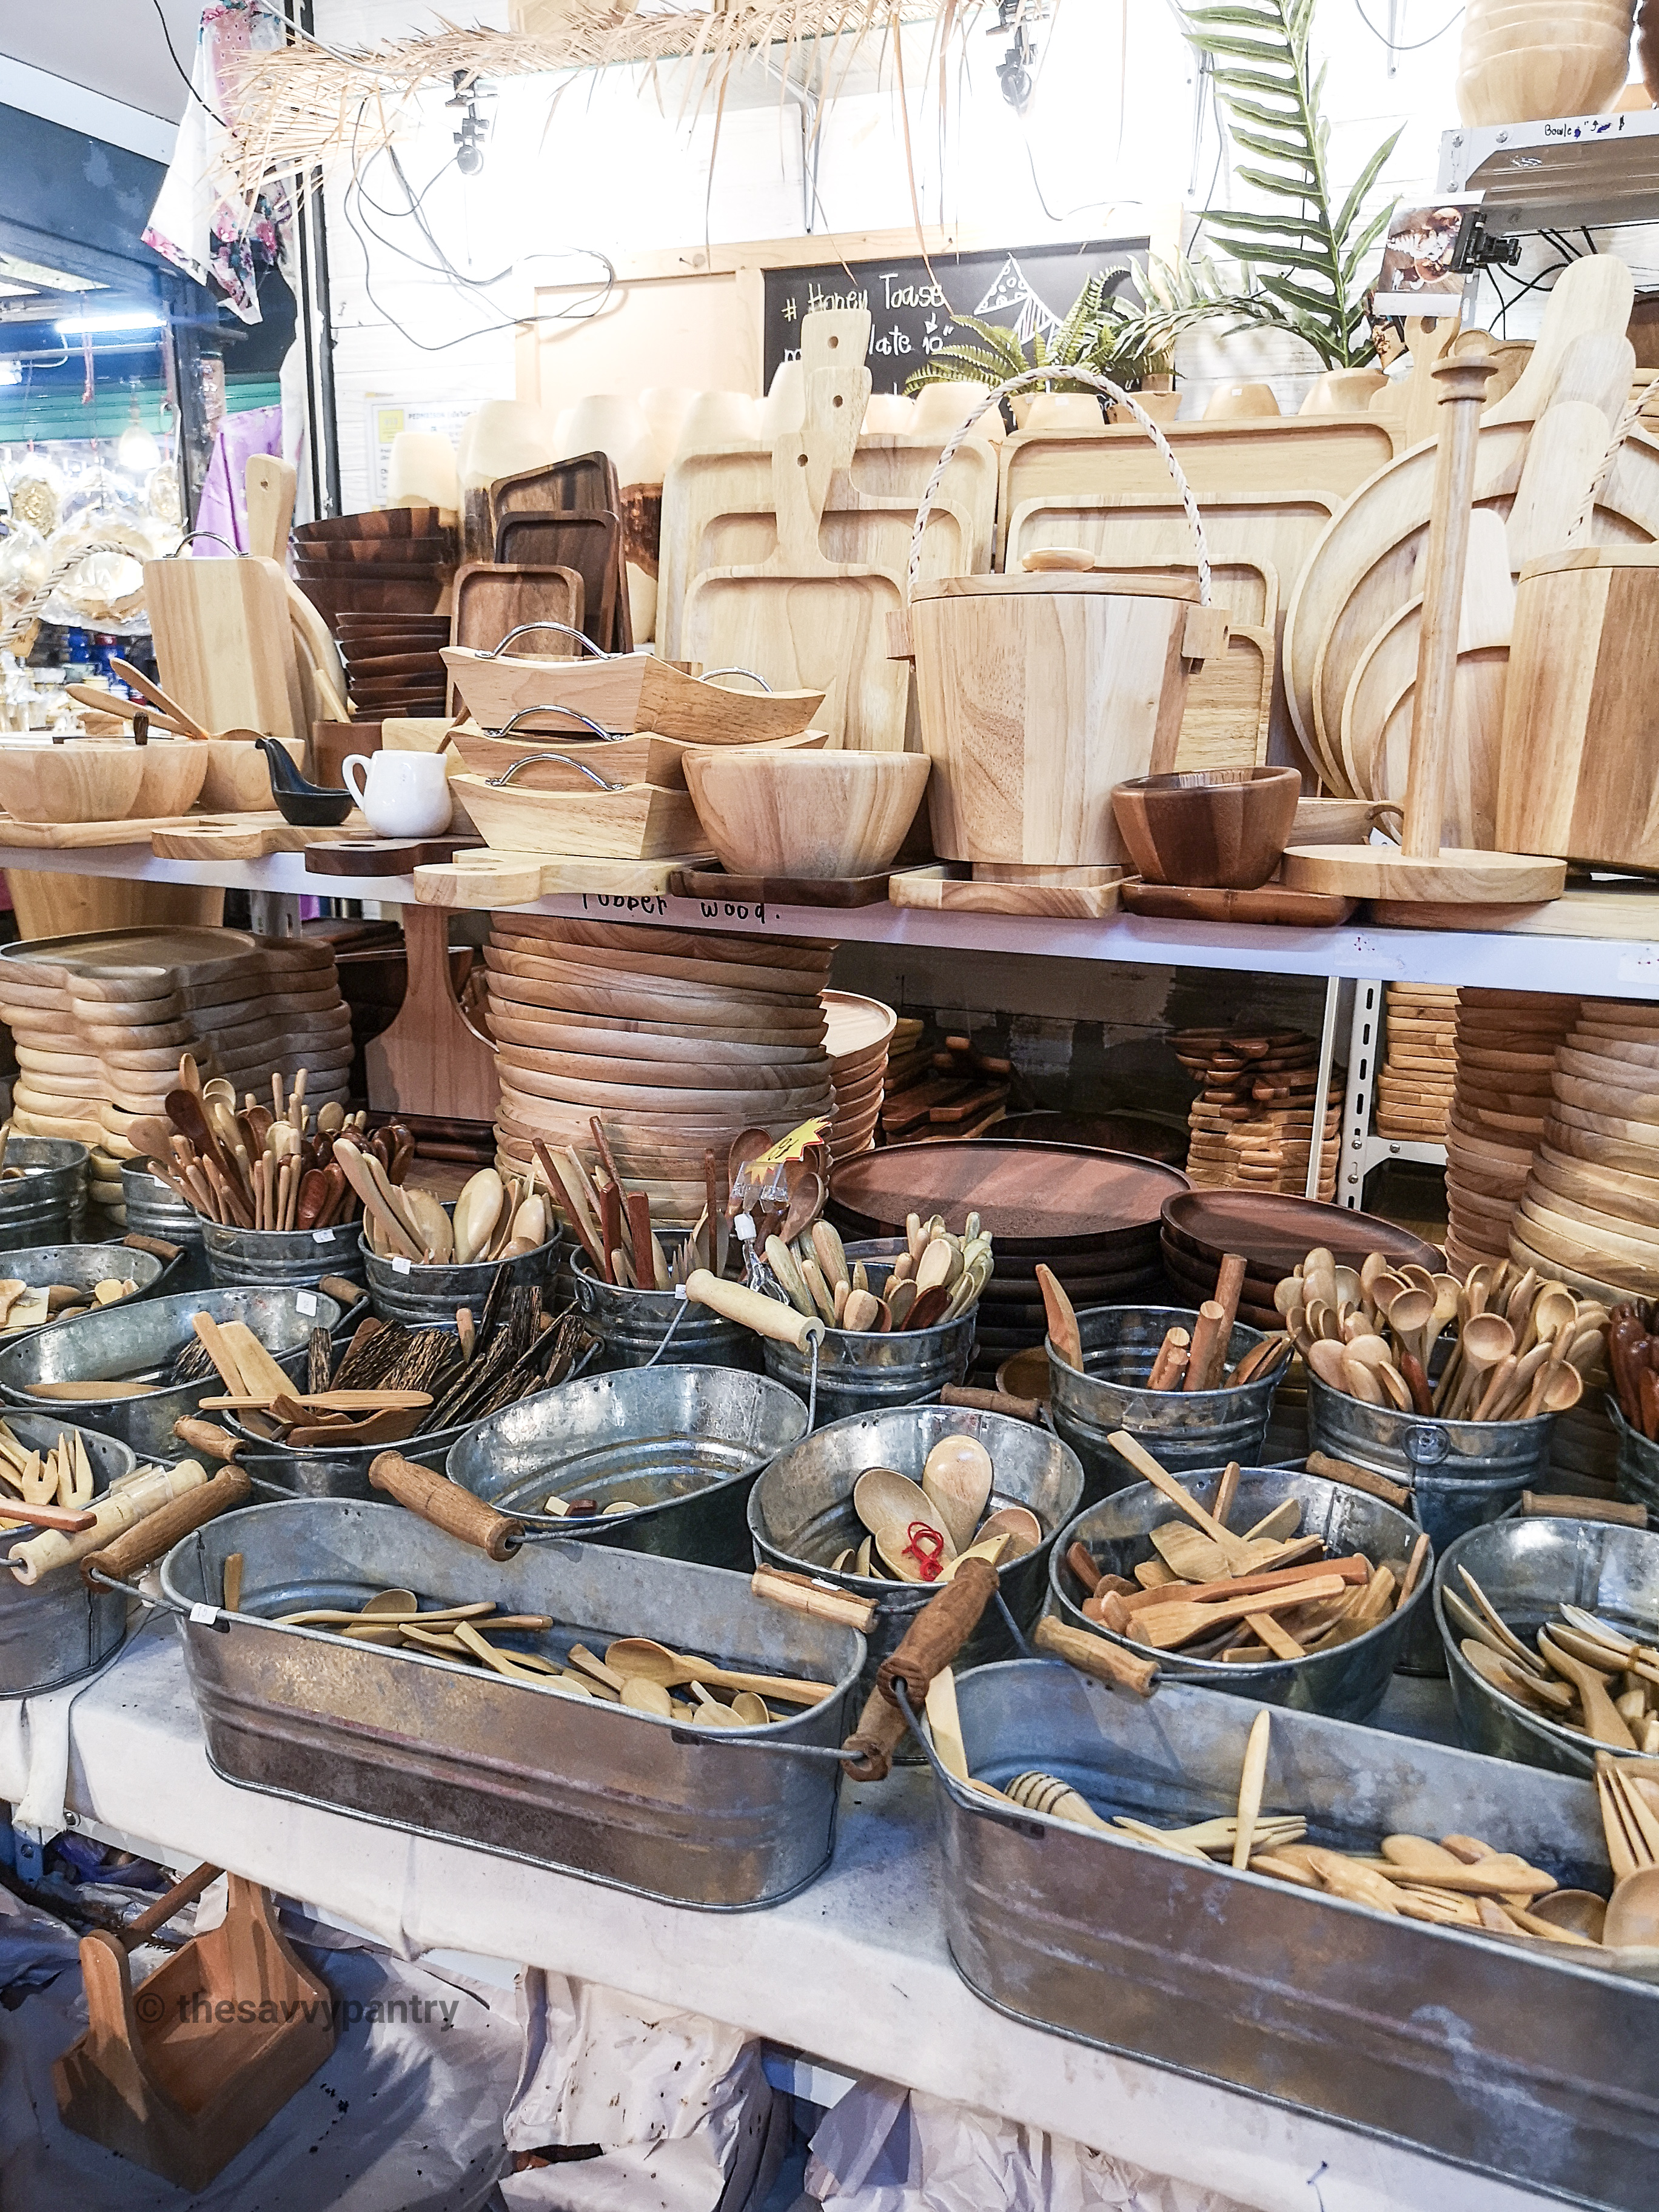

")
")
")
")
")
")
")
")


")
")

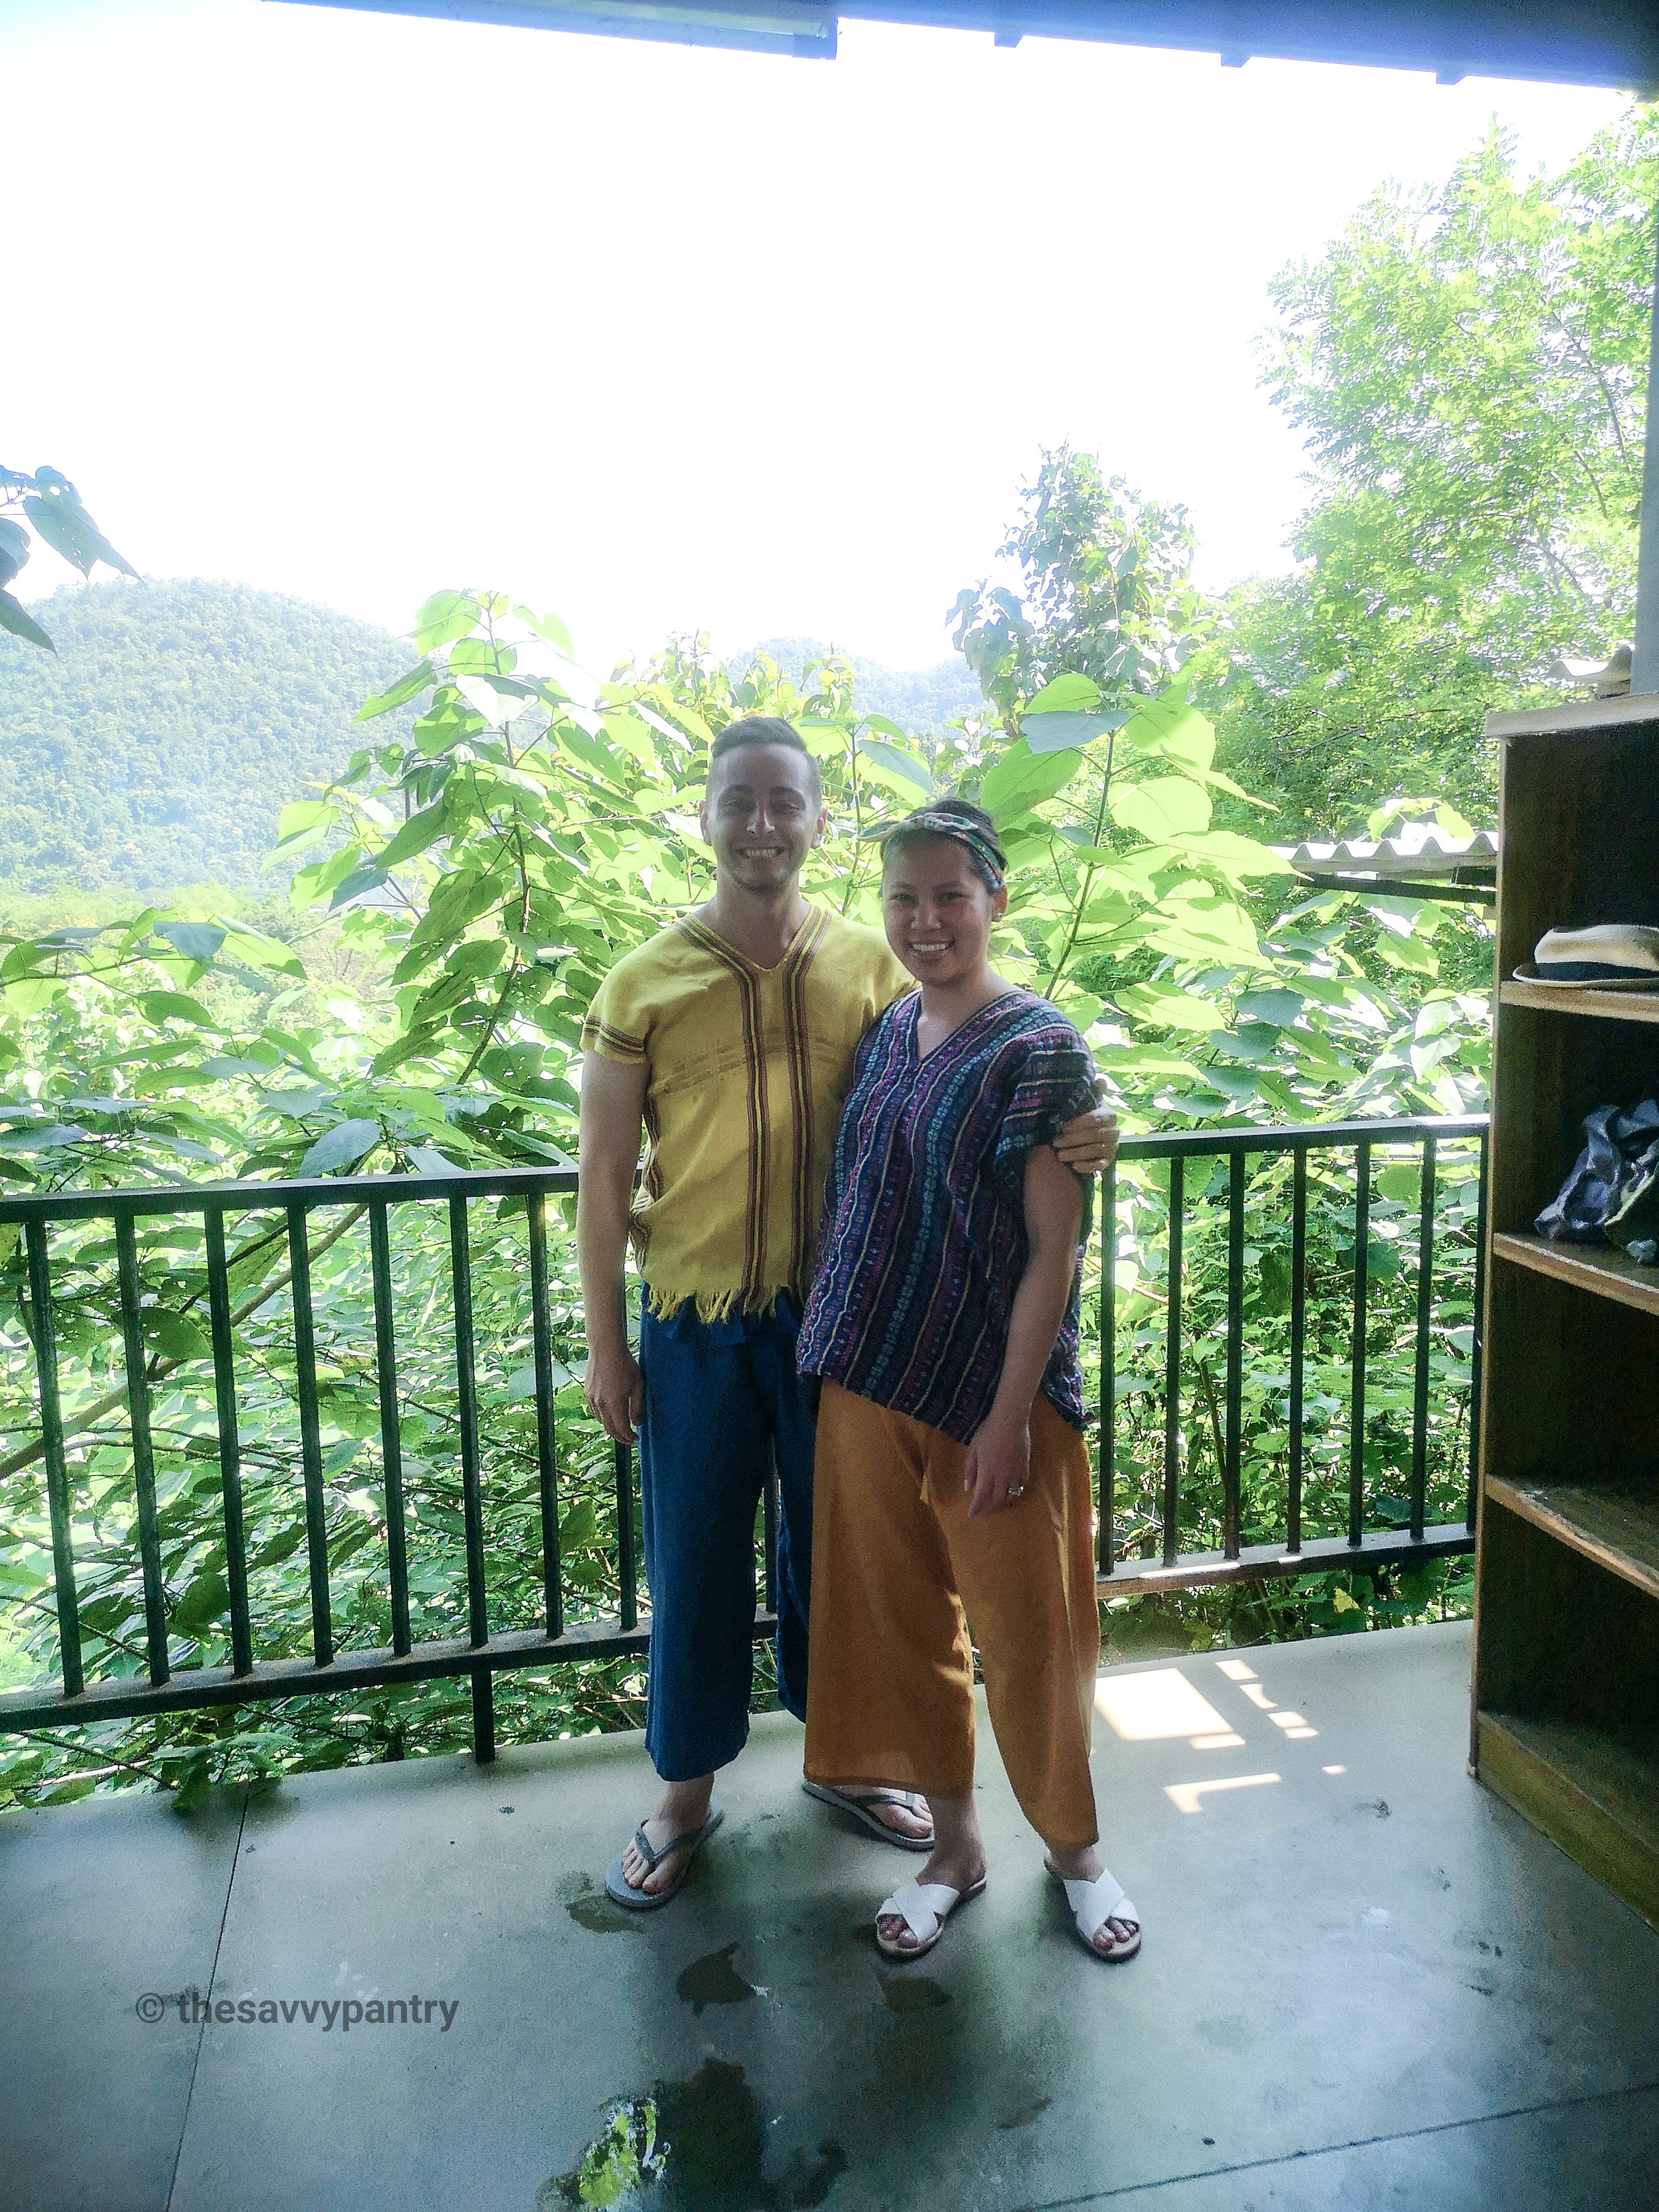
")
")
")
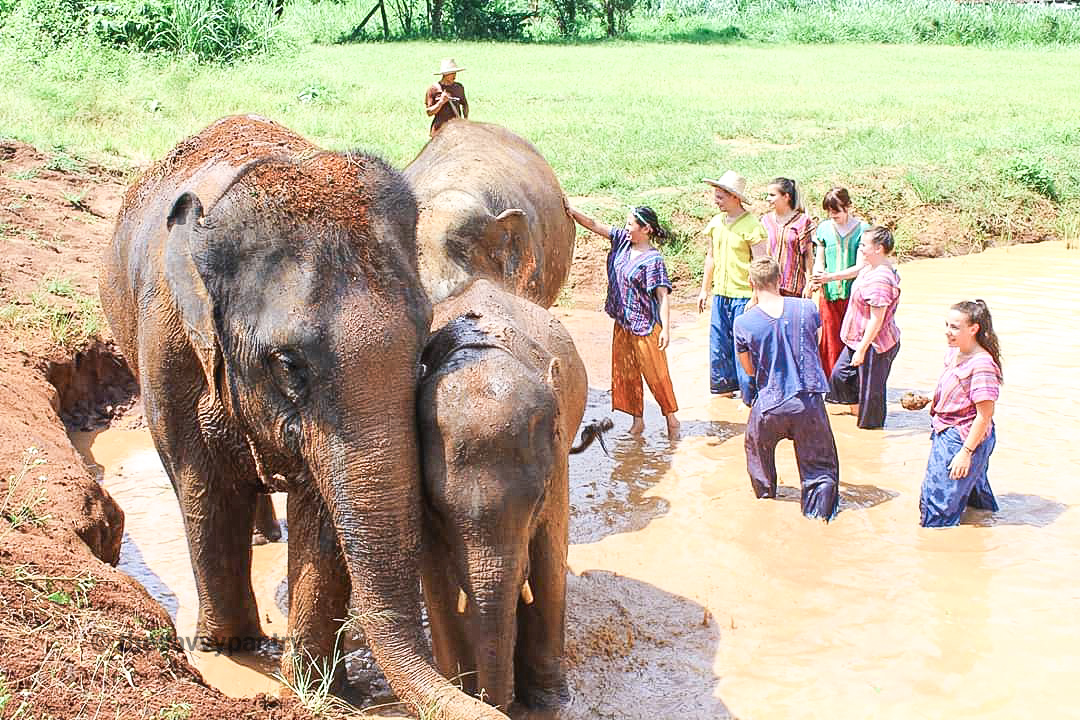
")
")
")
")
")
")
")
")
")
")
")
")
")
")
")
")
")


")
")
")
")
")
")
")
")

")
")
")
")
")
")
")
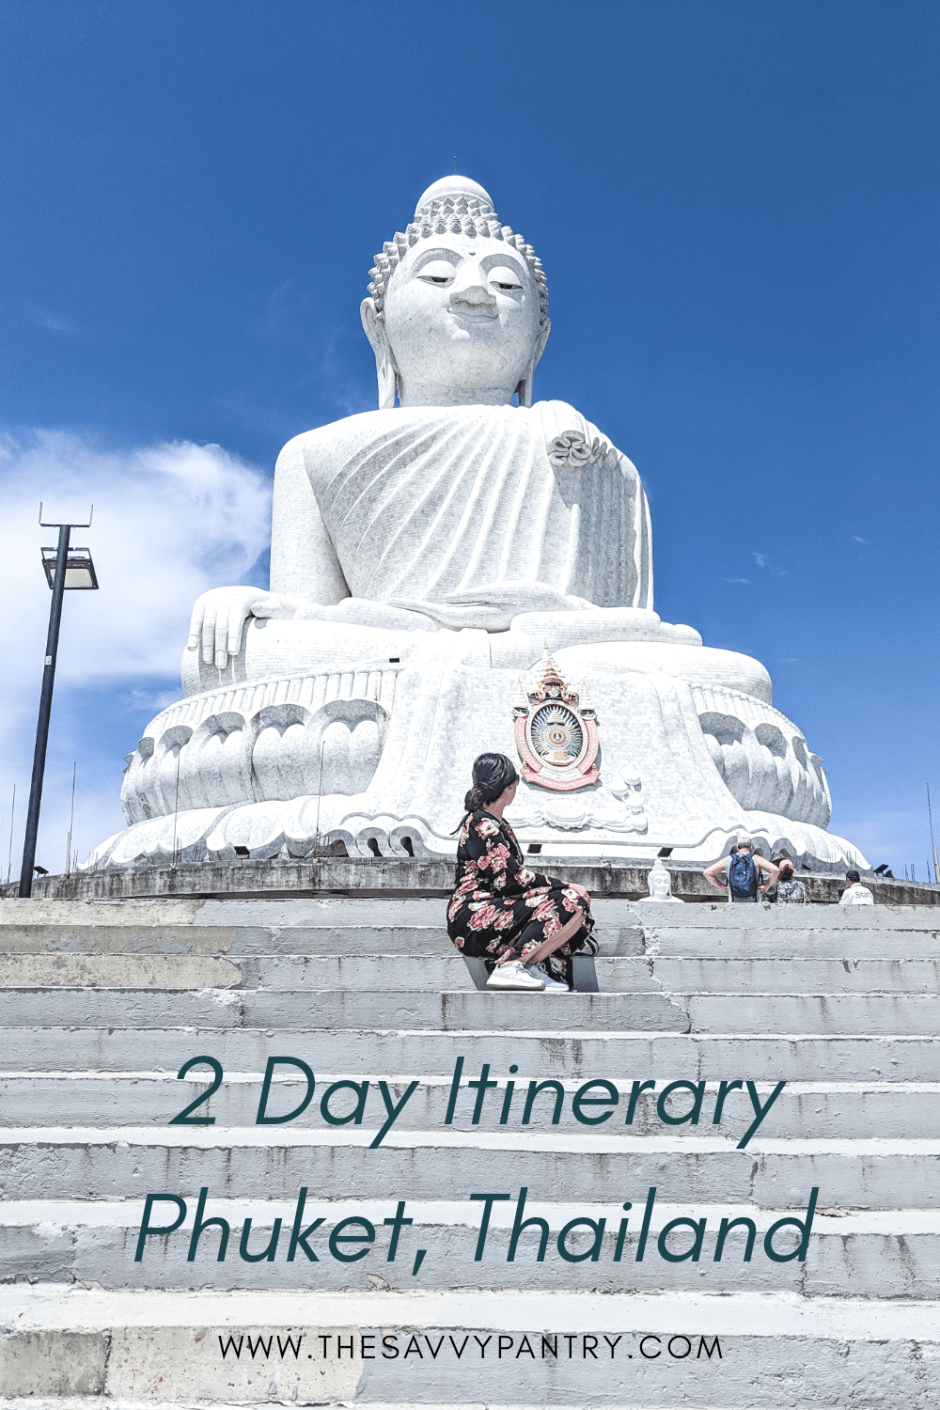

")
")
")
")
")
")


")
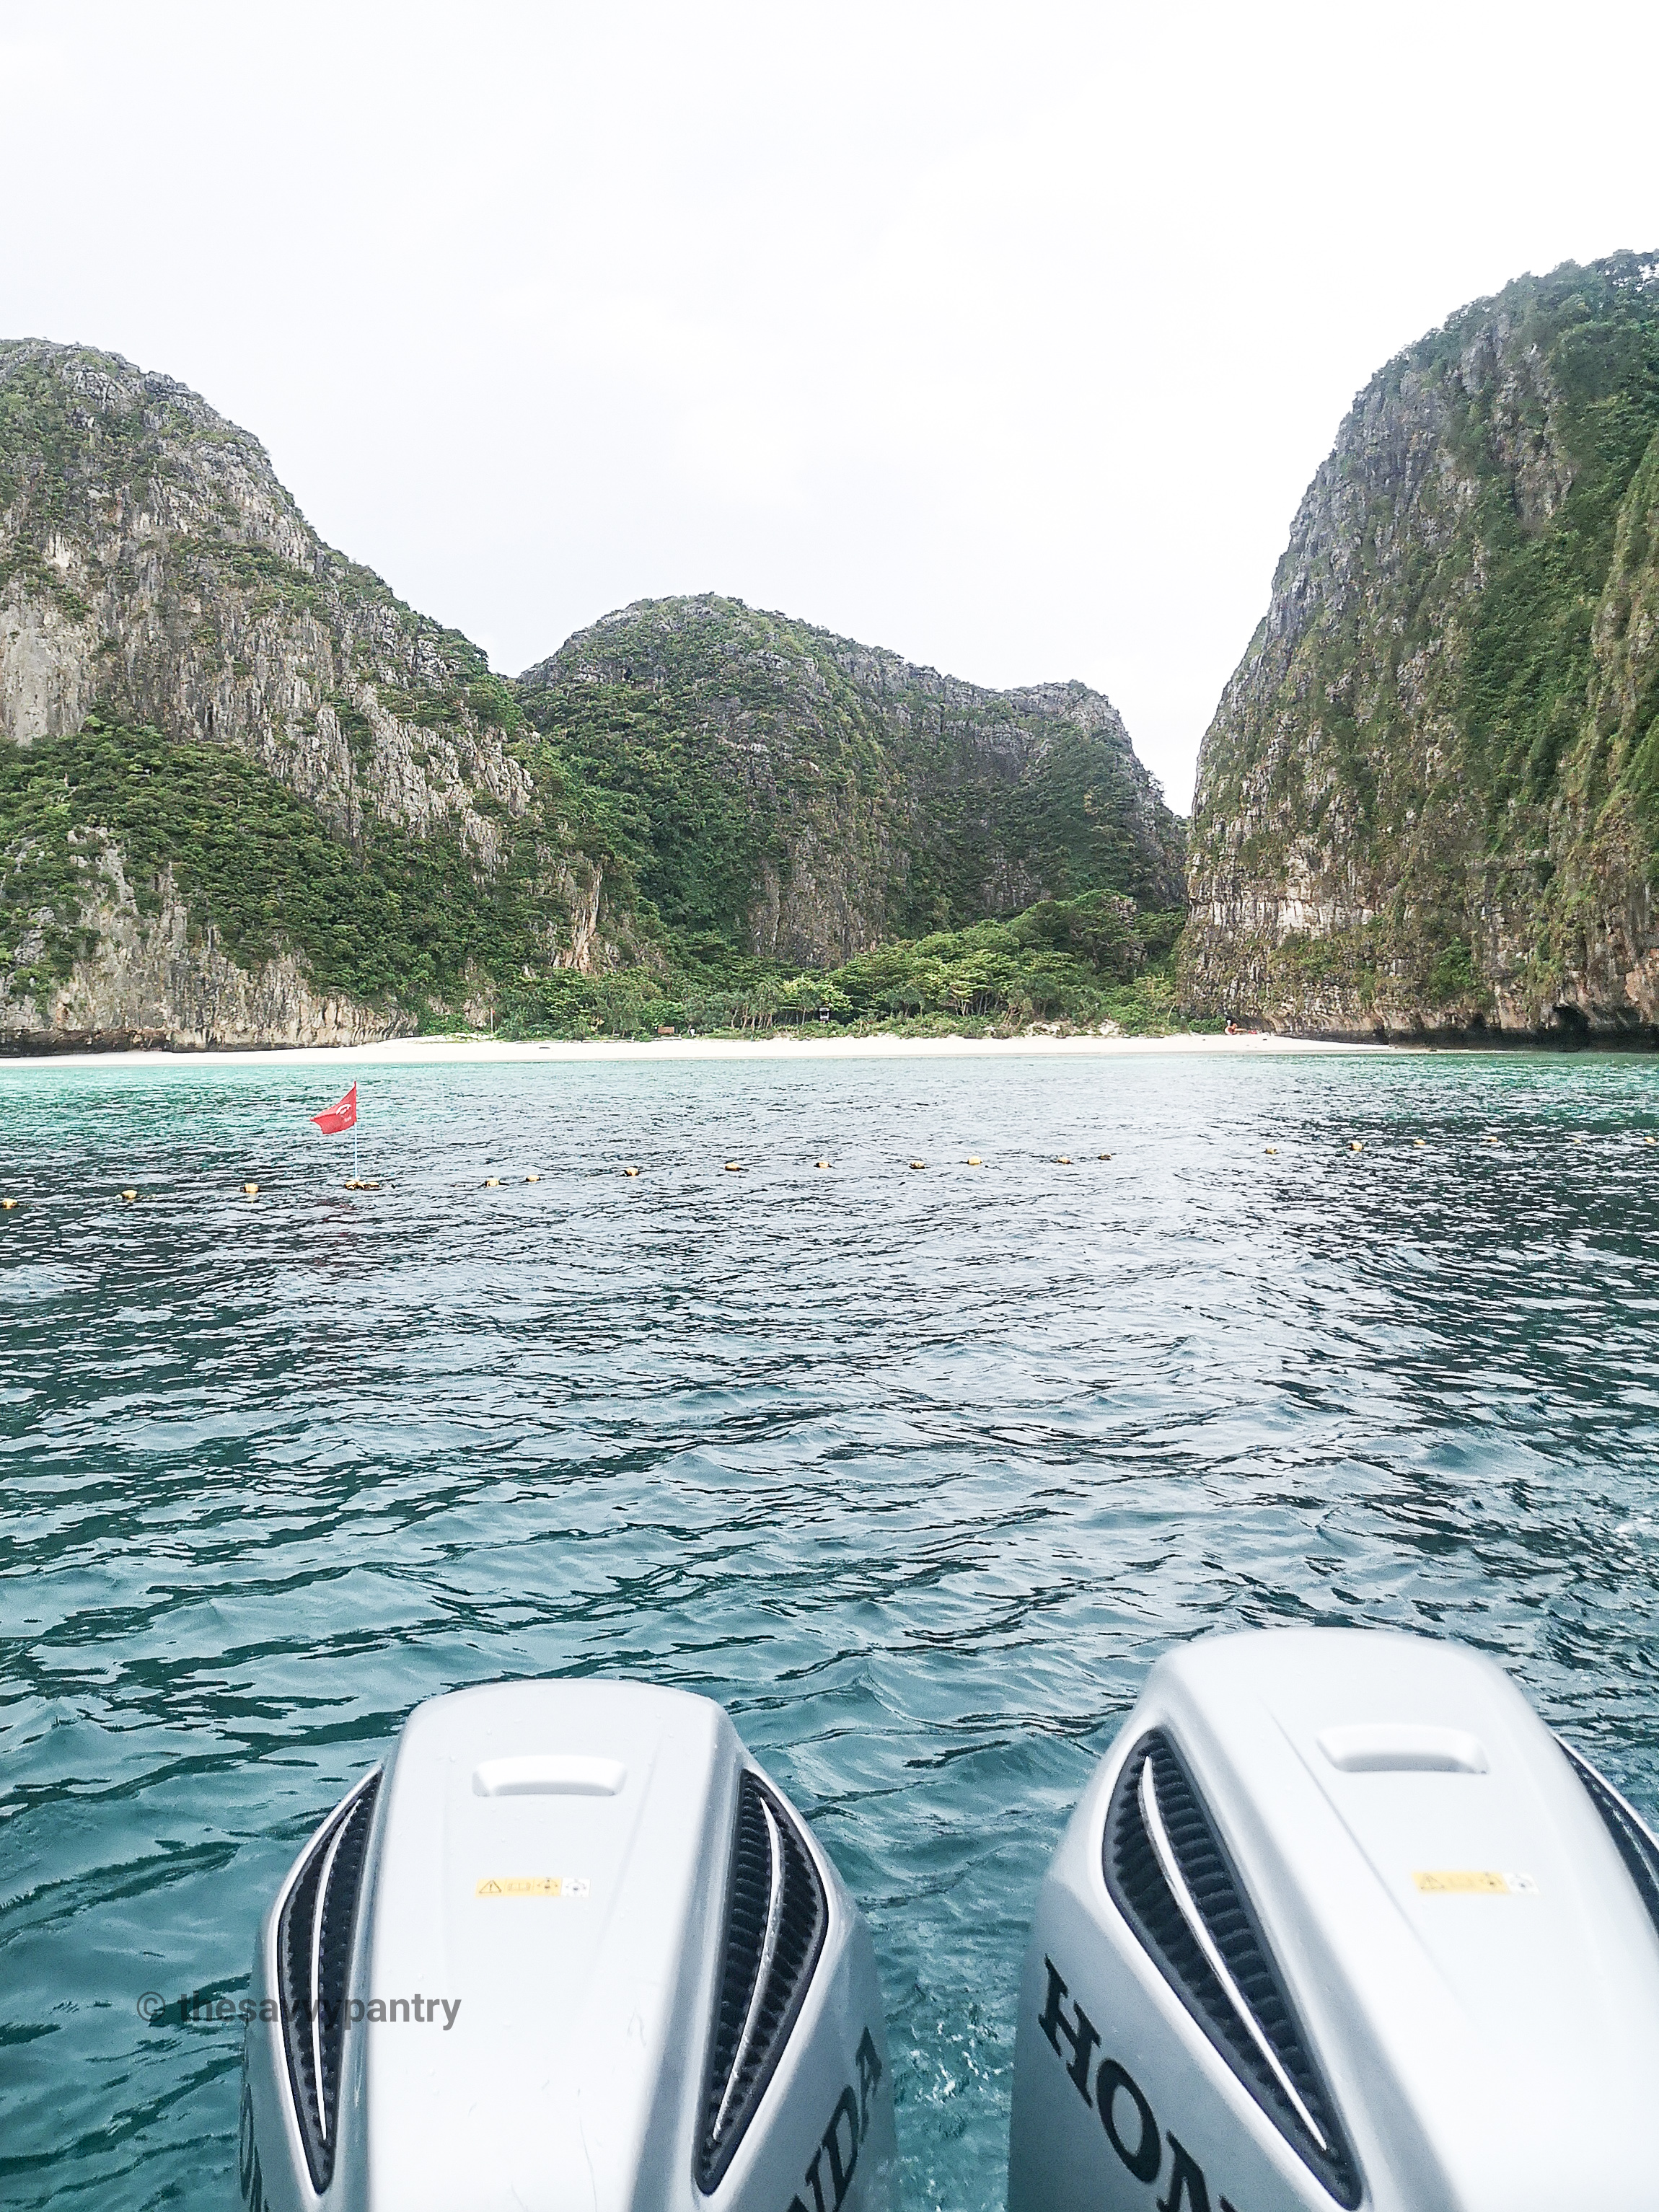

")
")
")
")
")

")
")
")


")

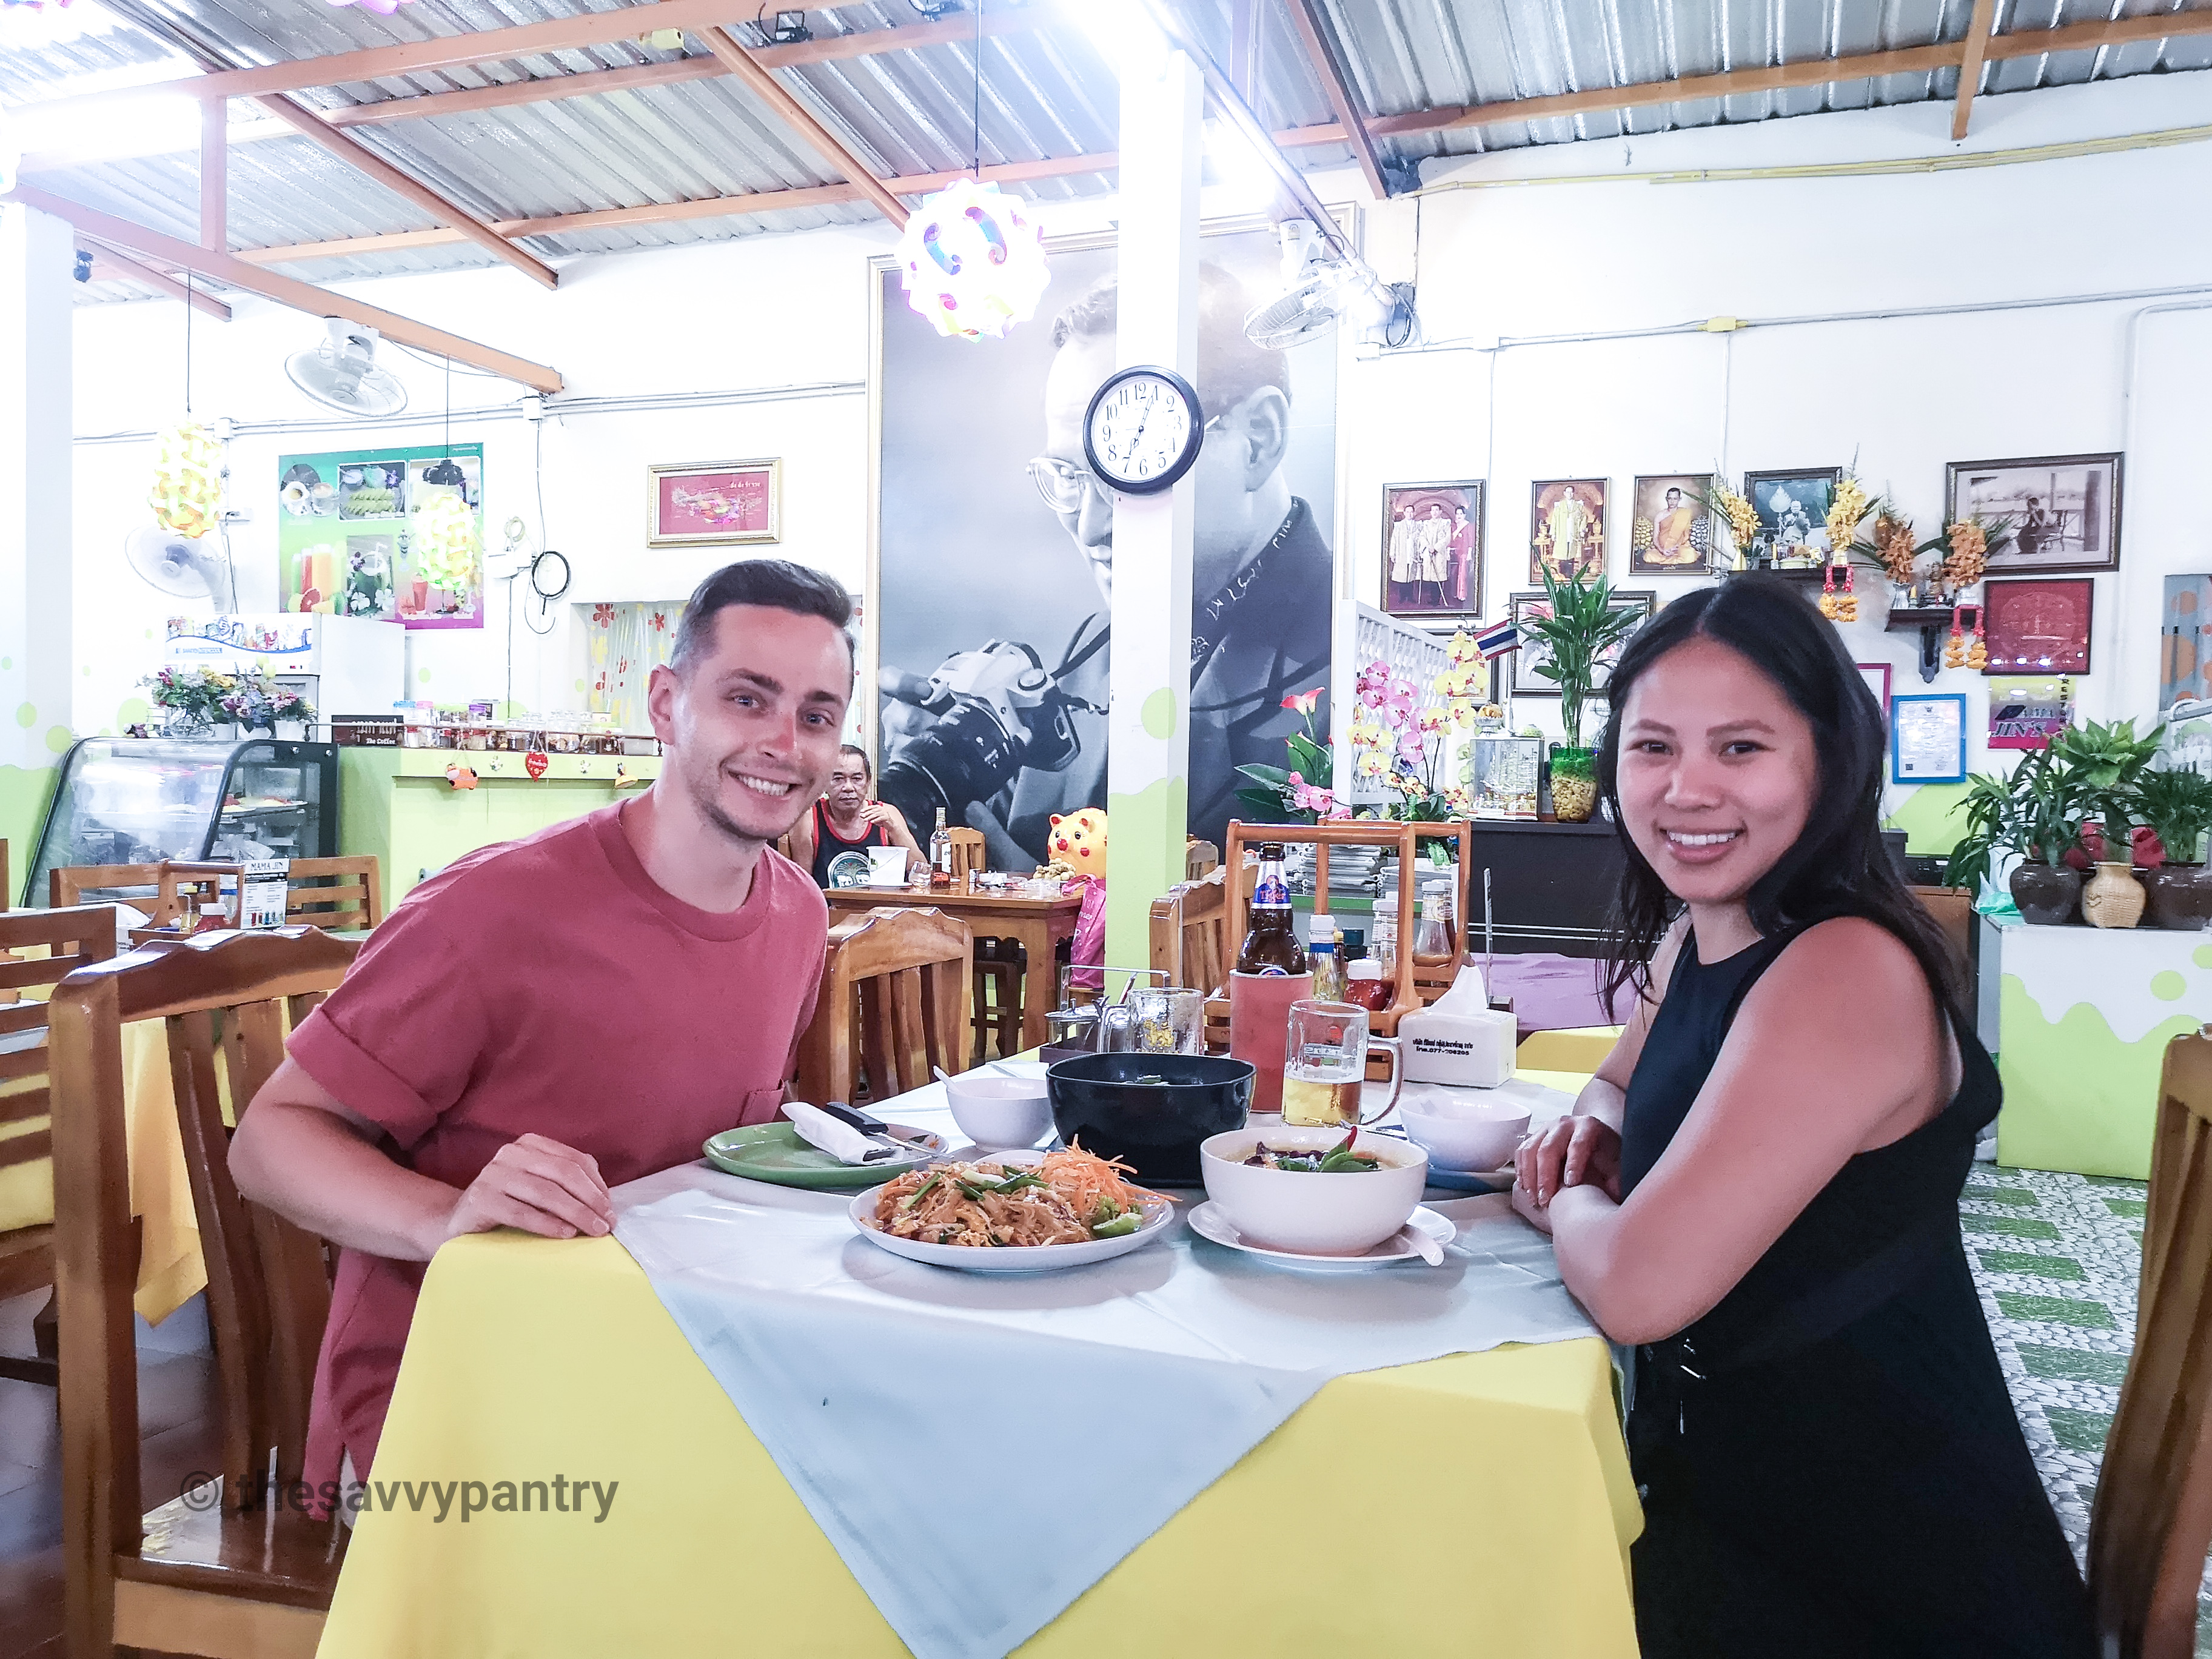

")
")
")
")
")
")
")
")
")
")
")
")
")
")


")
")
")
")
")
")
")
")
")
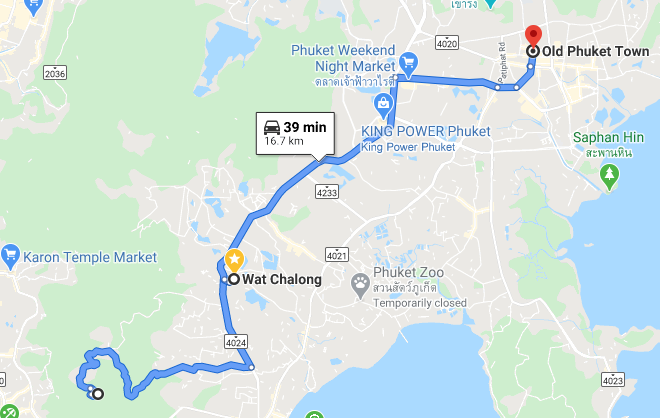


")
")
")
")


")

")
")
")
")

")
")
")
")
")
")
")
")
")
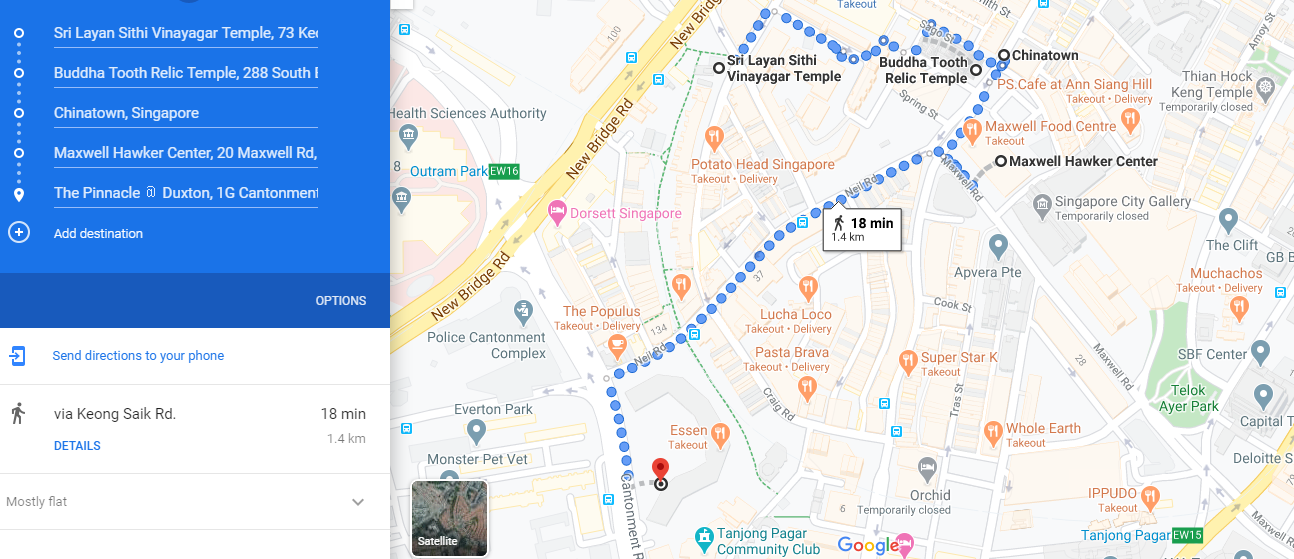


")
")
")
")

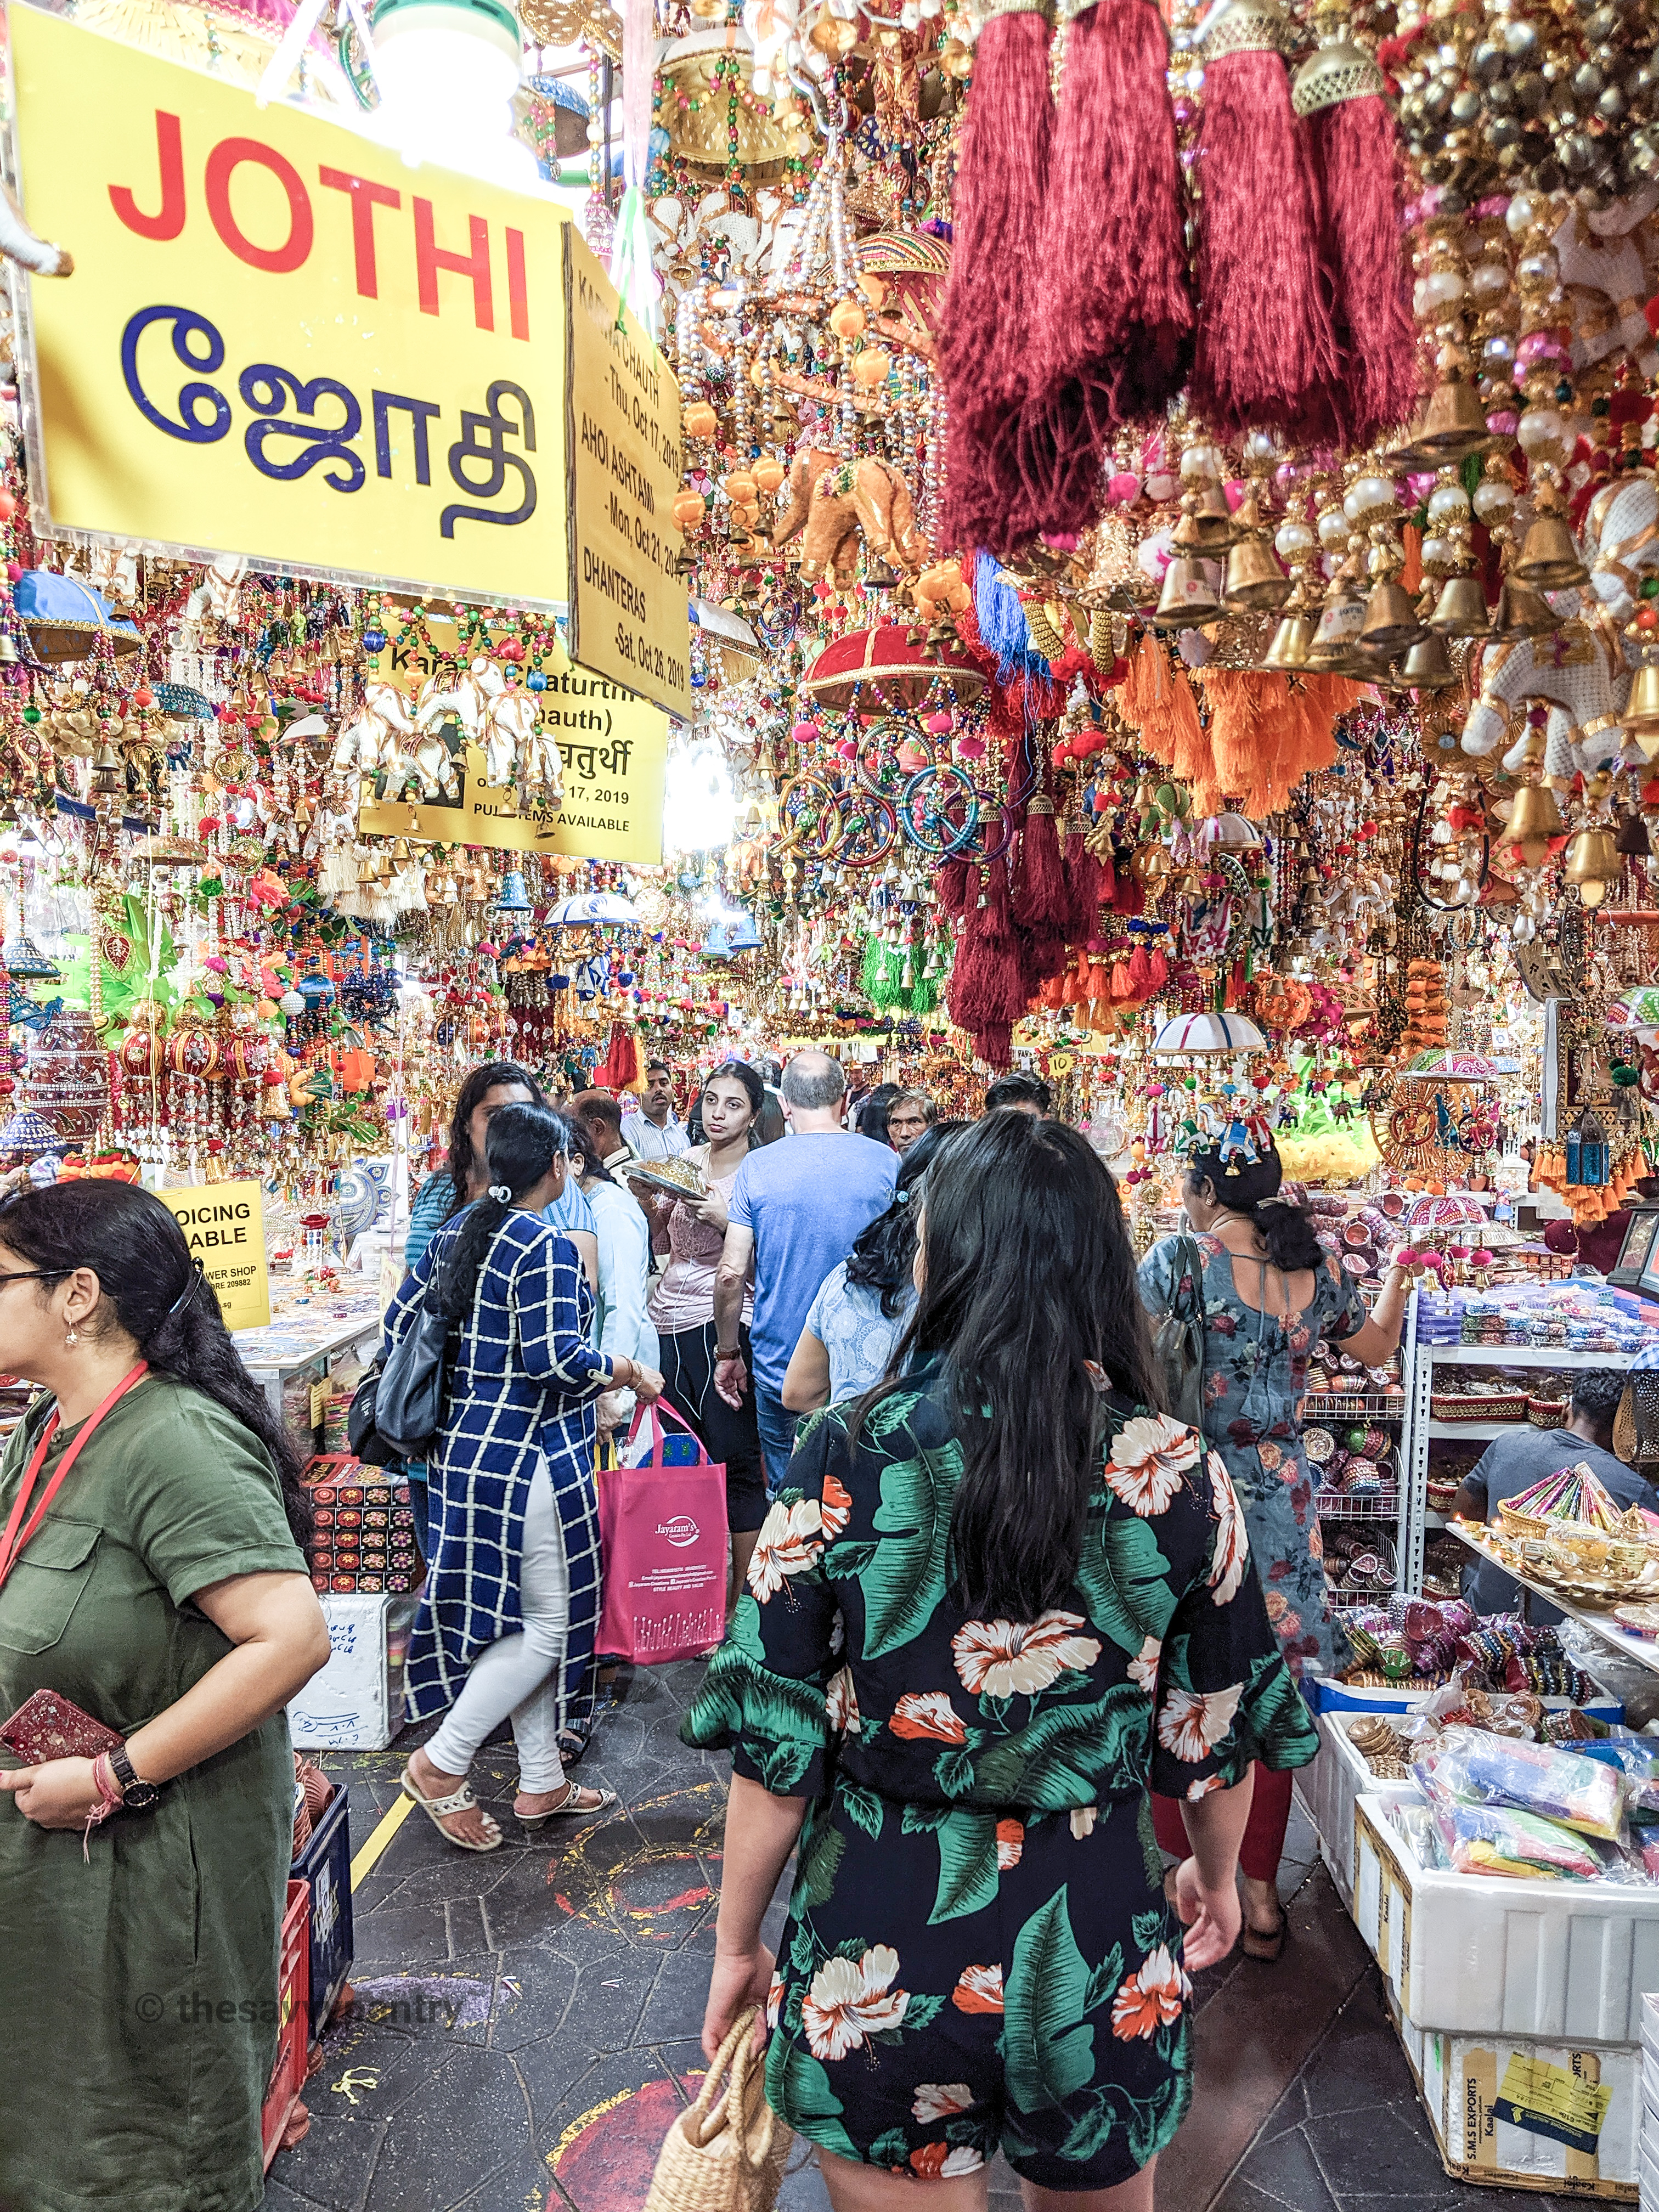
")
")
")
")

")

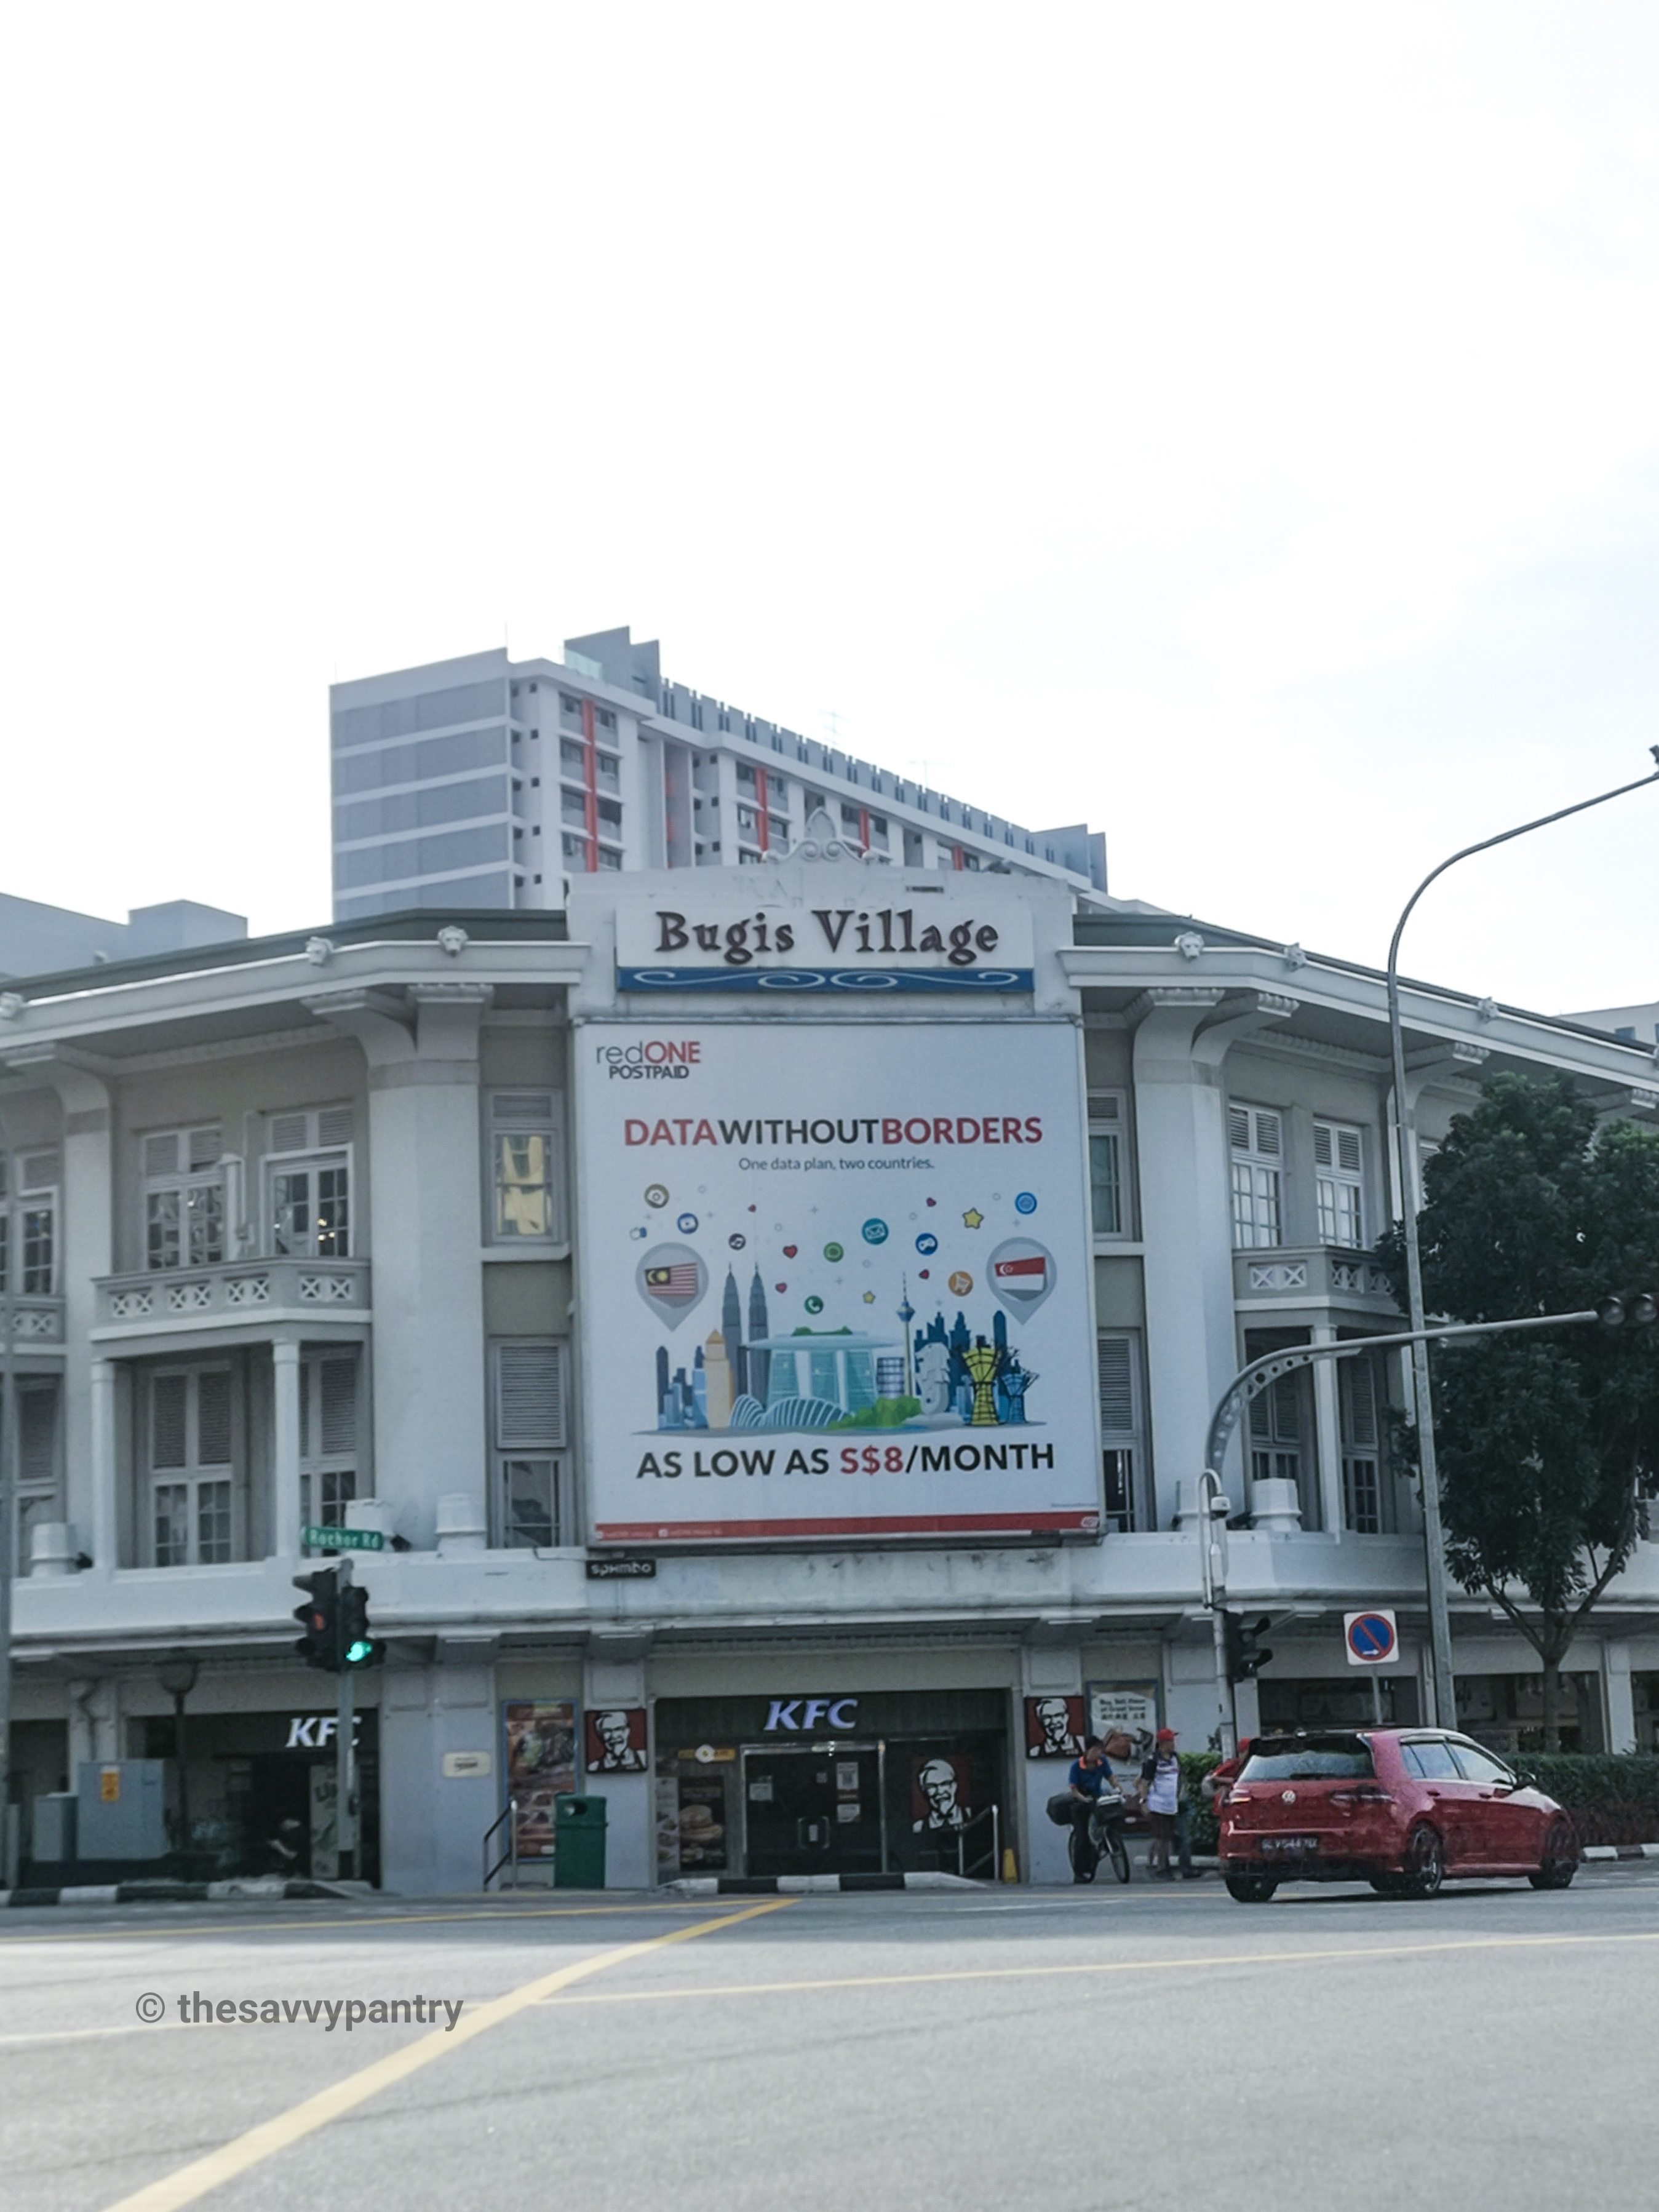
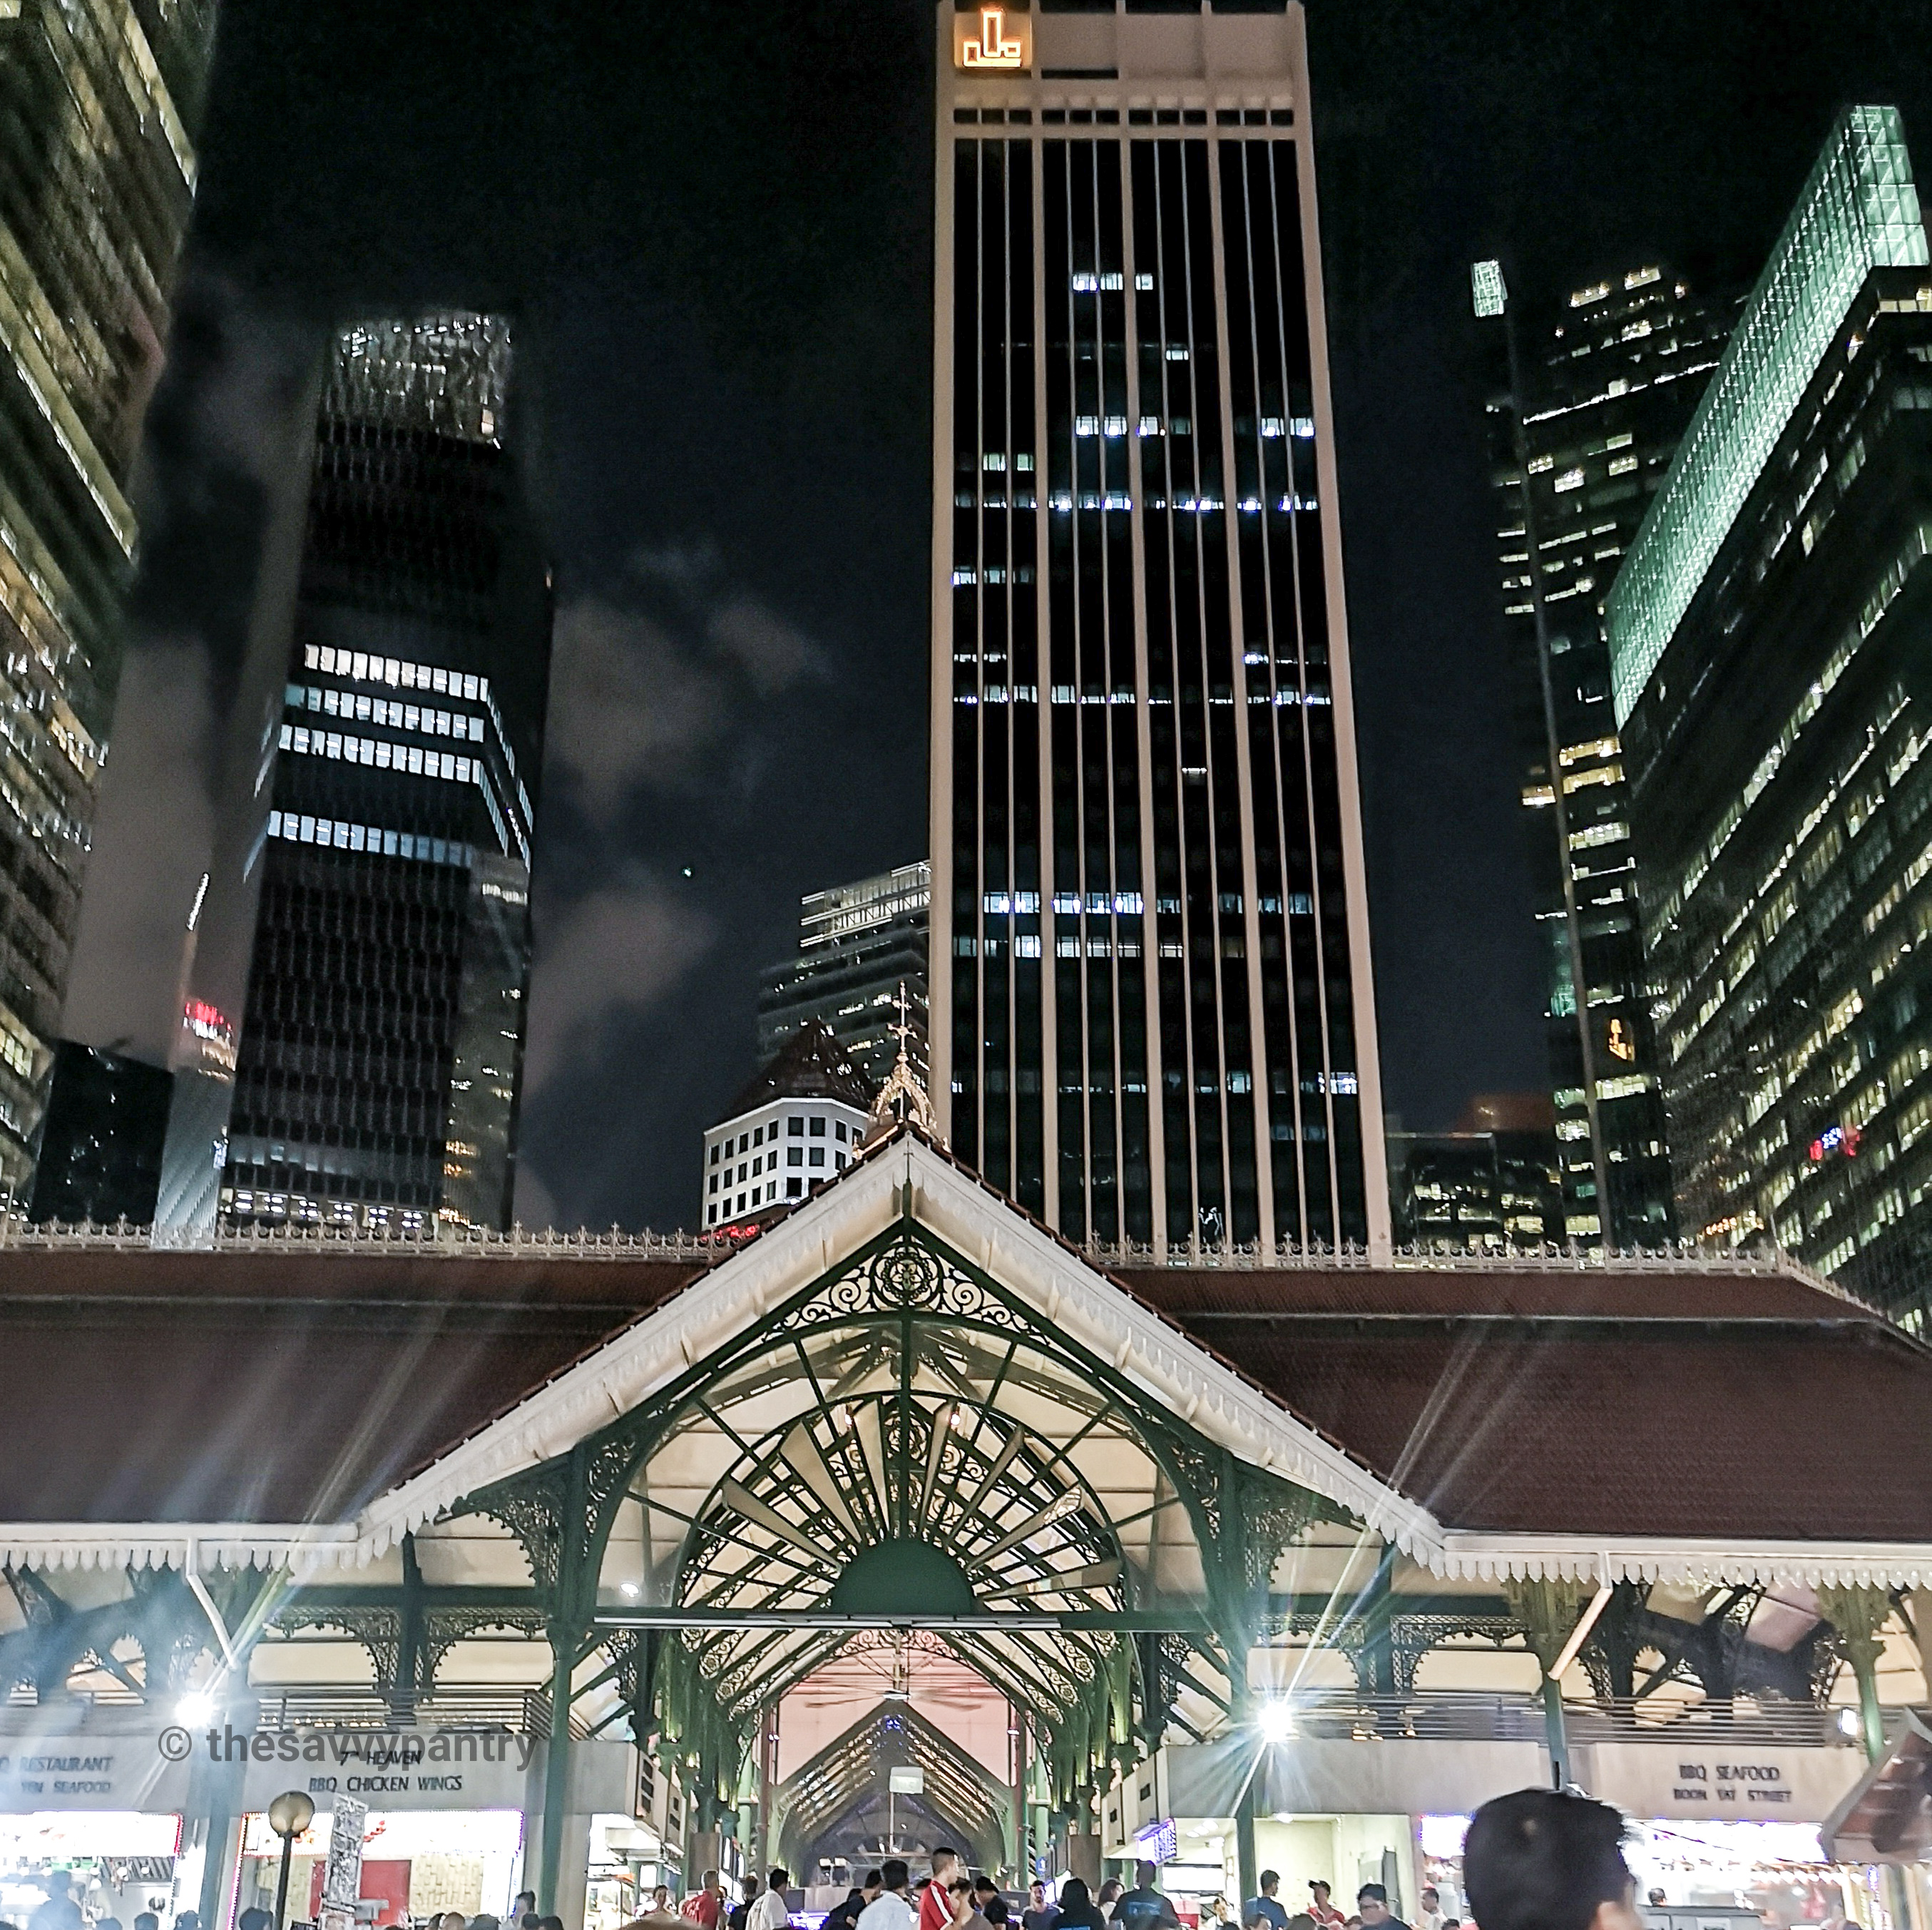
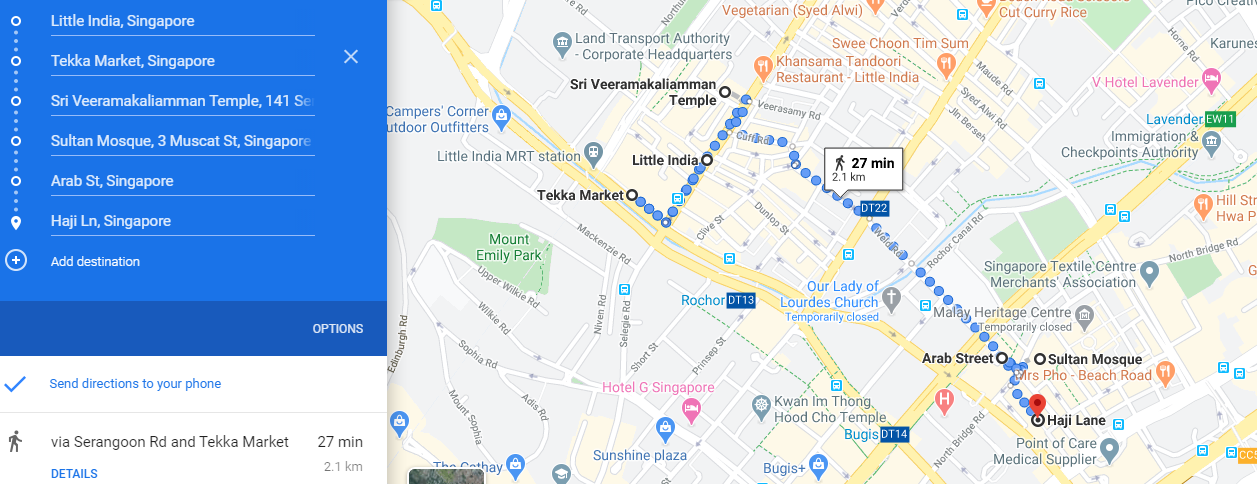

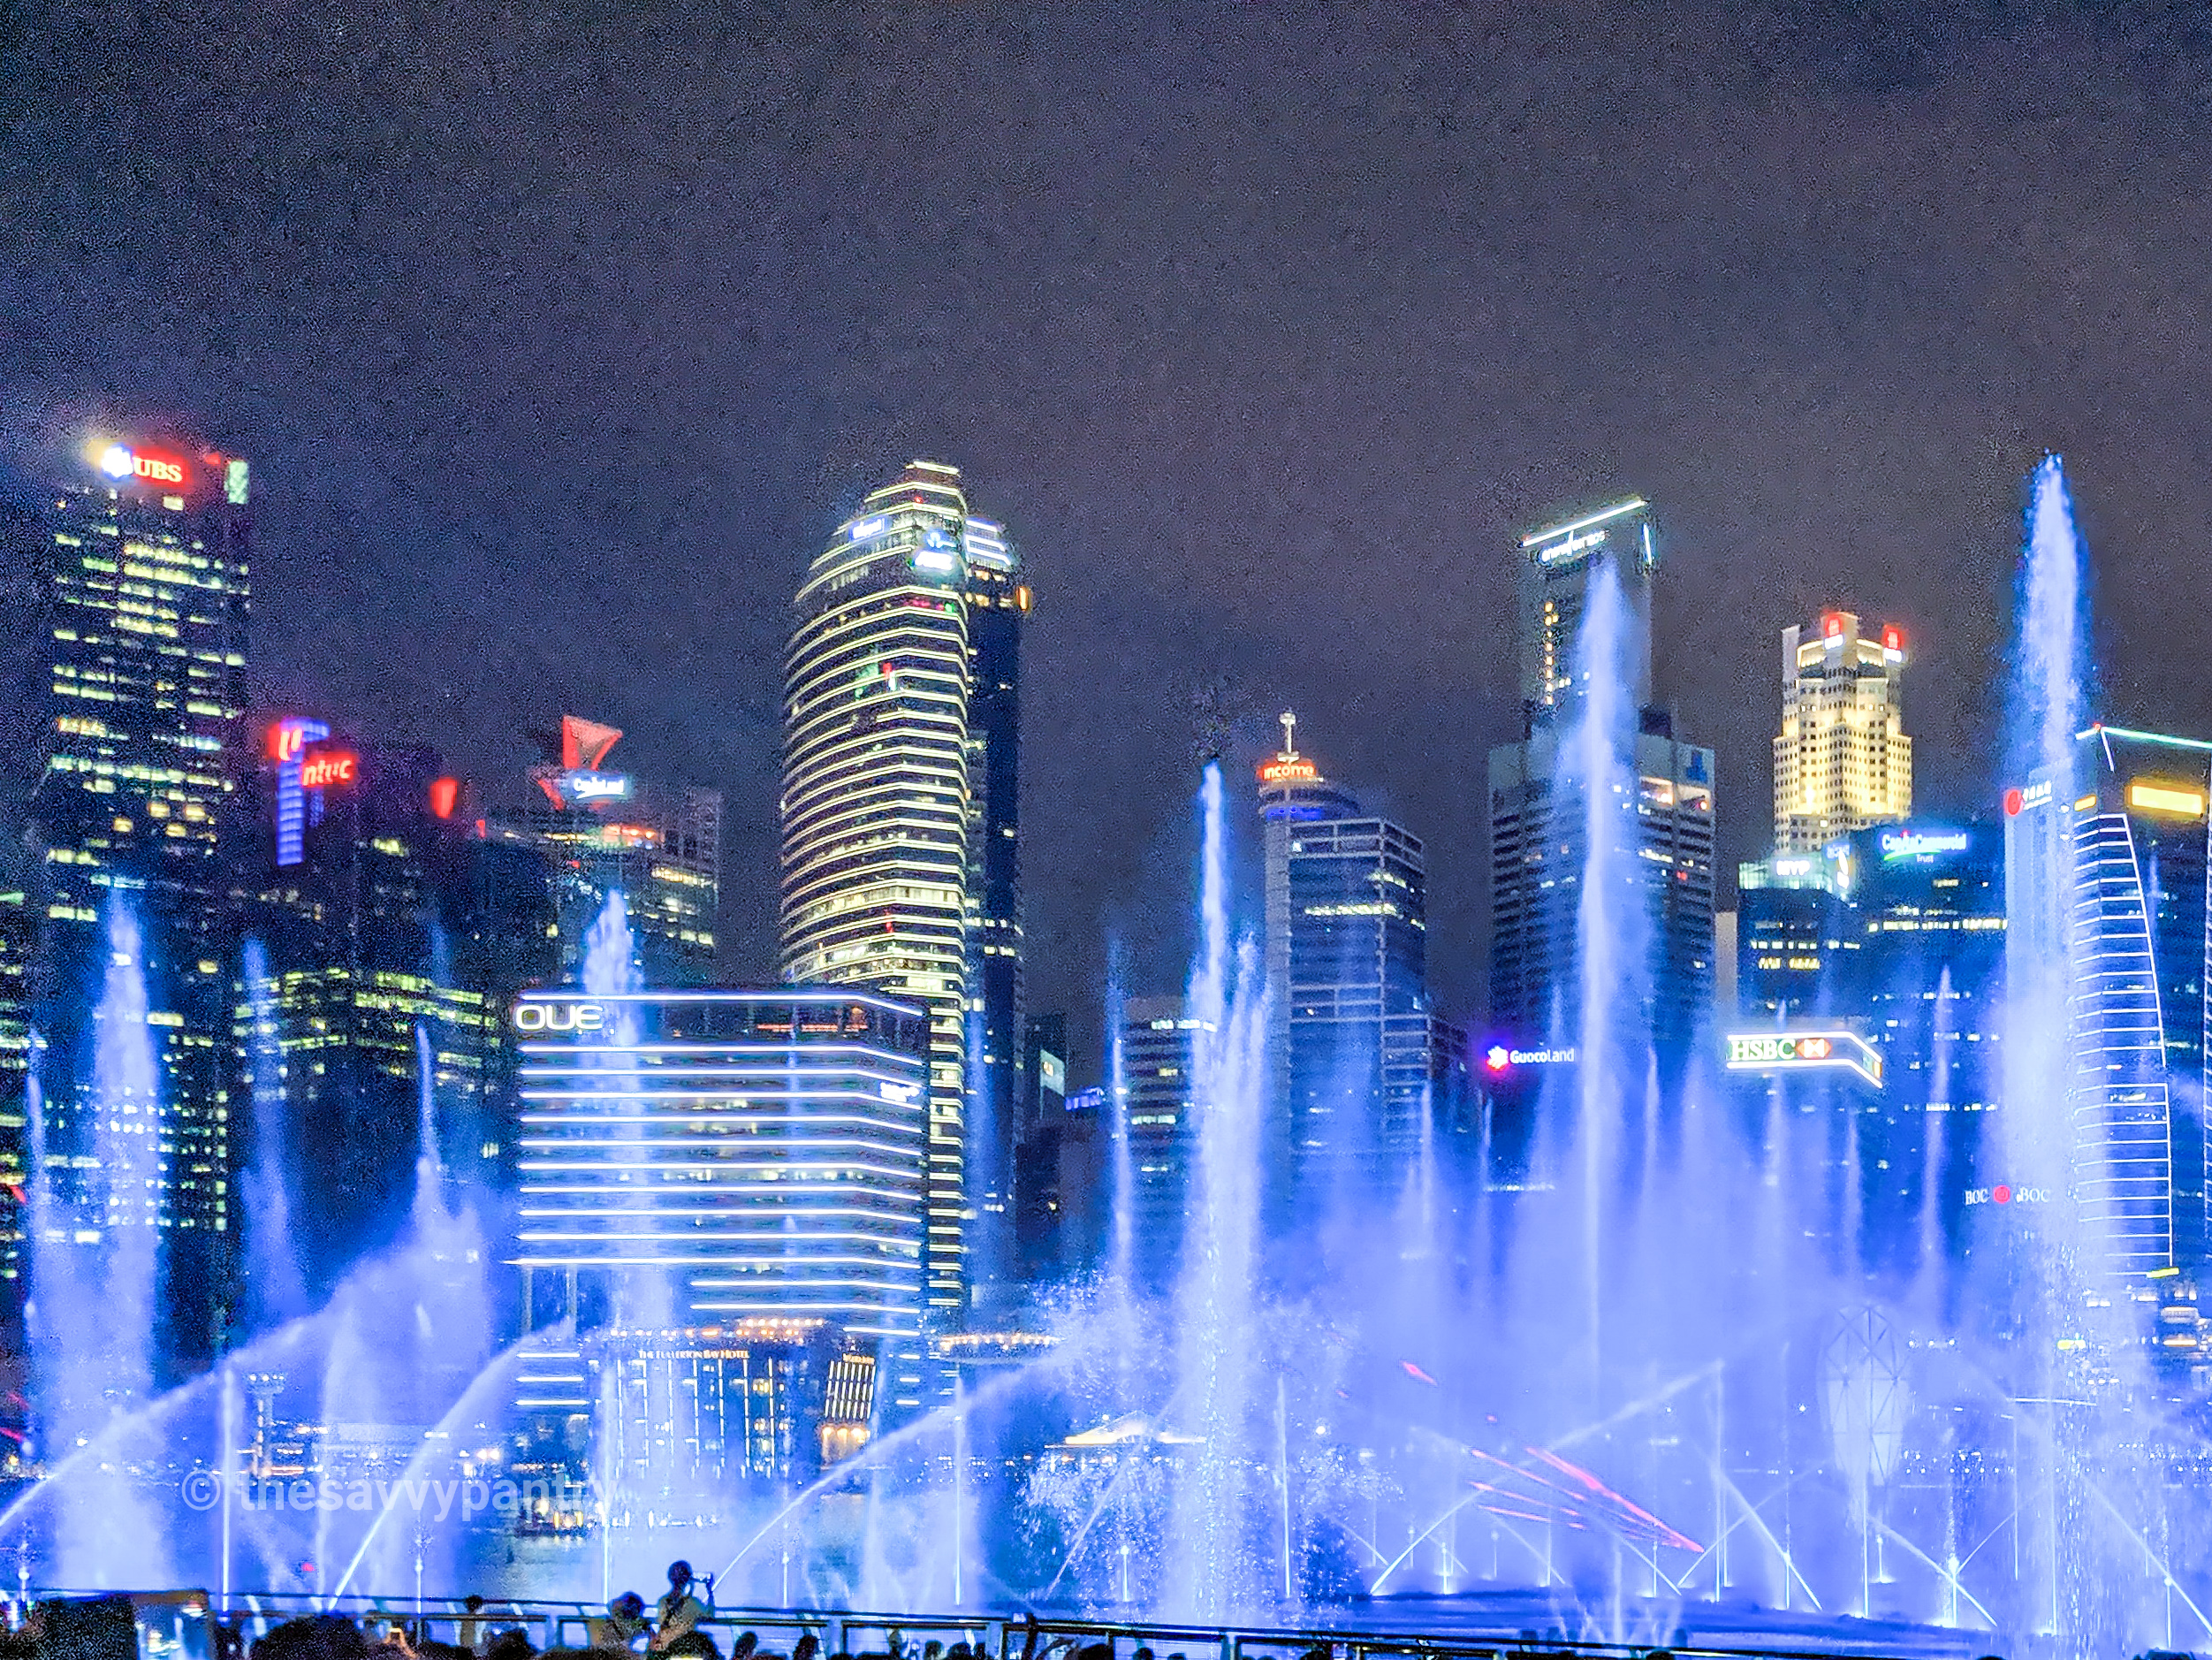
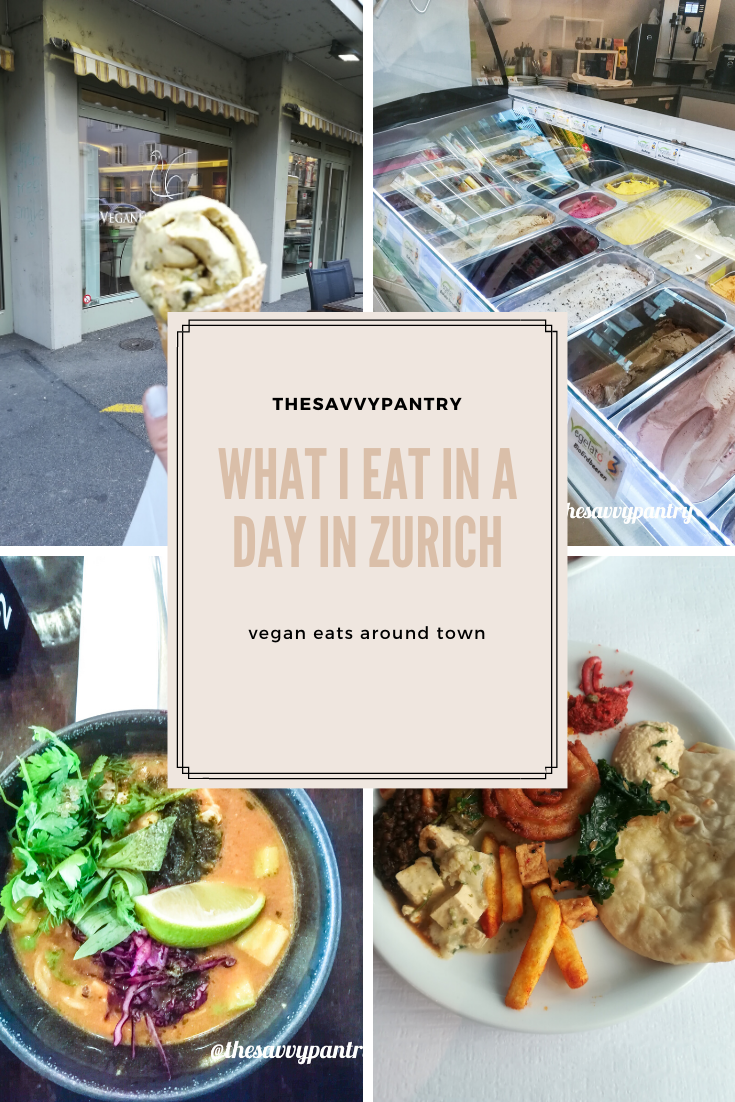


")
")
")
")
")
")
")
")
")
")
")
")
")
")
")