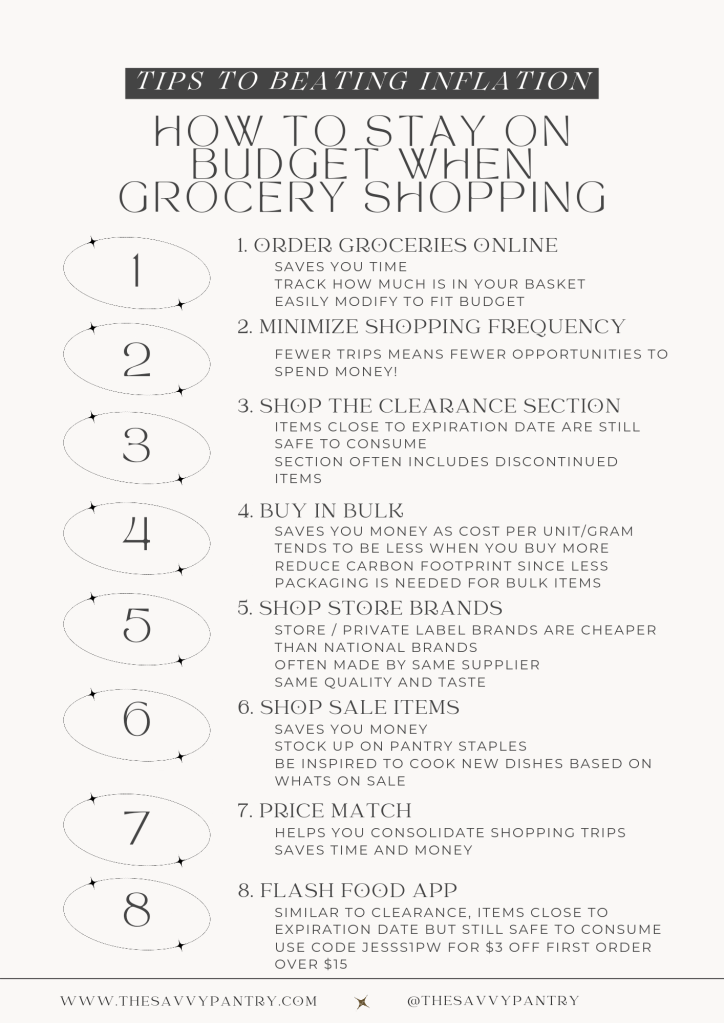
Hi Savvys,
As the colder months roll in, keeping your family healthy becomes a top priority. Boosting immunity naturally is always a great choice, especially when it’s as simple as using two powerful ingredients that are likely already in your kitchen—ginger and lemon. This quick and easy immunity booster is perfect for the whole family, even for the little ones!
Why Ginger and Lemon?
Ginger is a well-known anti-inflammatory and antioxidant powerhouse. It’s been used for centuries to relieve colds, nausea, and improve digestion. Ginger’s anti-viral properties make it an ideal ingredient to fight off seasonal illnesses.
Lemon, packed with vitamin C, works wonders for your immune system. It not only helps the body fight infections but also detoxifies the system and provides a refreshing boost of energy.
Together, these two ingredients create a potent, natural remedy to keep your immune system strong throughout the winter months.

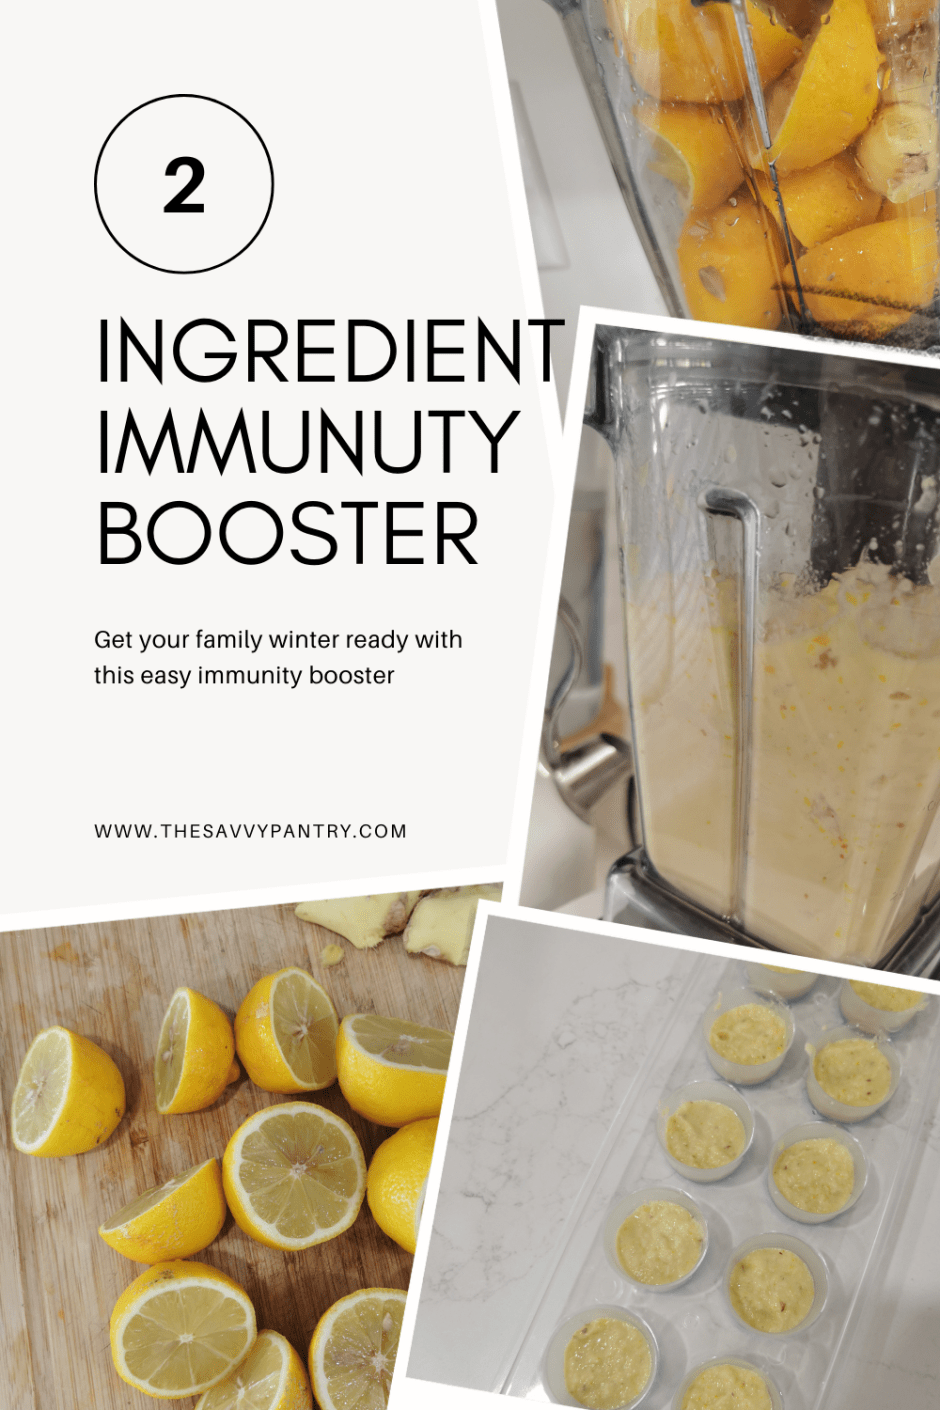
How to Make my 2 Ingredient Immunity Booster
Ingredients:
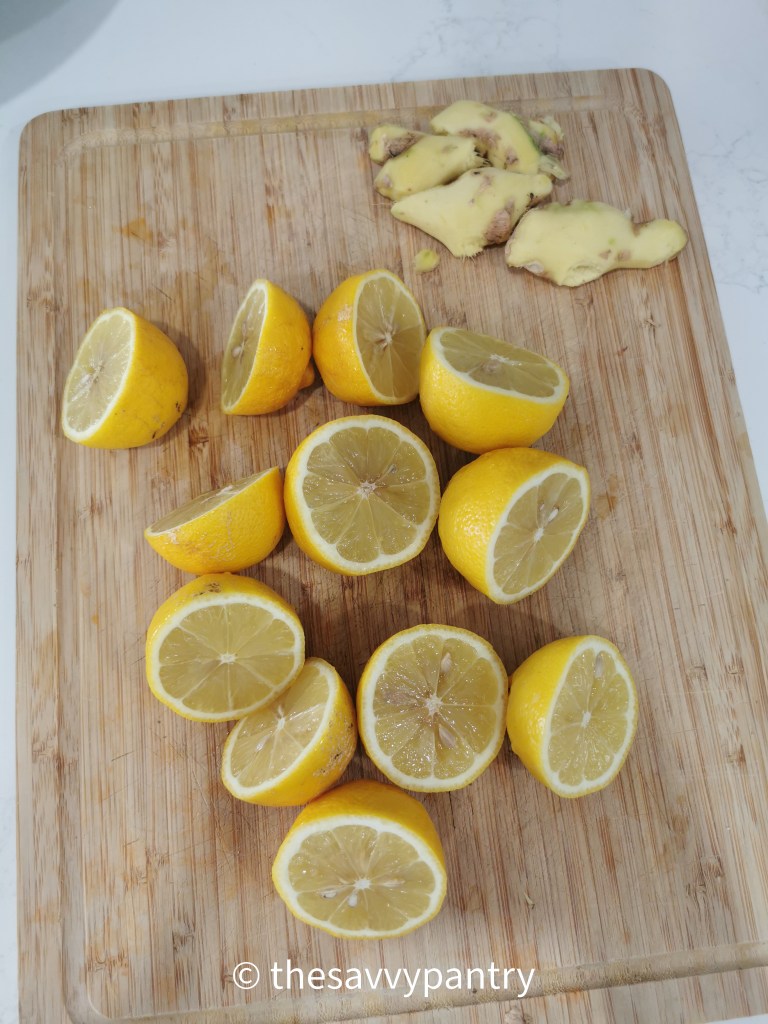
- 6 whole lemons, washed
- 1 large piece of ginger root, about 4 inches long
Directions:
- Prepare the lemon: Cut the whole lemons into 4 parts so that it fits into your blender
- Prepare the ginger: Peel the ginger and slice into 4 parts – it doesn’t really matter the size as it will all be thrown into a blender. Ginger can have a strong flavor, so feel free to adjust the quantity based on your family’s taste preferences.
- Combine and blend: Add the lemon and ginger pieces to a blender, along with about ½ cup of water.
- Blend until smooth.
- Strain (optional): If you prefer a smoother texture, strain the mixture using a fine mesh sieve to remove any pulp. For kids who might not enjoy the texture, this is a great way to make it more appealing. The straining part can also be done before your freeze into cubes or after, right when you are serving this mixture.
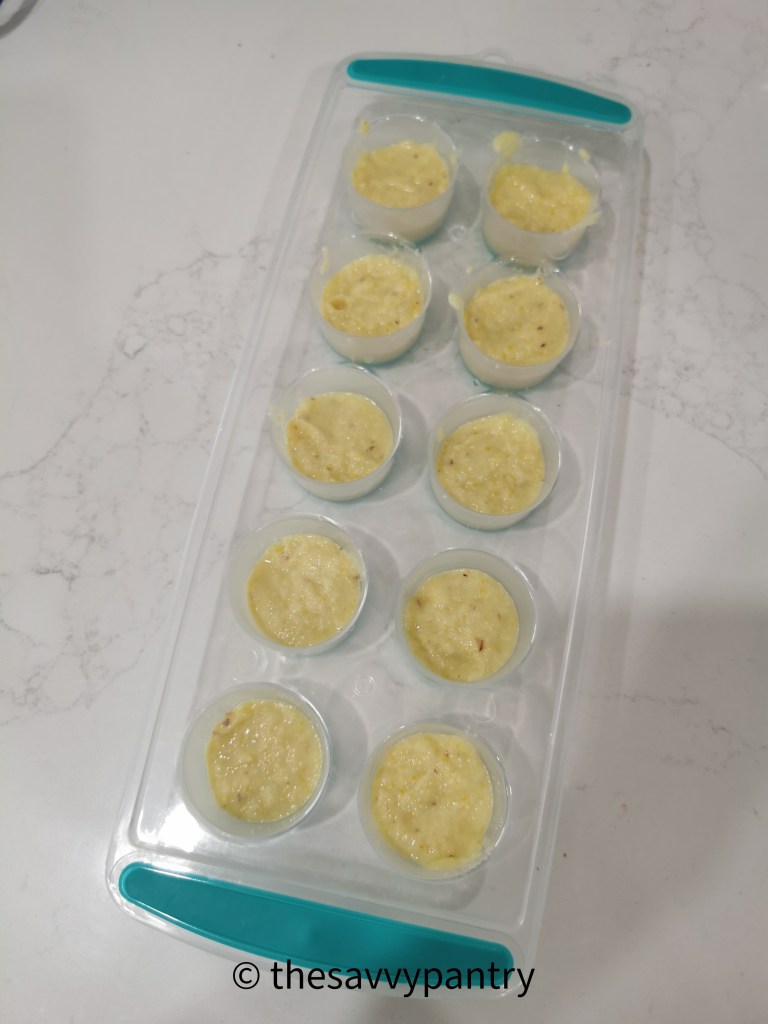
- To Store: Using an ice cube tray (I used large round ones that fit about 2 tbsp of mixture), evenly distribute the mixture and freeze.
- Serve: When you are feeling sick, boil some water, pop one of these ginger-lemon ice cubes into your glass and pour the boiling water over it so that it melts. You can either drink as is, strain and add sweetner if you like.
Family-Friendly Tips:
- For Kids: Dilute the mixture with more water or add it to their favorite tea or juice to mellow the strong flavors. You can also freeze the mixture into fun-shaped ice cubes or popsicles!
- For Adults: Take it straight like a quick shot or add it to your morning tea for an extra zing.
Why This Works for the Whole Family
The natural ingredients are gentle and safe for most people, including kids. Both ginger and lemon are known for boosting the immune system without causing any side effects like drowsiness, making them an excellent remedy to incorporate into your family’s daily routine.
This immunity booster can help your family stay healthy throughout winter, offering a simple, natural defense against the common cold and flu.
Storage
I make a big batch and it keeps in my freezer all winter long!
Now set forth and be savvy!