

Hi Savvys!
I’m sad that this series is ending but I had so much fun making these DIYs for my sister’s bridal shower. Today’s 4th and last DIY in my garden inspired DIY series was very last minute and was inspired primarily by the new garden collection at my Dollarama. As soon as I saw these artificial moss mats, I knew I wanted to make something with them.
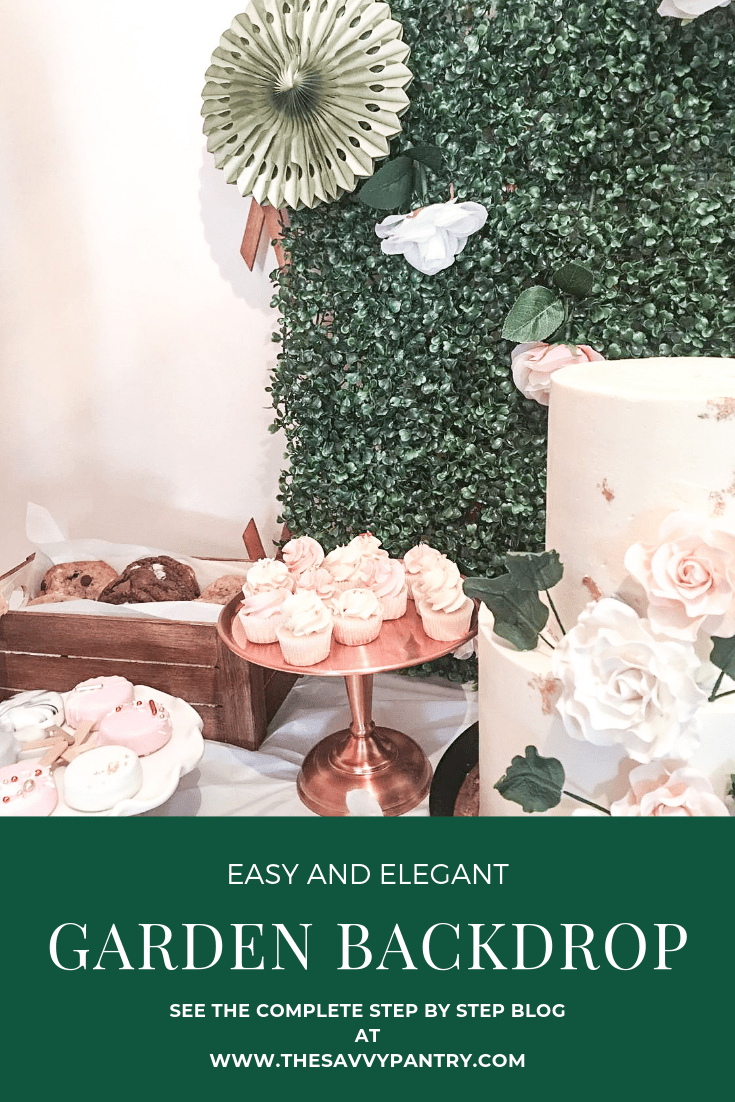
Initially I envisioned using this backdrop to take photos with guests with since that was also on my DIY to do list. But because of the size and the weight and poor planning on our part on where we would even hang a back drop, it ended up being the perfect backdrop for our dessert table. I really liked it in the end because it really helped tie all of the garden elements together, and the sweet table ended up being a back drop in itself!
All of these materials were purchased from my Dollarama.
Materials you will need for this project:
- Garden Trellis, $3
- Artificial Garden Moss mats, $2 each, I needed 9 for a total $18 dollars
- Zip ties (you should have on hand if you made the DIY Rose Gold Floral Wreath)
- Push pins (you should have on hand if you made the Vintage Inspired Picture Frame)
- Optional – left over flowers from the DIY Rose Gold Floral Wreath


Directions
- First, you’ll want to expand the garden trellis to be as wide as you want, depending on how many mats you bought. Since I bought 9, I wanted it to be 3 by 3.
- Then you’re going to lay your mats on top of the trellis to see if you’ve expanded it enough. Adjust depending on the size you want. I left a bit of the trellis exposed to give it that garden vibe.
- Once you have the size you want, remove the moss mats so you have only the garden trellis. On the trellis, look for the mechanisms that allow it to expand and contract. Using your push pins, pin each side of the wood to prevent it from expanding and contracting. Complete for all of the areas until it is stable.
- After pining everything I realized that I could have used a hot glue gun and glued the wood to prevent the mechanisms from expanding and contracting, but I only had 1 glue stick left and needed it for this next step.
- Turn the trellis over, and you will notice some of the push pins are exposed and poking through. Since we don’t want any sharp edges, take a hot glue gun and glue the pins that stick out. This will create a smooth surface and prevent any injuries. I also used the rest of the glue to glue the edges together.
- Put the trellis to the side.
- Lay out your mats with the underside facing up. Place the garden trellis on top with the pin tops facing up. I had made the mistake of having them face down which means that you can see them but that’s ok.

- You will use your zip ties to secure the moss mats to the trellis. As you are securing the moss mats to the trellis, make sure that you are also securing the mats that are next to each other to close off the seams. Use as many zip ties as needed. I ran out so I had to be strategic but I recommend using more.
- If you like, you can also use the left over flowers from the rose gold wreath DIY by inserting them directly into the mats
I loved how I was inspired by Dollarama and how I was able to create something without even an idea. This turned out so well and will definitely use it as a backdrop for future events.
Hope you guys enjoyed this DIY series. I loved how easy and affordable all of these DIY’s were. I hope this will leave you feeling inspired to create something new the next time you have an event.
Now set forth and be Savvy!
