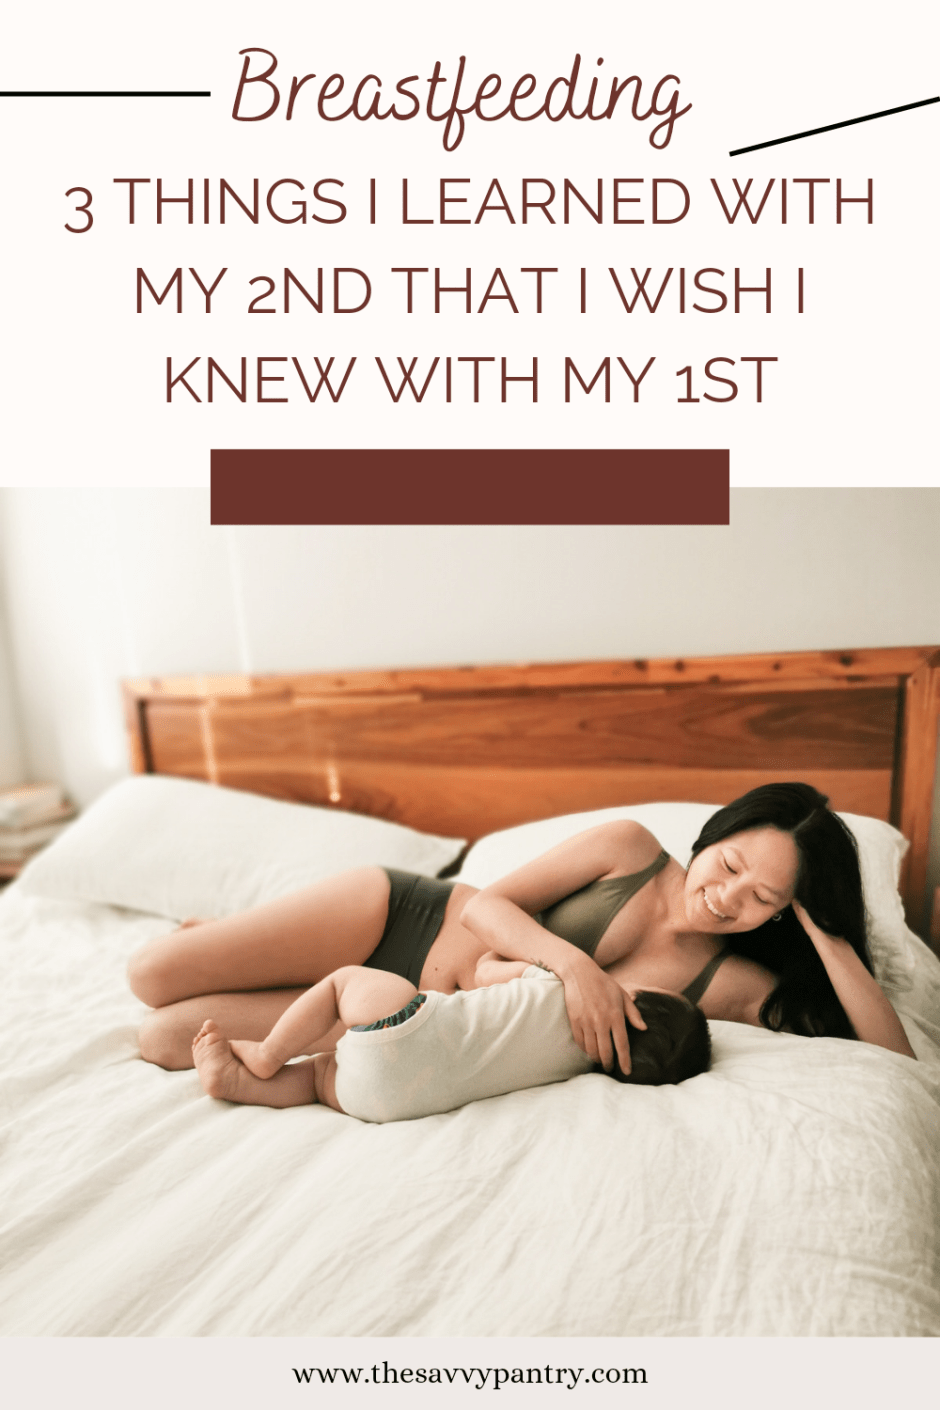
Breastfeeding Things I Learned with Baby number 2

Hi Savvys,

It is breastfeeding awareness month and we have just completed year 1 of breastfeeding with my 2nd baby.  Even though I exclusively breastfed both babies, I learned so much breastfeeding the 2nd time around.  I wanted to share some tips to help alleviate any stress that other moms might face during their breastfeeding journey.  I do want to emphasize that this was my experience and I know every mother and baby will have a slightly different experience, but these are some things that I learned breastfeeding my 2nd baby that I wish someone would have told me during my 1st

  1. Cluster Feeding
    • Nothing prepares you more for cluster feeding than going through it yourself.
    • Cluster feeding is a way for your baby to help increase your milk supply and can happen as often as every 45 minutes.  With my first, I used to stress so much because I thought it meant that my little one wasn’t getting enough milk
    • After understanding that it’s just nature’s way of ensuring your milk supply is ramped up, breastfeeding my 2nd became mentally much easier, even though it was still physically very exhausting
    • Also be prepared that cluster feeding tends to happen more often overnight, so you will experience frequent night wakings!
  2. How often should a baby feed?
    • You will read all over the internet that a baby should feed every x amount of time and anything more or less than that is not normal and you should supplement with formula.  This used to cause me so much stress and mental exhaustion, trying to calculate how much breast milk my little one was getting.  In actuality, breast fed babies will eat as often and as long as they need to. 
    • As long as they are gaining weight and producing the appropriate amount of dirty diapers for their age, then they are fed enough. 
    • The rule of thumb is to offer the breast as soon as baby seems fussy as a first response.
  3. Milk Output when Pumping
    • Lots of advice is given that you should pump especially in the early stages to help increase milk supply.
    • I did this with my first and would only be able to pump an ounce here and there at a time
    • What I now understand is that in the first 3 months when your milk supply is still regulating, the best way to increase is to just put your baby to your breast.
    • I also learned with my 2nd that if I were to pump in the first 3 months, I would actually be putting myself into over supply since I am telling my body that I need to produce more milk than I actually need.  I learned this because my milk letdown for my 2nd baby was a lot more than with my first.
    • Know that your baby is more efficient than a pump when you are exclusively breastfeeding.
    • I say this because while your pump might only be able to remove an ounce of milk, your baby is probably removing at least double that
    • I used to stress so much about having low production, but understanding this really helped and let me focus on other areas outside of feeding.

I hope you find this information helpful.  As a disclaimer, please consult with a healthcare practitioner or lactation specialist if you do suspect you are having production issues.  Remember, fed is best, whether you choose to breastfeed or bottle feed!

Now set forth and be savvy!

Fresh Blueberries – 8 Ways

  1. Blueberry Lemon Scones
  2. Blueberry Waffles
  3. Blueberry Muffins
  4. Blueberry Lemon Chia Jam
  5. Banana Blueberry Lemon Bundt Cake – shaped in a loaf pan
  6. Blueberry Cookies – I used this recipe and swapped out the chocolate chips for blueberries.  It made more a softer, denser cookie, more similar to a muffin top rather than a cookie, but my boys loved them
  7. Blueberry Cauliflower Smoothie
  8. Pancakes

Gluten-free Eggless Salad Sandwich

Hi Savvys,

It’s finally summer, which means it is officially picnic season!  We love to have picnics with the family either in our backyard or at the park because it’s a good way to get some fresh air, and honestly everything tastes better when it’s eaten outdoors!  My family is currently loving this Eggless Salad Sandwich recipe and I’m happy to have partnered with Little Northern Bakehouse to bring you a gluten free sandwich you can share with your loved ones!  In my recipe, I am using The White Wide Slice but you can use whichever gluten-free bread from Little Northern Bakehouse that you desire. 

I use extra firm tofu and vegan mayo as a base and like to add different seasonings to switch things up.  In this recipe I am using curry powder, but you omit and add other dried herbs such as chives, dill and parsley.

Leave me a comment on your favourite way to enjoy this gluten free eggless salad sandwich!

Now set forth and be savvy!  

Ingredients

Makes 4 sandwiches

  • 8 slices of The White Wide Slice Gluten-Free Bread from Little Northern Bakehouse
  • 1 package extra firm tofu (340 g), drained
  • ½ cup vegan mayo
  • 2 tbsp Dijon mustard
  • ½ tsp black salt (kala namak, optional)
  • 1 tsp curry powder
  • 1 stalk of celery, diced
  • 1 stalk of green onion, sliced

Directions

  1. Crumble the extra firm tofu into a food processor
  2. Add the vegan mayo, Dijon mustard, black salt and curry powder to the food processor
  3. Pulse until combined and resembles ricotta cheese. You don’t want to completely blend it smooth, otherwise you will end up with tofu dip!
  4. Fold in the celery and green onion
  5. Spread evenly onto 4 slices of toasted bread
  6. Serve with favourite veggies, such as cucumber, lettuce or tomato

This can be kept in the fridge for up to 4 days, making it a great meal prep recipe

Get Ready with Me: Mama Friendly Outfits

https://youtube.com/shorts/7YQFyKUziVQ

Hi Savvys,

I love fashion, always have, but since becoming a mom, I’m the first to admit that I have put my passion for clothes on the back burner.  Especially since COVID and the working from home life, it’s so much easier to lounge around the house in comfy clothes, even if they are not the nicest to look at.

Now that we are returning to the office more, weather is getting nice and we are going out more as a family, the spark has come back and I am in the mood to put together outfits, comb my hair, wash my face and take on the world!

I was gifted Elita Intimate’s Silk Magic Collection  just in time for me to jump back into my spring wardrobe!  I love that this collection is made from really soft material making it feel like luxury on my skin, and is also really light weight making it perfect for the warmer months!

I am ready to embrace my new body 9 months after having my 2nd baby.  Check out my video and get ready with me while I get into 4 different outfits that are office appropriate but comfortable so that I can still run around and do mom things!

Lingerie featured in the video include:

Hope you enjoy this post and get re-inspired by what’s in your closet this spring!

Now set forth and be savvy!

3 Kitchen Hacks to Help You Save Time and Reduce Food Waste

https://youtube.com/shorts/wX-rz1IUqYs

Hi Savvys,

I though I was a pro at food and meal prep before having kids, spending about 15 hours on the weekend meal prepping for the week for only my husband and myself.  However, since becoming a mother of 2, I have mastered the art of meal and food prep and have become more productive with my time!  I am more efficient, am still able to make nutrient packed meals and still have time to spend with the family.  Here are my 3 kitchen hacks that I use on a weekly basis to help me save time in the kitchen!

  1. Wash all of your leafy greens
    1. In our household, we always have bok choy, cabbage, lettuce and other leafy greens on hand for salads and stir frys.  To ensure that our greens are not going to waste and actually ending up in our weekly meal rotation, I wash and cut all of my leafy greens as soon as I get home from the grocery store.  I spin dry them in a salad spinner and chop them up so it’s easy to add to any dish.  A brilliant hack I have is to reuse salad containers to store your washed produce in!  Not only are you reusing something that would have most likely ended up in the landfill, but it’s also the perfect size, already made to fit your fridge!
  2. Wash and prep all of your fruit
    1. My family always has fresh berries on hand.  To ensure their shelf life and easy access for the little ones, I wash soak them in a water and vinegar solution for 10 minutes before air drying them for half the day.  Once they are dry, I store them in containers in the fridge so it’s easy to add to our oatmeal breakfasts and to the kids’ plates for meals.  I also ensure that I chop up any fruit like melons or pineapple to ensure that I can save time when looking for a quick snack for the kids or to add to smoothies.
  3. Prep minced garlic, onion and ginger
    1. Because we cook the majority of our meals from scratch, I use a lot of garlic.  To save me time in the kitchen, at the beginning of every week, I will add all of the cloves of garlic of an entire heave of garlic to a mini food processor and process until finely chopped.  Then I store it in a small mason jar in the fridge so it’s ready to go.  This saves me so much time when I am whipping up a weeknight meal.  You can prep onion and ginger in the same way.  Since I don’t go through ginger as quickly, I like to store them in ice cube trays in the freezer so that I can take out small portions as needed.

I hope you guys find these tips useful in your kitchen!  Comment below on any hacks that you use in your kitchen that you would like to share!

Now set forth and be savvy!

Pickled Asian Veggies

Hi Savvys,

Growing up, we always had these pickled carrot and daikon in our fridge, and I never what it was for besides in banh mis.  We typically ate it during holidays or special occasions, and it wasn’t until I was much older (like in my 20’s) that I learned to appreciate these Pickled Asian Veggies!  I like these in salads, wraps and on bowls.  They are also great to have along side any really fatty dish to help lighten it up.

Nowadays I always make sure to have a jar of these in the fridge.  So easy to make, crunchy and refreshing!  Savvy Tip: when all of the pickles are eaten, save the pickle juice to add to marinades, sauces and dressings!

Comment below on how you like to have these Pickle Asian Veggies!

Now set forth and be savvy!

Ingredients

  • 2 large mason jars (1L size), cleaned and sterilized
  • 1 medium daikon
  • 4 medium carrots
  • 1 cup white sugar
  • 2 cups white vinegar
  • 2 cups water

Directions

  1. Ensure your mason jars are sterilized and ready to go
  2. Cut the daikon and carrots into 2-3 inch length match sticks.  You can also use a mandolin or a food processor with the “julienne” blade.
  3. Add the water and vinegar to a pot and let it come to a boil.
  4. Meanwhile, add the cut-up veggies to your mason jars.  I was able to fill 2 large mason jars with this amount of vegetables.
  5. Add and stir the sugar into the hot mixture until dissolved.
  6. Pour into the jars over the vegetables.  The veggies should be completely submerged in the liquid.
  7. Let the jars come to room temperature before storing in the fridge.  They can be eaten the next day and stored for up to 6 months in the fridge.

Veganizing the Famous TikTok Tuncado Recipe with Smoked Tofu

Hi Savvys,

The TikTok Tuncado recipe has taken the internet by storm with its unique combination of tuna, avocado, and seasonings. I wanted to veganize this recipe with smoked tofu!  In this blog post, I’ll show you how to make a vegan version of the TikTok Tuncado recipe using smoked tofu instead of tuna and made gluten free using The Thin Artisan Flatbread from Little Northern Bakehouse.  I also used furikake to add some fishiness to the smoked tofu that you would usually find in canned tuna.  My toddler and infant loved this “tuna” salad as much as I did and it will definitely be added to the lunch rotation!

Now set forth and be savvy!

~Makes 2 servings of tuna

Ingredients

  • 2 Gluten Free Flatbreads of your choice – I used 1 package of Thin Artisan Flatbread from Little Northern Bakehouse
  • Block of Smoked Tofu – 180 g
  • 2 tbsp vegan mayo
  • 1 tsp furikake
  • 1 tbsp vegan pesto (store bought or homemade)
  • 1 avocado, sliced
  • 1 Roma tomato, sliced

Directions

  1. Shred the smoked tofu on a box grater
  2. Add in the vegan mayo and furikake, mix until well combined
  3. Cut each flat bread in half
  4. Spread the pesto on 2 of the halves of the flat bread
  5. Divide the tofu mixture in half and spread on top of the flatbread topped with pesto
  6. Add half of the sliced avocado to each flatbread
  7. Add half of the sliced tomato to each flatbread
  8. Close the sandwich with the other half of the flatbread
  9. Press in a panini maker for a minute, rotate then press for another minute to get the criss-cross grill marks
  10. Serve and enjoy!

Chewy Vegan Oatmeal and Raisin Cookies

Hi Savvys,

I developed a hobby for cooking and baking at a very young age.  I have early memories of watching my mom bake cakes and muffins where she allowed me to participate, which helped me develop my own confidence and skills in the kitchen.  When I first started to bake on my own, the first thing I learned how to bake were oatmeal cookies.  I still feel nostalgic almost 20 years later making this recipe. 

To make these cookies healthier, I love adding raisins and whatever nuts you have on hand to make these feel appropriate for both breakfast and as a dessert.  I also prefer my cookies to be mini and bite sized and used a mini cookie scooper to shape these, but feel free to make them larger if that’s what you desire.

Hope you guys enjoy this recipe.

Now set forth and be savvy!

~makes 48 cookies

Ingredients

  • 2 flax egg (2 tbsp ground flax seed, 6 tbsp hot water) OR 6 tbsp of aquafaba
  • 1 cup vegan butter, softened
  • 1 cup brown sugar
  • 1 cup white sugar
  • 1 ½ cup white flour
  • 3 cups rolled oats
  • 4 tsp baking powder
  • 2 tsp ground cinnamon
  • 2 tsp vanilla extract
  • 1 tsp salt
  • ½ cup raisins
  • ½ cup chocolate chips
  • 1 cup chopped walnuts

Directions

  1. Preheat oven to 350 degrees
  2. If using a flax egg, make your flax egg by mixing the ground flax seed and water in a bowl, set aside.
  3. Cream the butter and sugars together in a stand mixer (or with an electric mixer or by hand).
  4. Add the flax egg and mix until well incorporated.
  5. Add the flour, oats, baking powder, cinnamon, vanilla extract and salt and mix until well combined
  6. Using a wooden spoon or spatula, mix in the raisins, chocolate chips and walnuts (or whatever nuts you have on hand)
  7. Using a cookie scooper, scoop out about 1 tbsp of the batter and place on a cookie sheet and flatten with the back of your spoon
  8. Bake for 12-15 minutes and enjoy!

3Toddler Friendly Activities to Help with Around the House

Hi Savvys,

Toddlers are naturally curious and always want to lend a helping hand.  Whenever we are doing chores around the house, we see this as an opportunity to engage our toddler by allowing him to “help us”.  Not only are we able to continue on with our weekly chores, but it allows us to bond as well as burn some much-needed energy, especially during the winter months when it’s hard to get outdoors!

See below for 3 toddler friendly activities you can include your toddler in!

  1. I don’t know about your toddler, but my toddler is absolutely obsessed with water.  In the summer time, we have a water table that he likes to play with in the backyard, however during the winter months, it’s hard to get some water play.  Since I water my plants once a week, I decided to include him in this activity!  With a spray bottle or a small measuring cup, I allow him (with supervision) to help water the plants.  It also allows me to teach him the importance of taking care of plants!
  2. I reserve my intensive meal preps for the weekend when my husband is home and can watch the little ones.  But sometimes during the week, especially when my toddler has a lot of energy, I like to bake with him.  This is a great way for me to share my passion of cooking with him while also teaching him life long skills.  I like to set out all of my ingredients on the counter and we will measure the ingredients together.  His job is dumping and taste tester!
  3. The third activity is usually one he helps out with my husband, since my husband does the majority of the cleaning around the house.  We will allow him to help wipe down any spills and press the on button for the vacuum.  It’s also great because it teaches him the importance of cleaning up after yourself.  We’re lucky because our toddler loves to clean up his own toys after he is finished playing.

I hope these activities help inspire you to look for opportunities to include your toddler in your daily routine.  Not only will it serve as great bonding time but it will also help teach your little one life long skills!

Comment below on what activities you like to share with your toddler!

Now set forth and be savvy!

Vegan Teriyaki Fish Burger

Hi Savvys,

It’s the new year and if you are looking to incorporate more plants into your diet, I’ve got an easy vegan teriyaki “fish” burger that you can add to your repertoire to use all year long.  This burger is so flavourful, easy to make and is a crowd pleaser.  Pair it with a bun for a burger or use this tofu as a topping on a salad, curry and even rice!

If you make this recipe, don’t forget to share it and tag me @thesavvypantry!

Now set forth and be savvy!

Ingredients – Teriyaki Marinade

  • 1/4 cup soy sauce
  • 1/4 cup water
  • 2 tbsp brown sugar
  • 1 tbsp Bull’s eye BBQ Sauce
  • 1 tbsp rice wine vinegar
  • 1 clove of garlic, minced
  • 1-inch nub of ginger, grated

Ingredients – Spicy Slaw

  • ½ cup vegan yogurt
  • 2 tbsp sriracha (or Asian hot sauce of your choice)
  • 1 tbsp pickle brine (or can use lemon juice)
  • 1 tsp granulated garlic
  • 1 tsp granulated onion
  • ½ tsp salt
  • ½ tsp black pepper
  • 1 cup red cabbage, sliced
  • 1 cup green cabbage, sliced
  • 1 green onion, sliced

Ingredients – Burger

  • 4 burger buns of your choice
  • 1 Block of Extra Firm Tofu, divided into 4 blocks
  • 3 tbsp flour
  • 2 tsp ground flax seed
  • 6 tsp hot water
  • 3 tbsp panko bread crumbs
  • 1 tbsp Furikake (or 1 tbsp toasted black and white sesame seed)
  • 1 tbsp oil

Ingredients – Mushroom Topping

  • 1 package oyster mushroom (150 g)

Directions for the Marinade

  1. Cut the block of extra firm tofu into equal squares
  2. Place the tofu into a heat safe container
  3. Add all of the ingredients for the marinade to a small pot
  4. Heat the marinade mixture over medium heat until it just comes to a roaring bubble, about 5 minutes
  5. Take the mixture off the heat as soon as the marinade bubbles
  6. Pour the marinade over the tofu blocks and set aside to marinate while you continue preparing the rest of the ingredients – ideally let this marinade for minimum 1 hour in the fridge – if you can, overnight is ever better.

Directions for the Spicy Slaw

  1. In a large mixing bowl, mix together the vegan yogurt, sriracha, pickle brine, granulated garlic, granulated onion, salt and pepper until well combined
  2. Add the cabbage and green onion to the sauce and toss until well combined
  3. Set aside until it’s ready to assemble your burger

Directions for the Tofu

  1. Preheat oven to 400 degrees
  2. Set up a dredging station with 3 bowls:
  3. Placing the flour into 1 bowl
  4. Combine the flax seed and hot water in a 2nd bowl
  5. Mix the panko breadcrumbs and Furikake in the 3rd bowl
  6. Dip each piece of tofu into the flour mixture until well coated, then into the flax mixture to create a binder and then finally into the panko mixture until the tofu is completely crusted
  7. Set each piece of tofu onto a wire rack over a baking sheet
  8. Reserve the rest of the marinade for the mushroom topping
  9. Using a pastry brush, brush oil onto the top and bottom pieces of the tofu, reserving the remaining oil to cook the mushrooms
  10. Bake the tofu for 20 minutes, flipping them over halfway through

Directions for the Mushroom Topping

  1. Wash 1 package of oyster mushrooms, peeling the large mushrooms into smaller pieces from the head down to the stem of the mushroom
  2. In a medium sauce pan, heat the remaining oil from the tofu over medium-high heat until the pan gets hot, about 1 minute
  3. Add the mushrooms to the pan and sautee until they start to get some nice color on them, around 5-7 minutes.  A tip to help them develop their caramelization is to not move the mushrooms too much, tossing them only occasionally so they get a chance to brown on each side
  4. Let the mushrooms cook down until they are half their original size
  5. Add in the rest of that tofu marinade and cook down until the majority of the marinade down until it has reduced and you’re left with a glaze on the mushrooms, about 3-5 minutes
  6. Take the pan off the heat and set aside until assembly

Directions to assemble the burger

  1. Starting with your buns (toasted if you like), place a mount of slaw on top of the bottom of the bun
  2. Next, place a piece of your baked tofu on top of the slaw
  3. Top the tofu with some of the mushroom mixture
  4. Serve with your favourite sides!
  5. You can also use the tofu in a salad or bun-less for a low-carb option!